Image: Shutterstock
Valentine’s day crafts are a good idea to spend time with kids making decorations for home or classroom. Involving kids in Valentine’s day celebrations can be fun. You may create some simple and beautiful crafts with the help of your kids and even gift them to friends or relatives. Crafting is one of the best ways to develop children’s fine motor skills and creativity.
Here are a few easy Valentine’s day crafts for kids that can be gifted to their classmates, teachers, grandparents, or decorate the home.
25 Creative Valentine’s Day Crafts
Here are the best Valentine’s Day craft ideas that you can help your kid try out:
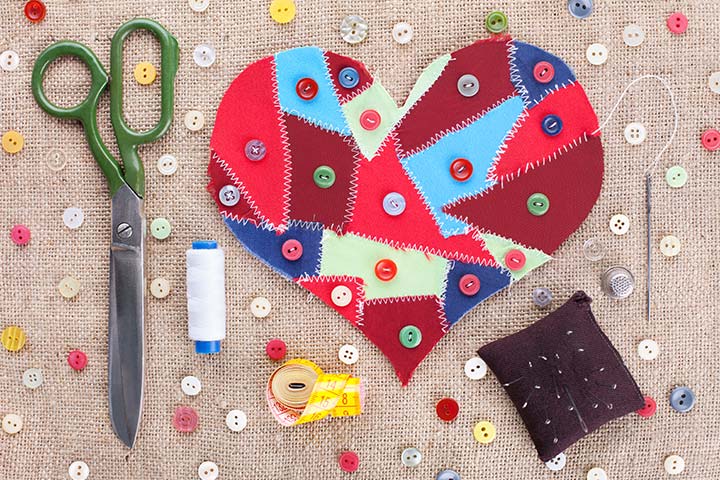
1. Valenine’s Day Sew On Heart And Buttons:
This beautiful and patch work heart can be made using old scraps and bits.
You will need:
- Scraps and bits from old fabric
- Buttons in different shapes, sizes and colors
- Needle and thread
- Safety scissors
- Glue
- Felt fabric
- Tracing pen
How to:
- Help your kid cut out the scraps from old fabric in different shapes and sizes.
- Ask your kid to trace out two big hearts of the same size from the felt fabric.
- Let your kid glue the scraps of fabric on the heart shapes.
- You can help your kid use needle and thread to create beautiful zig zag patterns on these hearts.
- Help glue on the buttons too.
- Now place the hearts one on top of each other and help sew on the sides.
- Depending on how you want to use it, you can let your kid keep some open space at the edge.
Tip:
Your kid can use this as a cover for a scrap book or make a small pouch out of it to hold knick-knacks. Sew it properly and you can also use this for yourself as a small coin pouch. All you will need to do additionally is add a zipper on one end.
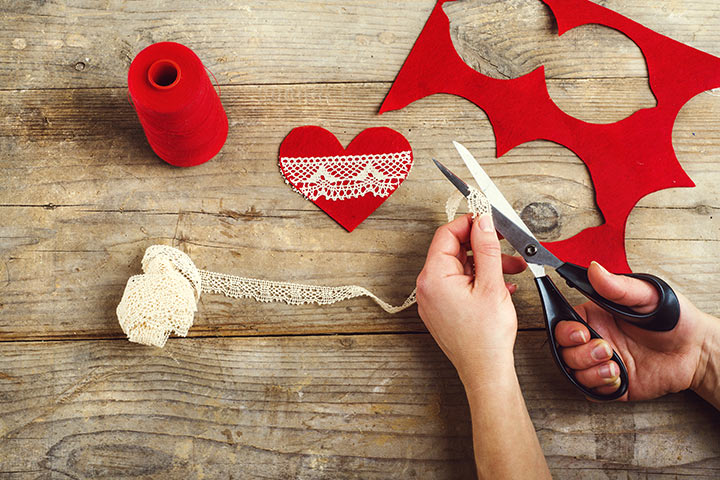
2. Valentine’s Day Lace Hearts:
These super easy to create and lovely lace hearts will add beauty in any part of your home.
You will need:
- Red colored lace with some texture on it
- Glue
- Safety scissors
How to:
- Help your kid cut out different lengths of lace using the safety scissors to create different sizes of hearts.
- Ask your kid to place the lace in heart shapes and glue them in the middle to form the shape of a heart.
- Once all the heart shapes are made, help your kid glue these together.
Tip:
Your kid can use these shapes to decorate the rooms, as wall décor or even on the door or window.
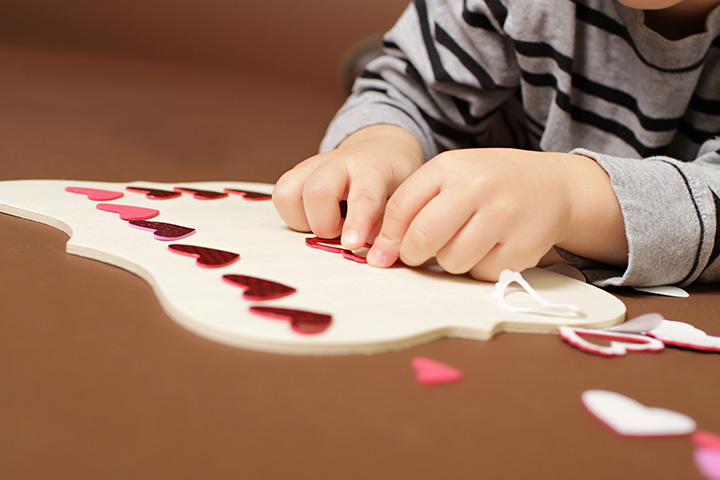
3. Valentine’s Day Ice Cream Heart Stick Stand:
This cute heart piece can be made using used up ice cream sticks.
You will need:
- Old ice cream sticks
- Glue
- Small heart shapes as cutouts or as the one created in activity one mentioned above
- Old pieces of ribbons or strings
- Paints and brush (optional)
How to:
- Ask your kid to clean out the ice cream sticks if they are used ones.
- Your kid can paint these in different colors or let them be as they are.
- Help your kid create a stand shape by gluing together the various ice cream sticks.
- Your kid can now decorate the stand using the heart shapes and the ribbons and strings.
Tip:
Your kid can use this stand as a picture frame that can be placed on the study table. It can also be used as a beautiful decorative piece on the family mantelpiece.
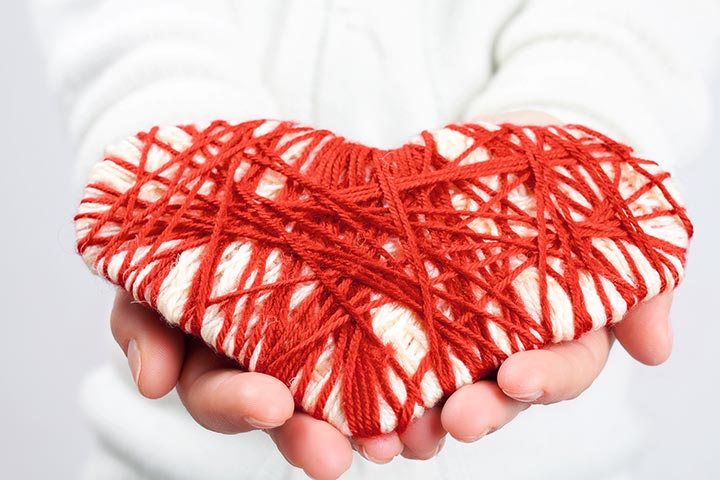
4. Valentine’s Day Heart Using Wool Wraps:
This beautiful woolly heart will be the perfect way to cuddle up.
You will need:
- Wool in the colors red and white
- Some old cotton balls
- Felt fabric
- Needle and thread
- Pair of safety scissors
How to:
- Help your kid cut out two heart shapes of the same size from the felt fabric.
- Using the thread and needle, help sew the edges of the felt, leaving a space to insert the filling.
- Now fill up the felt pouch that is created using the cotton balls.
- Once it is filled, help sew up the entire piece.
- Once it is done, use the red and white wool to help your kid wrap the heart.
- Help to trim out the edges of the wool and tie them in a knot or glue them up.
Tip:
Your kid can use the heart shapes as decoration in the room or make them in a larger size to use as a pillow.
5. Valentine’s Day String Up Heart Shaped Photo Hanger:
This simple string up craft will make a wonderful photo memory corner.
You will need:
- String
- Wooden clothes hanging pegs
- Paper in different colors
- Safety scissors
How to:
- Help your kid tie the string on the wall.
- Help cut out heart shapes from paper.
- Put them up on the string using the pegs.
Tip:
Your kid can also hang up different family pictures on the string to create a picture string collage.
6. Valentine’s Day Heart Shaped Border:
This very easy craft can be used to decorate any object in the house.
You will need:
- Red colored paper
- Scissors
- Glue
How to:
- Help your kid cut out heart shapes from the red colored paper.
- Using glue, your kid can stick it around any photo frame or mirror to create a lovely border.
Tip:
Use them to form beautiful borders around doors or windows.
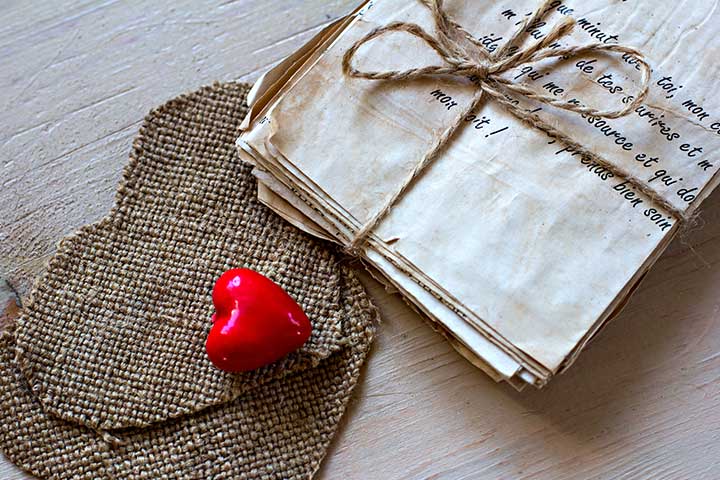
7. Valentine’s Day Letter Writing:
Help your kid discover the joy of letter writing this Valentine’s.
You will need:
- Paper and pen to write the letters
- Some old strings
- Heart shaped pouches or cut outs
How to:
- Ask your kid to write a letter to grandparents or other family members.
- Use the string to tie it up.
- Your kid can make heart pouches by following the craft ideas mentioned above.
Tip:
This will be a great way to help your kid form a lovely bond with writing.
8. Valentine’s Day Stained Window Art:
Your kid will love decorating the windows with these easy steps.
You will need:
- Glass paint in different colors
- Glass or any other permanent marker
- Brush
How to:
- Ask your kid to draw various heart shapes on the window.
- Let your kid fill them up using the glass paint.
Tip:
Your kid can also make this as a border for the mirrors.
9. Valentine’s Day Greeting Card Envelope Decoration:
This is a beautiful way to decorate envelopes.
You will need:
- Old lace in red color
- Felt in red and pink
- Glue
- Scissors
How to:
- Let your kid glue the lace on the front of the envelope.
- Help your kid cut out different shaped hearts from the felt.
- Help glue these on one side of the lace.
Tip:
Let your kid decorate the envelopes and send out Valentine’s Day cards to friends and relatives.
10. Valentine’s Day Pop-Up Paper Cards:
These very simple cut outs will make some beautiful cards.
You will need:
- Red colored chart paper
- Scissors
- Brown and green sketch pen
- White card paper
- Glue
How to:
- Help your kid cut out three heart shapes in big to small size using the red paper.
- Help place these one on top of the other from small to big size.
- Ask your kid to glue them in the center.
- Now let your kid fold them from the middle to form a dent in the hearts.
- Glue these inside the white card paper to make a pop-up shape.
- Ask your kid to make a stem and leaves using the sketch pens.
Tip:
Let your kid sent out these beautiful cards to friends and family.
11. Crayon Heart:
You Will Need:
- Crayons in different colors
- Silicon heart mold
- Parchment paper
How To:
- Tell the kids to peel the crayon and break or cut into small pieces. Place the crayon in the mold and bake at 250 to 275 degrees for 10 to 12 minutes.
- Remove from the oven and set it aside.
- When the mold has cooled, take out the crayons and place on a white paper.
12. Valentine Ribbon Brooches:
You Will Need:
- Felt sheets
- Wood disks
- Markers
- Various colored ribbons
- Rhinestones in different colors
- Pearl accents
- Fast Grab Tacky Glue
- Scribbles paint
- sGlossy Collage Pauge
- Pin backs
- Scissors
How To:
- Fold the ribbons and cut them into small and large pieces.
- Cut out circles from the felt and pearl accents. Tell the kid to arrange the ribbons, felt and accents to get a brooch.
- Color the wood disks with a marker or acrylic paint and cover with the glossy collage pauge.
- Now glue the elements one upon another, using fabric glue. Tell the kids to hold together for a few seconds to help it stick into the place.
- Now sew or hot glue the buttons, beads, and stickers. Kids are even free to add their embroidery touches.
- Affix the felt to the back and add the brooch with the hot glue gun. Leave it to dry overnight. The brooch is ready to wear.
13. Paper Heart Wreath:
You Will Need:
- Confectionerie Paper Pack
- Epson Premium Matte Photo Paper
- Mini Glue Dots or hot glue gun
- Paper Trimmer
- Ribbon
How To:
- Print out the paper on the both sides of the photo paper.
- Cut out 8 or 12, 2*11 inch strips from the paper and fold them in half.
- Put three dots on the edge of the strips and join to make a heart shape. Repeat the method for all the paper strips.
- Now arrange the hearts to make a round or oval wreath and attach them applying the mini glue dots on the edges of the heart.
- After connecting the hearts, stick a ribbon to hang the wreath.
14. Little Valentine Boxes:
You Will Need:
- Small packs of matchboxes
- Wrapping papers in different patterns
- Printed strings or yarn
- Candies
- Glue
How To:
- Tell your kid to cut out the paper four long and 2 inches wide, or about the size of your matchstick.
- Now tell her to stick the wrapping paper on the matchbox.
- Fill the matchboxes with little candies, tuck in a note, and wrap with string.
15. Valentine Garland:
You Will Need:
- Paper Straws
- Twine or string
- Ribbon
- Glue or Glue Dots
- Red tulle
- Chalkboard
How To:
- Tell your kid to bend the paper straw to get the shape of the heart. He just has to squeeze and push the straws.
- Stick the heart using a glue dot at the top. Use the method to make more hearts from the straw.
- Attach the hearts together with string or hot glue gun
- Stick the hearts to the blackboard.
- Cut pieces of red tulle and tie at both ends of the garland. The straw heart frame is ready to decorate.
16. Paper Heart Garland:
You Will Need:
- Red and pink construction paper
- Pencil
- String
- Tape
- Scissors
How To:
- Cut the paper into 3/4th strips.
- Tell your kid to fold it in half and curl the loose ends using a pen or chopstick.
- Stick the string to the heart using a tape.
- Stick the top of the heart together using glue.
- Create the garland by attaching several hearts to the same string.
17. Muffin Cup Flowers:
You Will Need:
- Green masking tape
- Hole punch
- Paper muffin cups, six for each flower
- Wire
- Scissors
- Tootsie Pops
How To:
- Fold four muffin cups into half. Punch a hole ½ inch from the edge of the folded paper.
- Fold the other two papers and make a hole right at the edge.
- Now tell your kid to place the four folded muffin papers on the Tootsie stick. Now insert the two open papers to the stick.
- To make the tape leaves, take two, 7 inches long green masking tape, sticky side up. Now place a wire in the center of one masking tape. Sandwich both the masking tapes together.
- Cut a leaf shape at both ends of the masking tape. Trim one inch in the middle.
- Now tell your child to twist the leaves just underneath baking cups.
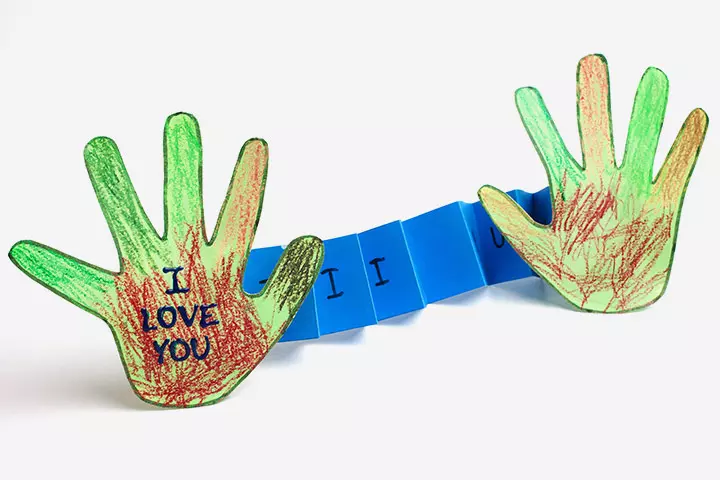
18. I Love You This Much Card:
You Will Need:
- Cardstock paper in three different colors
- A Popsicle stick
- Pencil
- Stickers or rub on
How To:
- Trace your kid’s hand on two different cardstock papers.
- Cut out a long strip from the third construction paper and fold it in the accordion style.
- Now tell your kid to use the run-ons or stickers to add ‘This Much” on the accordion.
- Now glue the ends of the accordion on the insides of the hands. The card is done.
19. Tootsie Pop Butterfly:
You Will Need:
- Stick on googly eyes
- Scrapbook paper
- Scissors
- Valentine Tootsie Pop
- Rotary Cutter
- Pipe cleaners cut in half
- Pencil
How To:
- Fold the scrapbook paper in half and cut it out. Now again fold the paper sheet in half.
- Draw a half heart on the uncut side of the folded paper and cut it out. You will get the shape of a butterfly.
- Now tell your kid to make two small cut in the middle of the butterfly cutout. Have him/her insert the Tootsie pop into the cut.
- Decorate the butterfly y with using pipe cleaners as the antennas and with the googly eyes.
20. It’s Raining Hearts:
You Will Need:
- Empty cardboard cereal box
- White tissue paper squares
- Red construction paper
- School glue
- Scissors
- String
- Tape
How To:
- Tell your kid to cut out a cloud shape from the cardboard paper.
- Now have her put glue on one side of the cardboard cloud and cover it with crumpled tissue paper squares. Tell her to continue until the entire cloud is covered with tissues.
- Now she has to tape five strands of string to the other side of the cloud. Each string should be at least 12 inches long.
- Trace and cut out the heart shapes from the red construction paper. You can even cut them out in varying sizes.
- Put the heart pieces underneath the string and place a tape over it to hold it in place. Stick a few over the clouds also. And it’s ready!
21. Valentine’s Day Pencil Craft:
You Will Need:
- Pencils
- Red and silver glitter paint
- Red lace
- A mason jar
- Silver and red pipe cleaners
How To:
- Apply a coat of red or silver paint on the pencils. Leave it to dry for a few hours and then apply a couple more coats, but make sure you dry the coats of paint between the coats.
- Now ask your kid to make hearts and spirals from the pipe cleaners. Twist and use a bit of glue to keep the pipe liners in place.
- Now affix the silver pipe liner spirals on the red pencils and red pipe liner hearts on the silver pencils.
- Tie a red lace around a clear mason jar and place the pencils in it.
22. Cupcake Liner Cards:
You Will Need:
- Cupcake liners in assorted colors and sizes
- Pinking shears
- Double-sided tape or quick-setting craft glue
- Heart punch or template
- Glitter
- Plain cardstock
- Ribbon
- Small, flat magnets or pin backs
- Ruler
- Valentine stamps
- Craft knife or a paper trimmer
- Ink pad
How To:
- Trim the edges of the cupcake liners using a pinking shear. It will add texture to the liners. For this, your tot needs to fold the cupcake liners in half and trim a 1/4th inch from the edge. Repeat with another cupcake liner of the same size. Now take a large cupcake liner and cut a ¾ inch from the edge.
- Take the center of each cupcake liner and scrunch it. The more your child scrunches the liner, the more ruffled effect she’ll get. Flatter the midsection of the liners with the fingertips.
- Layer the cupcake liners and secure with glue.
- Punch a heart shape from the cardstock and coat with glue. Tell your child to sprinkle glitter on it and dust off the excess. Leave it aside to dry.
- When the heart has dried, affix it to the center of the layered cupcake liners.
- Cut two, ½-inch strips of the ribbon and stick to the back of the cupcake liners. Leave it aside to dry.
- Cut 4*6-inch cardstock paper and stamp Valentine wordings of sentiment at the bottom of it.
- Now attach a magnet or a liner pin to the card using a double-sided tape. It’s ready!
23. Heart Suncatcher:
You Will Need:
- Hole punch
- Wax paper
- Parchment paper
- Curling ribbon
- Crayon pieces
- Scissors
- Old towel
- Iron
- Cheese grater
How To:
- Lay out an old towel and iron it. Now place a parchment paper on the towel and a wax paper on top of the towel.
- Tell your kid to separate the crayons into color groups. Shave the crayons using a cheese grater over the wax paper.
- Now place another sheet of wax paper covered with a piece of parchment on the crayon shavings.
- Set the iron to medium heat and iron until the crayon shavings melt.
- After the wax paper has cooled down, draw and cut out the hearts using a scissor.
- Punch holes through the heart cutouts and string a ribbon through the holes. You can even stick a piece of tape to keep the ribbon pieces together.
- Curl the ribbons of the smaller hearts and hang on the window.
24. Heart Wands:
You Will Need:
- Sticks
- Felt
- Strong glue for fabric or a glue gun
- Sequins
- Bright colored yarns like fuchsia, red and so on
How To:
- Tell your kid to wrap the yarn around the stick.
- Now cut out the heart shapes from the felt pieces.
- Stick both the heart shapes, leaving 2-inch space at the bottom.
- Affix the stick on the top of the stick. You can even use a glue gun for attaching the heart pieces.
- Now tell your child to decorate the heart with the sequins. He can even sew little on it.
25. 14 Acts Of Love:
You Will Need:
- Template Download Here
- Colored rice
- A clear jar
- 14 straws, sticks, pencils, or stick
- Scissors
- Glue stick
- Ribbon
How To:
- Color the rice in pink, purple, or red. To make the colored rice, add 20 to 25 drops of food coloring of your choice to give a rich look.
- Clean and dry the clear jar. Put the rice into the jar. You can even fill the jar with different layers of colored rice.
- Download and cut out the saying and hearts. Kids won’t be able to do it themselves, so you do it for them.
- Stick the 14 hearts to the straw or pencil and the sayings to the other side of the pencil or straw.
- Tie a decorative ribbon around the jar’s mouth and place the 14 act of love printable to the jar. It’s ready to display.
Having some great ideas on making Valentine’s crafts for kids can keep them hooked while enhancing their coordination skills and innovative thinking. These enjoyable and creative craft ideas will grab your child’s interest while allowing them to think out of the box. Most of these crafts, such as heart-shaped greetings and photo hangers, are simple to make and may require supplies, easily found in your vicinity. So, go ahead and indulge in preparing these fun Valentine crafts and create stunning decor for Valentine’s day.
Community Experiences
Join the conversation and become a part of our nurturing community! Share your stories, experiences, and insights to connect with fellow parents.

