Image: iStock
A study revealed that art and crafts could help children learn many life skills (1). Paper flower crafts for preschoolers are guaranteed to build their sensory, cognitive, and emotional skills. Whether it is folding, cutting, or joining pieces of paper to make something, it helps in boosting their motor coordination. To help you introduce your little one to art and crafts, here is a collection of some simple paper flowers for children that you can consider having a look at.
Key Pointers
- Creating paper flowers can develop children’s sensory, cognitive, and emotional skills and enhance their motor coordination.
- The level of difficulty can be adjusted according to the age of the children.
- Attractive paper flower crafts include making paper flower bouquets, Hyacinth flowers, and paper sunflowers.
- For teens, foldable tulip and dahlia wall decoration crafts can be good options.
- Children can utilize various materials such as paper, scissors, tissue paper, crepe paper, etc. to craft paper flowers.
Easy Paper Flower Crafts For Preschoolers
If you thought paper craft is just for older kids and adults, you were wrong! Go through these basic paper flower craft ideas that even your preschooler can make.
1. 5-Petal Flower
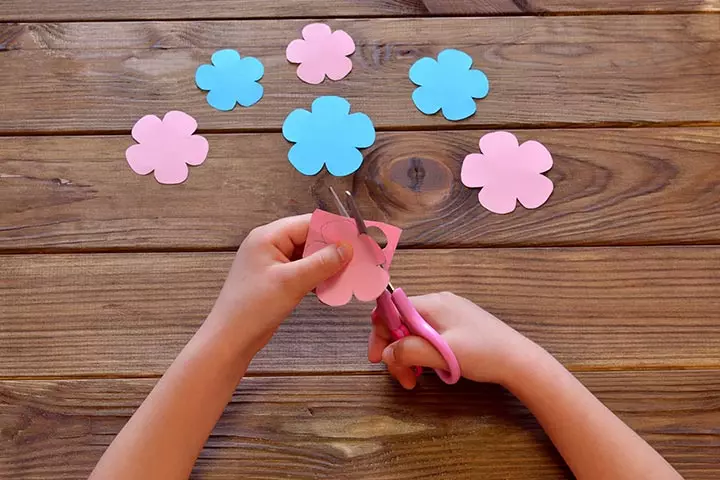
The five-petal flower is one of the most simple paper cutting craft ideas for kids that your child can make at home. You can make variations of this flower by changing the number of petals to six or eight.
You Will Need:
- Square color paper
- Pencil
- Scissors
- Glue
How To:
- Choose a paper that you can fold easily. For ease, pick a square-shaped paper so that the kids can start right with the flower.
- Fold the square in half, and use a ruler scale to mark the one-third point on the top-left edge of the paper. You can help your kid with this if needed.
- Now pull the bottom right corner of the paper towards the one-third point on the top left.
- Fold the bottom left corner over the right edge.
- Fold the top right corner over the left edge of the paper.
- You will have a pointy edge towards the bottom. Cut along the horizontal line made by the edge of the paper. The resultant would be a wedge.
- Starting from the top left corner of the wedge, draw a half-circle that goes down till a half-inch above the bottom right edge.
- Cut along the line and open the fold – you have a five-petal flower.
2. Watercolor Flowers
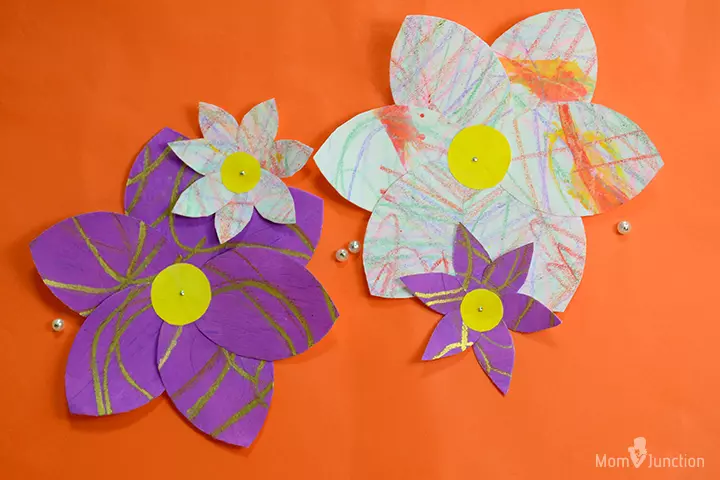
Kids love to draw. If your kids scribble often, why not make flowers out of their art?
You Will Need:
- White chart paper
- Watercolors, oil pastels, crayons – anything to color
- Containers for the water color
- A small glass of water
- Paintbrushes
- Beads (optional)
How To:
- Set up the art station for the kids using a washable cloth to cover the table.
- Let your kids use the watercolors, crayons, and oil paints to fill the white sheet of paper. Let them draw anything they like – lines, dots, wavy lines or just blotches – on the paper.
- Let the paper dry. Now cut the paper into small, petal-shaped pieces. You will need at least five or six petals for each flower. Make sure that the petals of each flower are of the same color.
- Cut out a small circle from the colored paper, preferably of a different color used by the kids. We chose violet for the flowers and yellow for the center.
- Glue the petals to the circle, close to each other, such that the circle is the center. The pointy edge of the petals should be out.
- Let it dry and then glue a small bead in the center to give it a cute look.
- Your DIY watercolor paper flowers are ready!
 Point to ponder
3. Paper Plate Flower
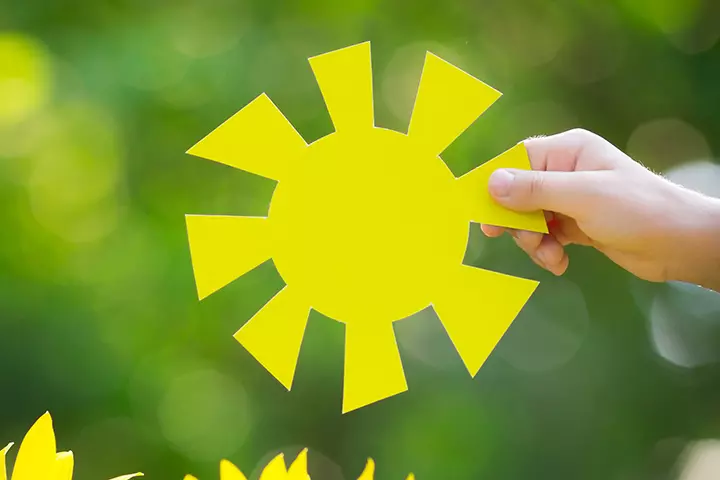
These paper craft flowers are made from mundane items like a straw and paper plates but are as beautiful as they can get.
You Will Need:
- Dessert size paper plates – white
- Watercolors or paint, yellow, green or other colors as you desire
- Craft sticks
- Scissors
- Glue
How To:
- Take a paper plate and create petals by cutting even slits along the border of the paper plate. Create enough slits to have eight to ten evenly sized petals.
- Take the watercolors and paint the front of the paper plate in yellow (or any color of your choice). Spread the color evenly on the plate.
- Paint the craft stick in green. Let it dry and then glue it to the back of the paper plate. You can cut two paper leaves colored in green and attach it to the craft stick, a couple of inches below the paper flower.
- Your paper plate flower is ready.
Attractive Paper Flower Crafts For Kids
Paper craft is fun and fascinating, and creating flowers with paper can be an exciting activity for children. Here is how to make paper flowers for kids in an easy way.
4. Paper Flower Bouquet
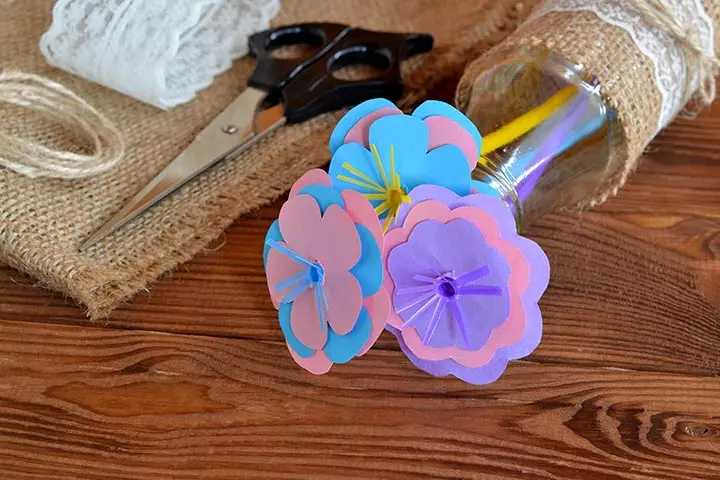
A bouquet for kids may seem like a stretch. But these paper flower making for younger kids is easy to do, with a little help from the adults.
You Will Need:
- Drinking straws for stems
- Craft paper of different colors – purple, blue and pink (other colors if you’d like)
- Scissors
- Glue
How To:
- Slit one end of the straw and flatten it so that it looks like a flower with a stem. Let the slits be an inch long, but not more.
- To make it easier for preschoolers, get templates of flowers in different sizes, printed on the color paper. Pick easy templates that the kids can cut using their scissors.
- Cut the flowers into sets, based on their shapes.
- Arrange the flowers by stacking them according to their size, with the wider or larger blossom at the bottom.
- Use the scissors to create a small circle/hole in the center of the flowers.
- Put the non-slit end of the straw from the top, into the circle in the middle and tape it from the bottom to hold the petals in place.
5. Tissue Paper Flowers For Kids
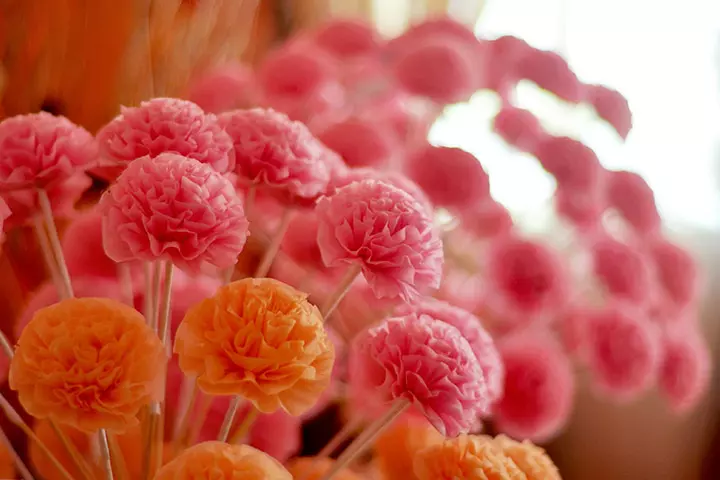
Tissue paper flowers are pretty to look at and can be easily made by kids. Here is how you can make colorful Mexican tissue paper flowers to deck your home.
You Will Need:
- Tissue paper (different colors)
- Scissors
- Floral wire, pipe cleaner, or twist ties
- Straw for stems
- Glue
How To:
- Take five to seven tissue papers and cut them into sheets of size 7×11 inches. You can use the papers of the same color or use different colored sheets to make a colorful flower. You can use more sheets to make the flower fluffier.
- Stack the sheets neatly and make ¾-inch folds, accordion style (folding the paper back and forth). The folds must be of the same size.
- If any excess paper is left, trim it.
- Round the edges of the paper using the scissors – once you do, there won’t be any corners.
- Use a pipe cleaner to tie around the center of the folded paper.
- Open one end of the paper, spreading the paper like a fan. Now, separate each layer of paper for the petals. Open the petals one layer at a time, don’t try to pull them all at once.
- Repeat the above step for the other end of the folded paper.
- Once all the layers are open, you have a pretty, fluffy pom-pom flower.
- Take a straw and stick it to the flower with glue or tape to create a stem.
6. Easy Hyacinth Flowers
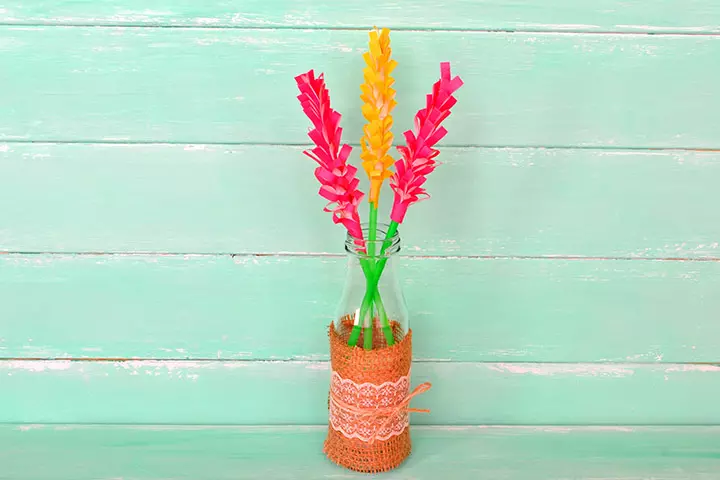
Hyacinth flowers are very pretty to look at, but they grow only in spring. When you can’t get the real flower, why not make them at home? Here are a few simple steps to make the hyacinth bunches with your kids.
You Will Need:
- Colorful construction paper – green (for the stem), white, purple and pink (you can choose any other color for the flowers)
- Glue
- Scissors
How To:
- Take the green colored construction paper and cut one-inch wide, lengthy strips from it. You can make as many pieces as the number of flowers you want to make.
- Roll the green strips to make stems – use glue to keep it in place. Let it dry.
- Now, take a sheet of any color you like for the flowers. Cut it into four parts, with smooth edges. You will get four sheets of papers.
- Fold these pages in half (long side) to get a folded sheet in the shape of a rectangle. The length of this sheet is more than the breadth.
- Leave one centimeter space and create slits along the folded edge of the sheet. The gap between the slits can vary, but not too much.
- Glue one end of the strip to the top of the stem. Let it dry and then slowly twist the stem to roll the remaining strip of the paper downwards, covering almost half of the stem. Glue the other end to the stem and let it dry.
- Repeat steps 3 to 6 for the other flowers.
- Put them in a vase and you have a colorful hyacinth bouquet ready.
7. Paper Daffodils
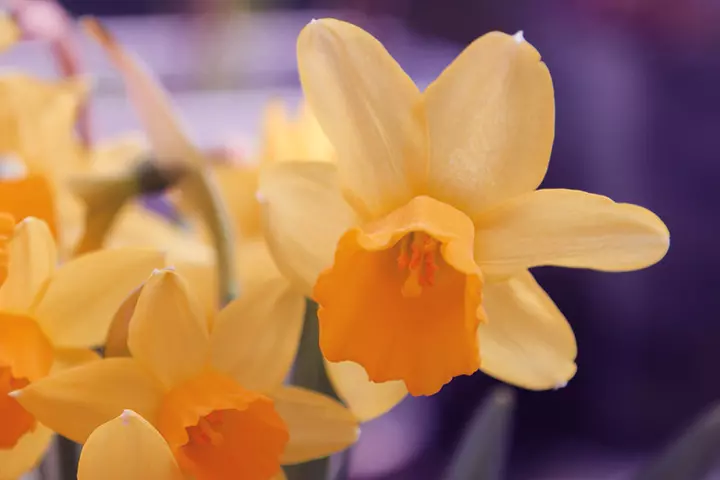
You Will Need:
- Craft paper in yellow (varying shades of yellow is better)
- Pipe cleaner
- Glue
- Scissors
How To:
- Take a 4-inch square sheet and fold it in half, diagonally. Fold the triangle again, to form a smaller one. Repeat the step until you get a small triangle.
- Cut this into the shape of a petal – you can use a sketch or pencil to draw a half-circle and then cut it.
- Snip a hole in the petal by cutting at the pointed tip. Create a bigger, two and a half inch diameter circle in the center.
- Cut the resultant circle into two halves (semi-circles).
- Apply glue on one edge of the semi-circle and roll it into a cone.
- Fold one end of a pipe-cleaner and add glue to the center of the flower, including the edges.
- Put the cone into the opening in the flower. Then put the open end of the pipe-cleaner into this opening and slowly pull it down.
- Your daffodil is ready!
 Do remember
8. Paper Sunflowers
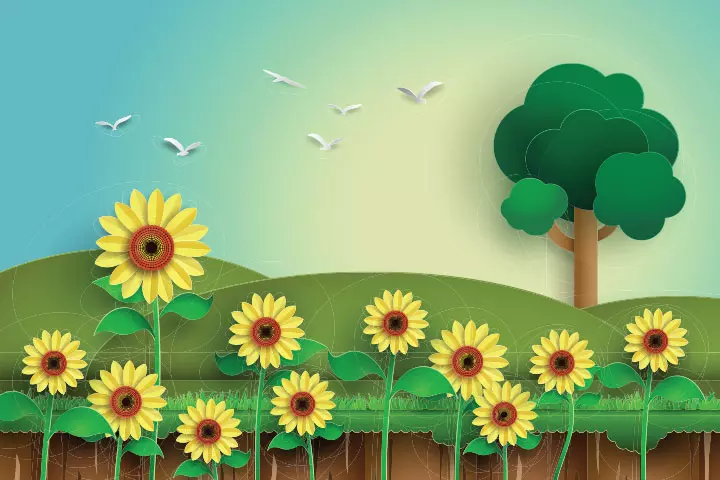
Sunflowers just brighten your day. The problem is that you don’t get to see them all through the year.
Here is a simple way for your child to show their creativity by making sunflowers with paper plates at home.
You Will Need:
- 7-inch paper plates
- Green and yellow construction paper
- Cardboard
- Brown or red wrapping paper (lunch bag will do too)
- Glue
- Scissors
How To:
- Start with the stem – cut rectangles that are two inches wide and 11 inches long. Wrap them completely in green construction paper and use glue to hold them together.
- Staple the stems to the bottom of the paper plates.
- Slit the brown paper or lunch bag into thin strips and curl them down – draw along the strip using one of the open scissor blades to curl them. Create at least two strips for each flower.
- Glue one end of the strips to the center of the paper plate. Add two or more until you like what you see.
- For the petals, use the yellow construction paper. Use a template to cut petals out of the yellow sheet.
- Glue the petals below the brown curlers, on the paper plate. You can have two overlapping rows of petals to get a genuine sunflower look. Add leaves to the stem and your sunflower is ready!
9. Paper Poppies
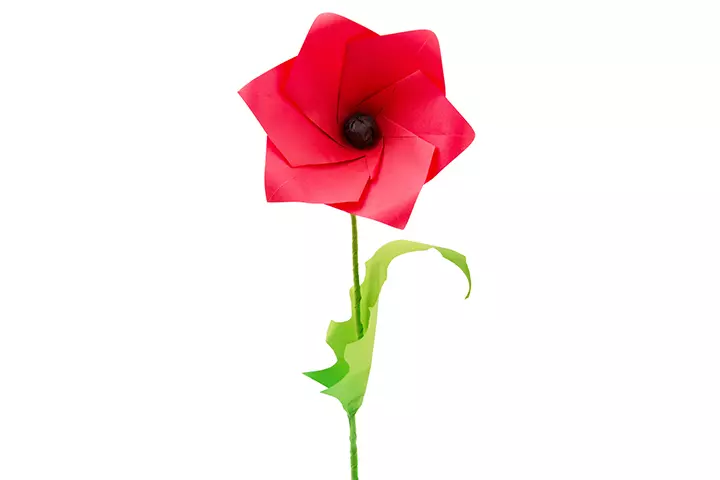
Poppies are red with black seeds in the center. Create paper poppies with your kids using red craft paper.
You Will Need:
- 1 A4 size red craft paper
- Straw and green crepe paper
- Scissors
- Glue
- Pencil and ruler scale
How To:
- Make two 10-inch squares from the craft paper.
- Fold each square in half and then fold that into another half.
- Fold the small square diagonally so that you get a triangle.
- Draw a curve starting from the pointy edge in the middle (the one opposite the longer side of the triangle) and move towards the center of the right side. Cut along the curve.
- Open that and you will have a red flower. Do the same with the other paper as well.
- Snip the center of the flower to make a small hole.
- For the stem, wrap the straw with the green crepe paper and glue them.
- Push the straw through the center of the flower and make a knot to prevent it from slipping down. Now glue to stick the knot to the flower, to hold the stem in place.
- The red poppy flower is ready!
10. Paper Rosettes
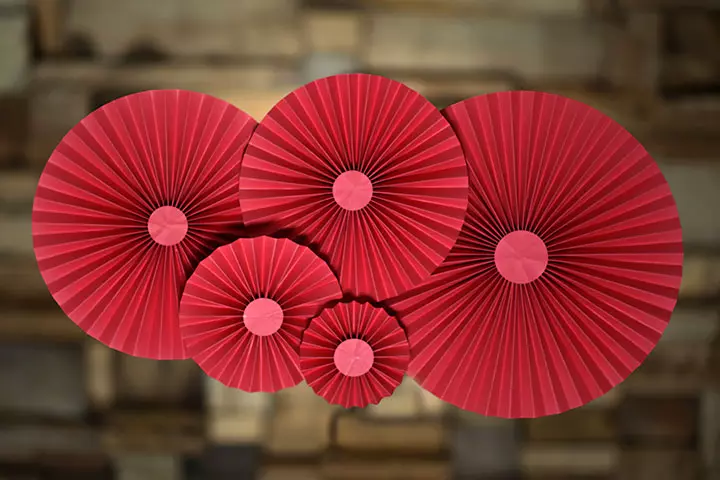
Paper rosettes look like flowers and are easy to make and are excellent decorations for parties.
You Will Need:
- ¼-inch tape
- 1/8 inch hole punch
- 11-inch by 8½ inch white or color papers
- Ribbons
How To:
- You will need three sheets of paper to make one paper rosette. You can use sheets of the same color or different colors.
- First, accordion-fold each of these papers. Then fold them in half again. Stick the folds of the paper using tape or glue.
- Join the three papers by opening their ends and sticking them with glue, to form a circle.
- Punch a hole on one side, and tie the ribbon to hang it as a decoration ornament.
11. Daffodil Pinwheel Flowers
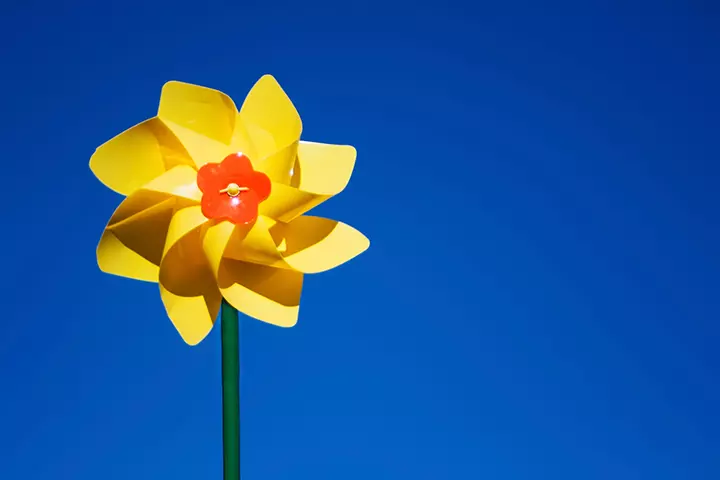
Daffodil pinwheels are fun – especially when you hold them and run with the wind blowing against you!
You Will Need:
- Green and yellow craft papers
- Paper fastener
- Stapler
- Pencil and ruler
- Scissors
How To:
- If you have a square paper, you can start with it. Otherwise, cut the existing sheet into a square.
- Use the pencil and the ruler to draw lines starting from the corners of the square, into the center of the square. Do not extend the lines till the center or join them.
- Cut along the lines using scissors.
- Tip the alternate corners of the slit paper into the center, use your finger to hold them in place. You can then staple the corners or glue them to the center.
- Make the stalk using the green craft paper. Cut narrow strips, and roll the green sheet into tubes.
- Join the pinwheel and the stem using a paper fastener – you can make a hole with the knife and then use the paper fastener to keep the wheel and the stalk.
- Make sure that the hole is loose enough for the pinwheel to twirl when it moves.
12. Cupcake Liner Dollies
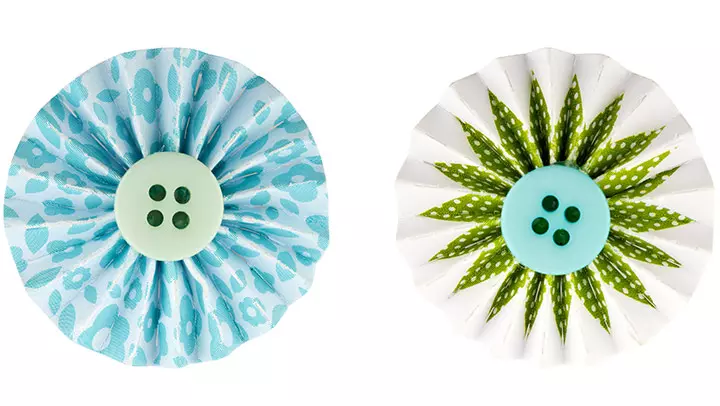
Cupcake liners are colorful, which makes them the perfect art supplies for making paper crafts. Here is how you can use them to make flowers.
You Will Need:
- Cupcake liners
- Buttons (bigger coat buttons)
- Glue
- Scissors
- Unsharpened pencils – preferably green, or craft sticks
- Green craft paper
How To:
- Get as cupcake liners for flowers.
- Turn them inside out, if the liners are white inside. Otherwise, you can leave them as they are.
- Decorate the center of the cupcake liner: it is usually flatter and smoother. Glue the buttons to the center. The flower is ready.
- Use the pencils for stems. Glue the unsharpened end of the pencil to the back of the paper flower.
- Use a leaf template to cut small leaves out of the green craft paper. This can be a challenge for the little ones – so help them draw the lining of a leaf on the paper and use the scissors to cut the shapes out.
- Glue these leaves to the sides of the stem – your cupcake liner flowers are ready.
13. Accordion Folded Spring Flowers Collage
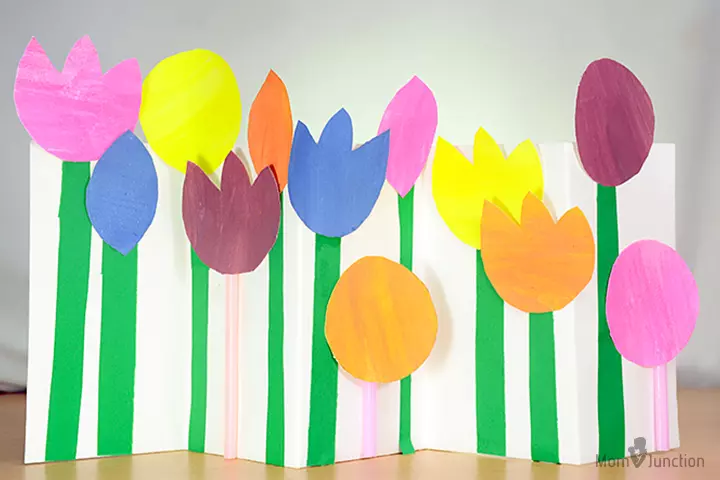
This is one of the best collage art ideas for kids you can try with your children. It is simple, colorful and has more flowers too.
You Will Need:
- Sturdy chart paper, preferably white or light cardboard for base
- Green craft paper and straws for stems
- White craft paper for flowers
- Scissors
- Watercolors, paintbrushes or crayons for flowers
- Glue
How To:
- Cut a strip from the chart or cardboard – 4×12 inches. Accordion-fold the chart (no more than six folds) to make the stand.
- Cut thin strips from green craft paper to create stems. You can also use straws to make stems. Make a few stems shorter than the rest.
- Stick the stems to the chart – keep a distance of half-an-inch or more between the flowers.
- Take another sheet of paper to make the flowers. Help the kids draw outlines of simple flowers (we chose tulips) and circles, single-petals. Color them differently – use as many bright colors as you want for the collage.
- Use scissors to cut the shapes carefully.
- Now glue the flowers and circles to the top-end of the stem and let it dry.
- Place the stand on the bedside table or in the living room.
14. Pop Out Flowers
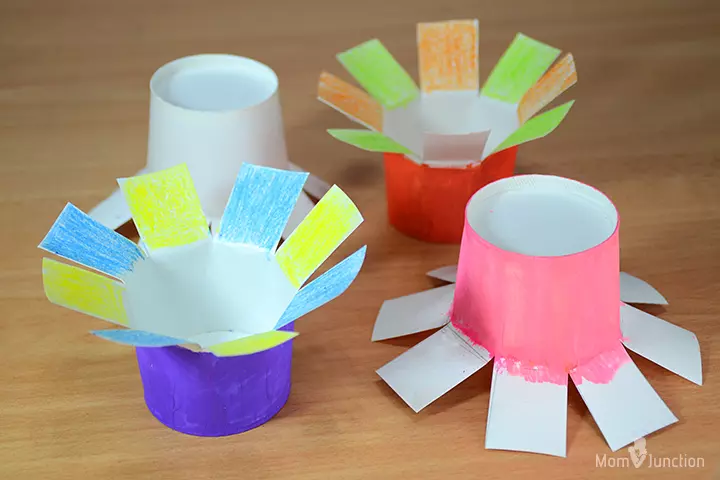
Making pop-out paper flowers is easy.
You can make these flowers anytime, anywhere with minimal art supplies and a little time to spare.
You Will Need:
- Big paper cups – white
- watercolors
- Paintbrushes
- Scissors
- Glue
- Sheet of cardboard (optional)
How To:
- Take a few paper cups – cut the rim out using the scissors. Make sure that the edge is evenly cut.
- Cut into the cups vertically – cut only half the length of the cup.
- Fan out the cut parts to bring out petals
- Use watercolors to paint the petals in different shades.
- Your pop-out flowers are ready.
- Stick the bottom of the flower to a paper or a cardboard and you have a cute gift ready.
15. Paper Daisies
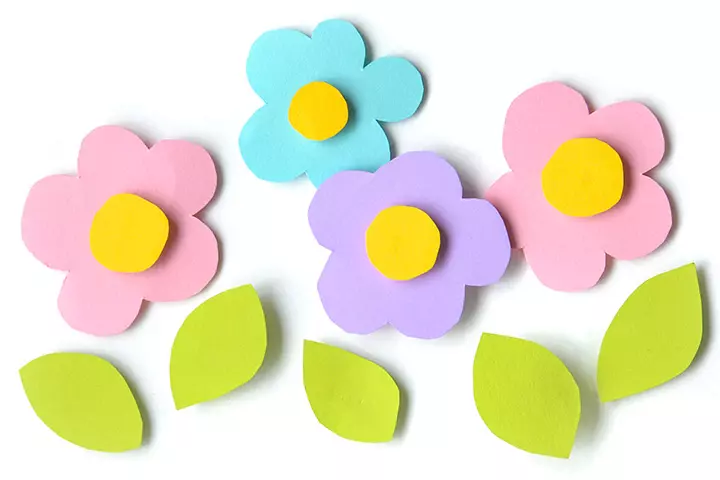
Daisies are cute and easy to make with paper. Here is how to make these flowers colorful with craft paper.
You Will Need:
- Craft paper – you can use only white or colored paper
- Green craft paper for stems (optional)
- Glue
- Scissors
How To:
- Take a sheet of color paper and draw flower shapes on them. You could use a pencil to draw the shape and then cut them using scissors.
- To get the perfect shape, use a stencil or an eight petal flower template.
- Draw as many flowers as you want to make, using different colored paper.
- Cut the flowers using scissors – make sure you use kid-friendly scissors to prevent injuries.
- Draw small circles, the size of a button, on yellow paper. Cut them out and glue them to the center of the flowers that you had cut earlier.
- Your daisies are ready.
- You could add a stem and a pair of leaves using green craft paper.
16. Spring Paper Flowers
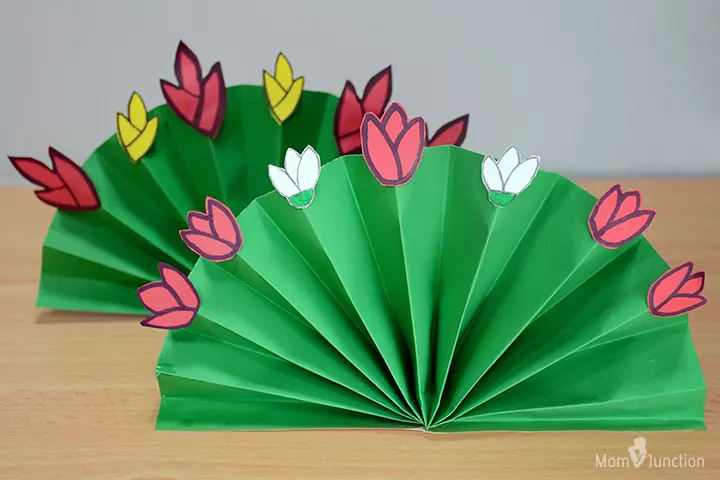
Here’s one of the spring activities for kids. Bring the colors of spring into your home with these colorful paper flowers for kids.
You Will Need:
- Craft paper – green, red, white and yellow
- Black sketch pen
- Glue
- Scissors
How To:
- Take the green craft paper – it should ideally be the size of A4. Accordion-fold the paper with half-inch folds.
- Fold the paper in the middle, from the top to give it a ‘V’ shape. Join the two ends of the paper to form a semi-circle. The flat end of the paper will act as the base. Make as many green bases as you want.
- Now, draw the shapes of small flowers – tulips or daisies or other simple flowers.
- Use a black sketch pen to give the flowers a neat outline.
- Cut the flowers, along the black outline, using scissors.
- Place the green folded paper on the table and stick the small, colorful flowers to one side of the paper.
- You have a green spring bouquet ready!
17. Colorful Cupcake Wrapper Flowers
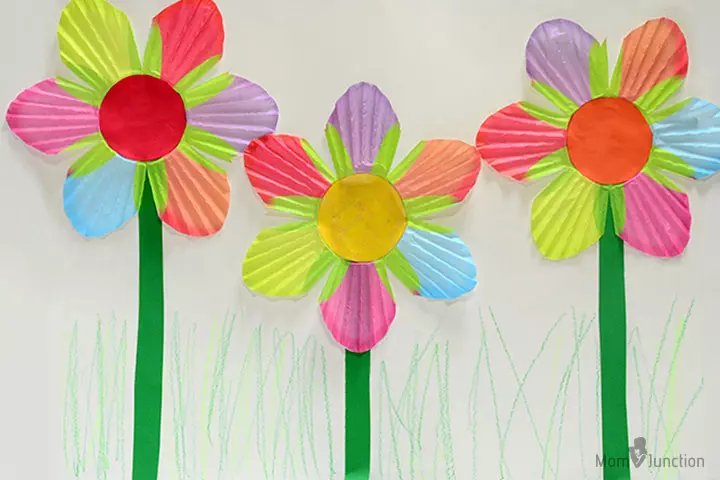
Make these cupcake paper flowers easily with just scissors and glue! This craft involves a lot of scissor practice.
You Will Need:
- Multicolored cupcake liners or wrappers
- Green craft paper
- Glue
- Scissors
- Beads (optional)
How To:
- Take colored craft paper and draw small circles – the size that fits inside the cupcake liner paper.
- Take a cupcake liner and flatten it. Cut into the folds until the center (stop at the fold that divides the base from the wall). Tell the kids to cut along the line, it makes it easier for them to focus.
- The slits on the wrapper can be simple, or slightly bent towards the edges, to look like petals.
- Glue the circles in the center of the slit cupcake liners.
- Cut green stems and glue them to the back of the wrappers to complete the flower.
18. Easy Paper Rose
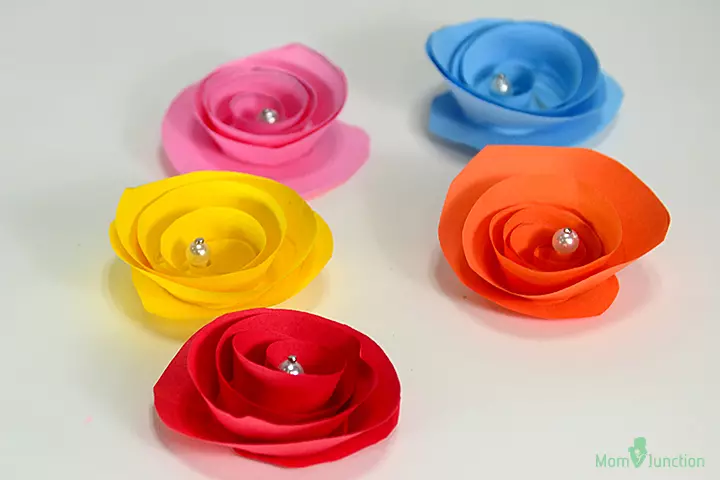
One of the most difficult flowers to make with paper is a rose. But here is how to make a paper flower easy.
You Will Need:
- Craft paper
- Pencil
- Scissors
- Glue
- Beads (optional)
How To:
- Cut the craft paper into four of five-inch squares. Use red, yellow, pink and white papers.
- Draw a large circle on the square paper – the circle should touch the edges of the paper.
- Start drawing a spiral inside this circle – start from the outer circle and go towards the center of the paper.
- You can have as many rounds as you want, but try to maintain a distance of half an inch between the inner circles.
- Take scissors and start cutting along the spiral lines – it is okay if your kid is not able to cut exactly on the line.
- Roll the spiral, starting from the outer side and moving towards the center. Try to roll the paper as tightly as possible.
- When the paper is almost rolled – with nothing or little left to roll – put some glue on the center (the unfolded part) and complete the roll. Press the bottom of the spiral so that the glue spreads properly.
- Let the paper flower free with its pointy end in your palm – you have a beautiful paper rose.
19. Balloon Flower
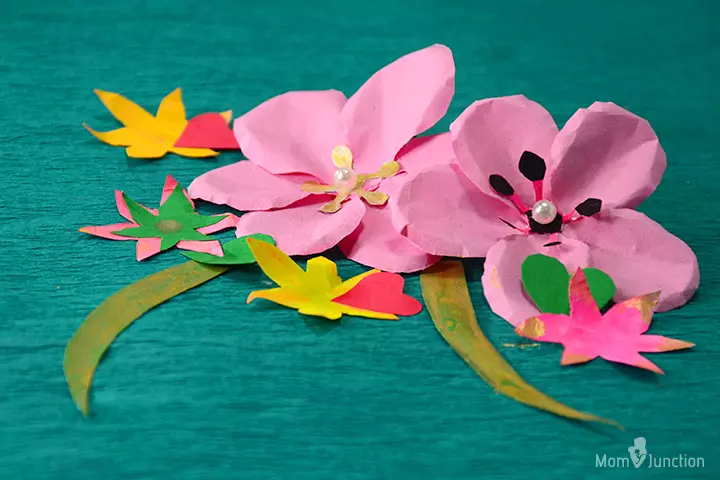
Make flowers with petals shaped like a balloon!
You Will Need:
- Pink craft paper
- Glue
- Punches/scissors
- Beads (optional)
How To:
- Start by making the petals – you can use a punch to make balloon shaped petals. Or you could draw small balloons on the sheet and cut them out.
- Place the pointed edge of the scissors on the balloon (from the bottom) and pinch it using your index finger and thumb. The fold makes it look like a petal.
- Cut small circles from the same paper. Have as many circles as the number of flowers.
- Use the circle as the base and glue the petals, overlapping each other a bit.
- Use a punch to make the flower center and glue it to complete the flower. You can use black paper for this.
- Add leaves using green craft paper, and it’s done!
Dr. Sonia S. V, a mother who has a keen interest in arts and crafts, shares a few ideas on how she makes balloon flowers out of paper. Using a balloon punch to get the desired shape, she explains, “I used punched balloon-shaped petals to make the large pink paper flowers on the cardboard photo frame… This paper flower can be made with a circle, oval, teardrop, or balloon shape. I used the balloon punch to make these punch craft paper flowers.”
Using an embossing tool for the base of the petals, she adds, “Lightly emboss a circle, sun, small flower, or even a scrap of paper to form a cup-shaped base for your paper flower.”
Taking the petals made using the balloon punch, she instructs, “Pinch your petal between your thumb and index finger. You need just 5-6 petals to make your paper flower. You can apply glue to the folded tip of your petal or onto the cupped base as I did here on my paper flower. Overlap subsequent petals and position the petals as you desire. I found using a thin-tipped object like my tweezer’s tip so much faster than using fingers. I stuck some quilled leaf shapes to make a large leaf for my paper daisy (i).”
20. Circle Flower
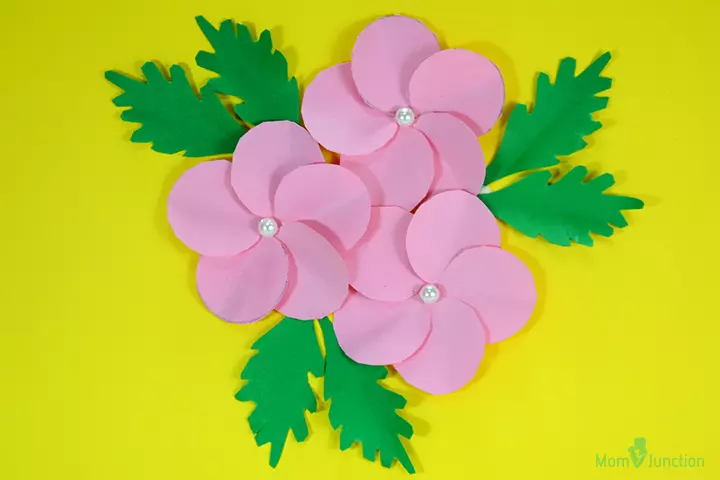
Did you know you can make a flower with simple shapes like circles?
You Will Need:
- Circle punch
- Craft paper – yellow or pink
- Glue
- Beads (optional)
How To:
- Punch small circles from the craft paper. These circles would be slightly larger than pennies.
- Take five circles and gently fold them in half; the fold must not be too deep.
- Take another circle for the base. Apply a good amount of glue on the entire surface.
- Glue the folded circles, slightly overlapping, to the base such that the five petals cover the diameter of the circle.
- Glue a bead to the center of the base to complete the flower.
21. Handprint Easter Lilies
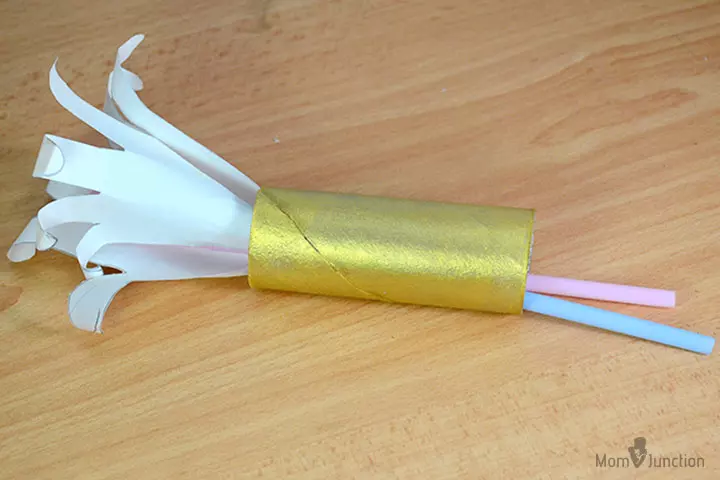
A fun way to create handmade flowers is to use your kids’ hand prints.
You Will Need:
- A4 sheets
- Colorful drinking straws
- Toilet paper roll
- Water colors – we chose golden glitter
- Paintbrushes
- Scissors
- Glue
How To:
- Trace your kid’s hand on a white paper using a pencil or a marker. Outline all the five fingers along with the palm.
- Cut the hand-print and roll it vertically – it should look like a funnel.
- Curl down the fingers of each roll to make the flower bloom.
- Take a straw and attach one end of it to the end of the flower roll.
- Your handprint Easter Lily is ready. Make three or more for a beautiful bunch.
- Make a vase out of a cardboard toilet paper roll and paint it in golden glitter or silver.
22. Tissue Paper Tulip
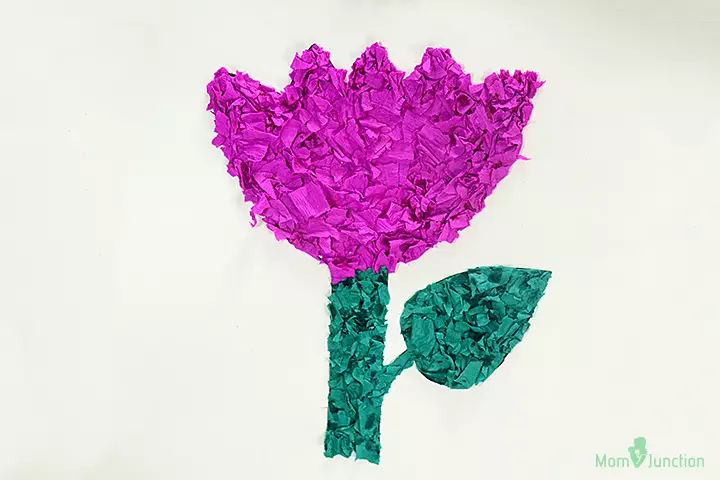
You can make beautiful paper flowers with something as mundane as a tissue paper. Here is how.
You Will Need:
- White chart paper
- Printable tulip pattern – you can also draw it if you want
- Pink and green tissue papers (or crepe paper)
- School glue
- Scissors
How To:
- Draw a tulip on a sheet of white paper. Or you can have the tulip pattern printed on a white sheet of paper. The pattern should include a stem as well.
- Cut the tulip pattern using the scissors.
- Cut the green and pink tissue papers into small squares, much smaller than the tulip pattern.
- Crinkle all the tissue squares a little.
- Apply glue to the surface of the tulip pattern and fill the stem with the green crinkled squares.
- Fill the flower portion with the crinkled pink squares.
- Your tissue paper tulip is ready!
23. Heart Punch Flower
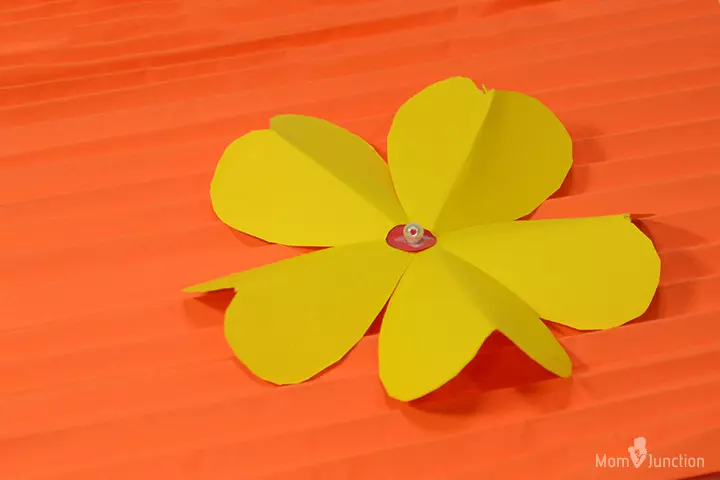
Make flowers with little yellow hearts! You will need a heart punch for this one.
You Will Need:
- Yellow chart paper
- Heart craft punch
- Glue
- Scissors
How To:
- Punch five or six hearts from the yellow craft paper to make petals.
- Gently fold each heart vertically.
- Apply glue to the center of a bright colored square paper or card.
- Stick the tips of the heart-shaped petals to the center – the hollow part of the fold is downward.
- The petals should be glued next to each other, not overlapping.
- Glue a small bead in the center to complete the craft.
Paper Flower Crafts For Tweens and Teens
The flowers you have learned above are easy to make for younger kids. If you have a teen interested in crafts, here are two paper flower designs they may enjoy making.
24. Easy Foldable Tulip
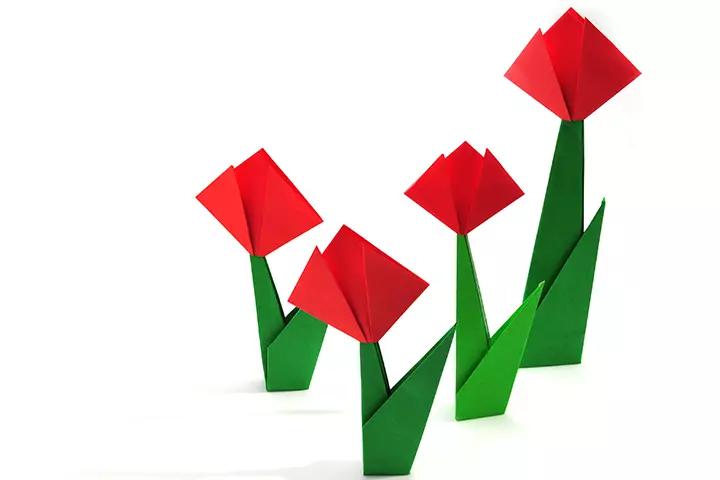
Tulip is one of the most commonly made flowers with paper. Here is a simple way to make a tulip by just folding paper.
You Will Need:
- Red square origami paper
- Green craft paper
- Glue
How To:
- Take the red square paper and valley-fold it in half and then unfold it.
- Now valley-fold the paper vertically and unfold it again.
- Cut one-fourth of the paper out to get a smaller square.
- Take the smaller square and place it on a surface. Rotate it 45 degrees, so it looks like a diamond.
- Fold the paper vertically. You have a triangle. With the longer side as the base, valley-fold the triangle and then unfold it.
- Pull the right and left corners of the triangle through valley-folding.
- Apply the mountain-fold at the newly formed left and right corners – fold just a little. The tulip is ready.
- For the stem, take a green square paper and create an origami stem, or a simple green stem with leaves.
- Your origami tulip is ready.
25. Dahlia Wall Decoration
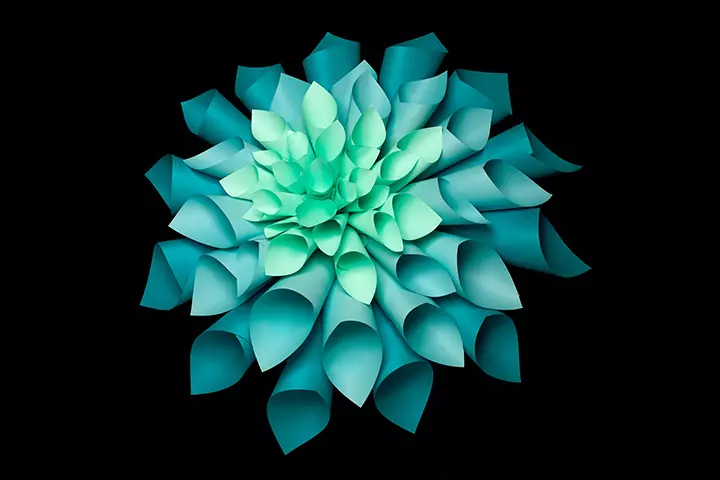
The dahlia wall decoration needs a lot of work and is a great activity to engage teenagers. The process involves rolling sheets and tactfully arranging them to form the shape of a flower. So, if you have a group of bored teenagers, follow this tutorial–a must-try paper craft.
You Will Need:
- Colored thick craft paper (should be foldable) in sky blue, light green and maybe yellow
- Glue
- Scissors
- Cardboard
How To:
- You will need several square-shaped craft papers with sets of different sizes (3-inch, 4-inch, and 5-inch).
- Take a square paper and roll it from a corner, into a cone. Glue the side of the cone to keep it intact.
- Roll cones of different sizes using different colored papers. You can use one color for one size, or vary them as you like.
- Once all the cones are ready, create a circular base using the cardboard. The circle must be big enough to fit all the cones you made.
- Glue the cones to the cardboard base in descending order of their size – start by pasting the bigger cones on the outer edge of the circle.
- Paste the smaller cones next, such that they complete the next circle.
- The smallest cones will form the innermost and the smallest circle in the arrangement.
- Your dahlia pattern is complete once you finish covering the entire cardboard base.
Frequently Asked Questions
1. How can I decorate my child’s room using paper flowers?
You can use paper flowers in your child’s room for decoration. You can use various paper flower crafts your child has made and arrange them in a vase, hang them on the walls, or even create a floral collage.
2. How can I incorporate paper flower crafts into a party or event for children?
Paper flowers can be a fun and engaging craft activity that you can incorporate at a children’s party or event. Set up a craft station with pre-cut paper flowers and other materials and have the children decorate them, or you can put children in groups or pairs to create a paper flower craft using the available supplies.
3. How long does it take to make paper flowers with children?
The duration of making paper flowers with children depends on the child’s age, the difficulty and size of the craft, and the child’s creative and artistic skills.
4. What are some common mistakes to avoid when making paper flowers with children?
Some common mistakes to avoid when making paper flowers with children include using excess glue, cutting the paper too small or too large, and not folding the paper correctly. Also, ensure the child’s safety when using the scissors or other art supplies.
5. Can paper flower crafts be a therapeutic activity for children?
Yes, paper flower crafts can be used for children to divert their stressed minds from studying and other topics. Crafting can also enhance their critical thinking and project management skills. You may use these activities as a relaxation technique and a tool for children to express their emotions creatively.
Paper flower crafts for kids that are easy to make and attractive can draw their interest and develop their creative skills. Moreover, indulging your child in art and crafts such as paper flower making also helps promote motor skill development and hand-eye coordination. You can start with a simple project like a paper daisy or five-petal flower and gradually introduce them to more intricate designs, including kirigami and origami craft for kids, once they master the basics.
Infographic: Simple Paper Flower Craft Ideas For Children
Craft is one of the best educational ways to engage children. These activities are not only fun but also help in improving the motor and artistic skills of little ones. Look at the infographic below to learn some easy-peasy paper flower crafts for children of all ages, from preschoolers to tweens. Illustration: Momjunction Design Team
Illustration: How To Make Paper Flowers For Kids?
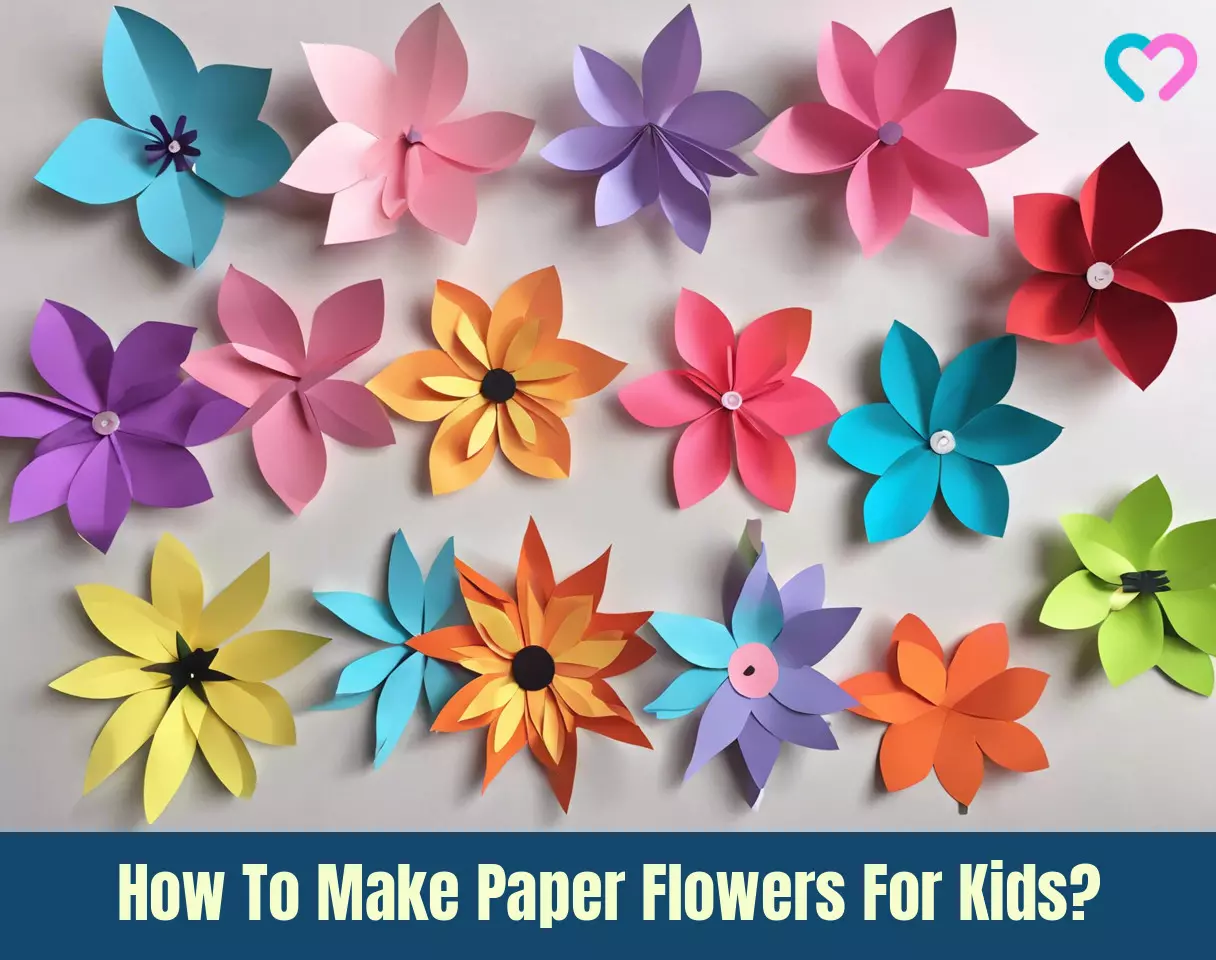
Image: Stable Diffusion/MomJunction Design Team
Let’s make some easy paper flowers with your kids! It’s a fun and creative way to get them involved in crafting and decorating. Let’s get started!
Personal Experience: Source
MomJunction articles include first-hand experiences to provide you with better insights through real-life narratives. Here are the sources of personal accounts referenced in this article.
i. Paper flowers on Handmade Photoframe.https://cardsandschoolprojects.blogspot.com/2012/02/
References
- 6 Life Skills Kids Can Learn at Art Class.
https://www.whitbyschool.org/passionforlearning/8-life-skills-kids-can-learn-at-art-class
Community Experiences
Join the conversation and become a part of our nurturing community! Share your stories, experiences, and insights to connect with fellow parents.
Read full bio of Erin DeCarlo
Read full bio of Harshita Makvana
Read full bio of Deepa Thomas
Read full bio of Vaswati Chatterjee


