Image: ShutterStock
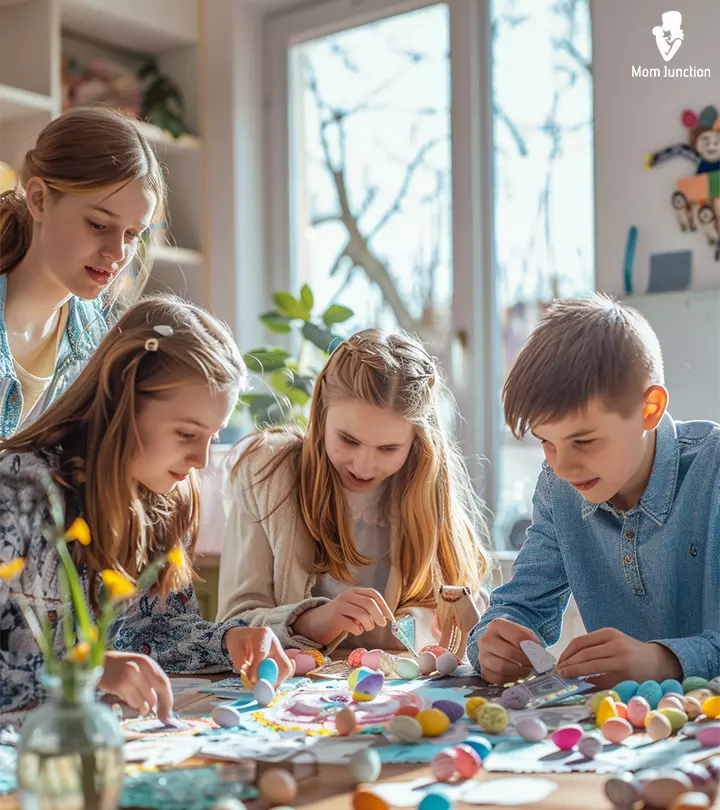
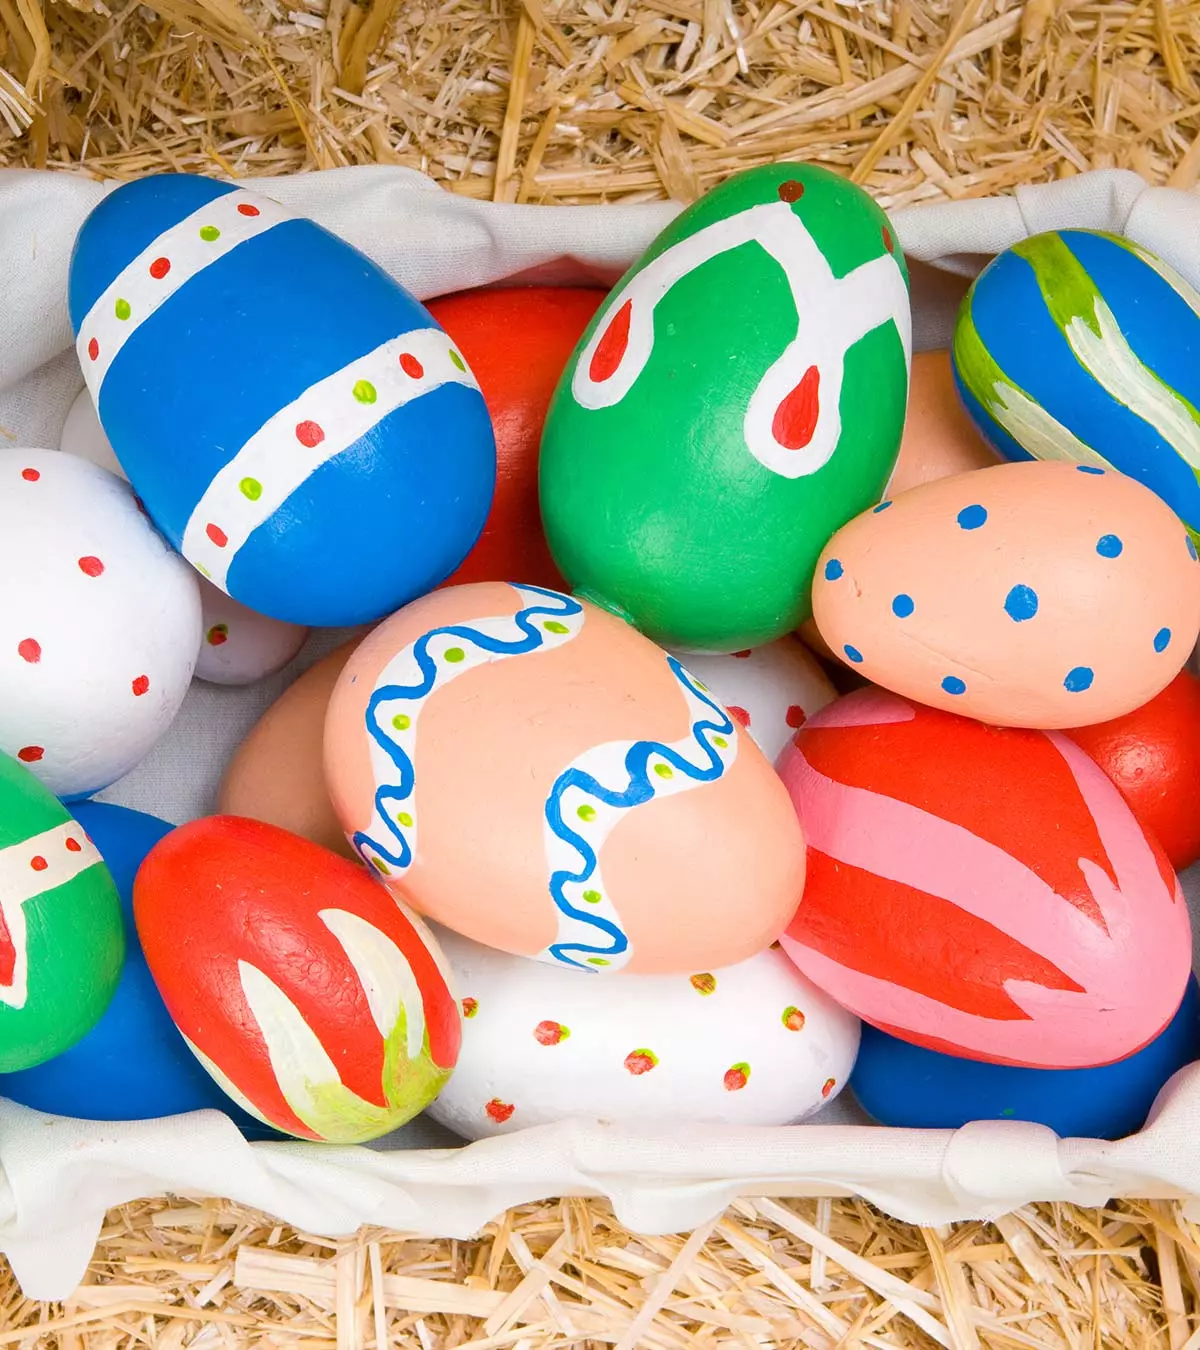
Eggs fascinate most children. Be it the egg’s shape or feel, children love playing with them. So, why not use different egg craft ideas to keep your little munchkin engaged without missing on entertainment. From using the eggs to paint various figures to turning them into a Hedgehog, your child is sure to have a fun learning experience.
So, let your child take the steering and decide how they want to use their imagination for making beautiful crafts and art projects using eggs. We got you a list of easy-peasy craft ideas using eggs to give them an initial prompt.
Key Pointers
- Get creative with egg crafts using materials such as eggs, paint, clay, and paper.
- Preschoolers will love making egg bee, hedgehog egg, paper egg garland, Easter bunny egg, egg necklace, and clay egg craft.
- Younger children can try egg heart and egg dinosaur designs.
- Required materials include food colors, paint brushes, craft paper, scissors, glue, plastic eggs, bamboo skewer, and colored card papers.
Egg Crafts For Preschoolers
Here are some interesting egg craft ideas to keep your little toddler occupied during vacations.
1. Egg Bee Craft

You will need
- Eggs
- Yellow, black, and red food colors
- Paint brush
- White craft paper
- Scissors
- Glue
How to
- Give your kid an egg, yellow color, and a paint brush to paint the egg yellow entirely.
- Place the egg on the table with its oval end in the front and help your child paint a broad, black circular strip across the egg as you see in the image.
- Cut a pair of wings from the white craft paper using the scissors and glue them to the top of the black strip of egg making wings of the bee.
- Create eyes of the bee using the black paint and mouth with the red color.
For more advanced options, parents can assist their children in egg blowing to preserve the egg shell and its decoration.
 Did you know?
2. Eggshell Mosaic
You will need
- Crushed eggshells
- Glue
- Paper
- Paint
- Pencil
How to
- Crush eggshells into small pieces.
- Dip the eggshells in paint or paint them separately with different colors to match your design.
- Draw your design on paper and apply glue, then stick the eggshells to form the design you want.
- Let it dry and paint it over for added color.
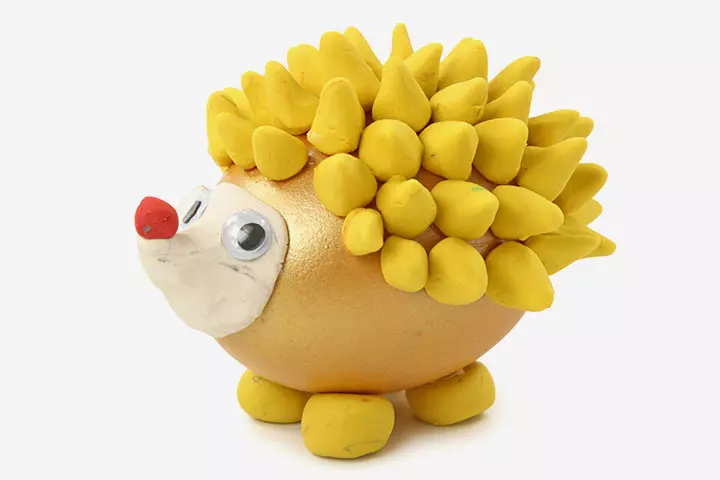
3. Hedgehog Egg Craft
You will need
- An egg
- Brown food color
- Paint brush
- Yellow and white clay
- One red berry
- Wiggle eyes
How to
- In this fantastic nature crafts technique, help your kid to paint an egg entirely with brown color using a paintbrush, and consider it as the body of the hedgehog.
- Make the spines of the mammal by shaping small spines from the yellow clay, and place them on the animal’s body
- Form hedgehog’s four legs from the yellow clay and set them below the egg as you see in the image.
- Create the mammal’s mouth using the white clay. Now, stick the mouth on the oval front of the egg.
- Press a pair of wiggle eyes and a red berry as the nose on the animal’s mouth. Voila, your very own animal crafts are done.
4. Eggshell Planters
You will need
- Half eggshells
- Soil
- Seeds for small plants like herbs
- Water
- Glue
How to
- Clean and dry the half eggshells so they can serve as pots.
- Paint a layer of glue and let them dry and become harder.
- Fill each shell with soil. Be careful not to break the shells.
- Plant small seeds, lightly water them, and place them in sunlight.
- You can even use the egg tray as a base so the planters won’t tumble over.
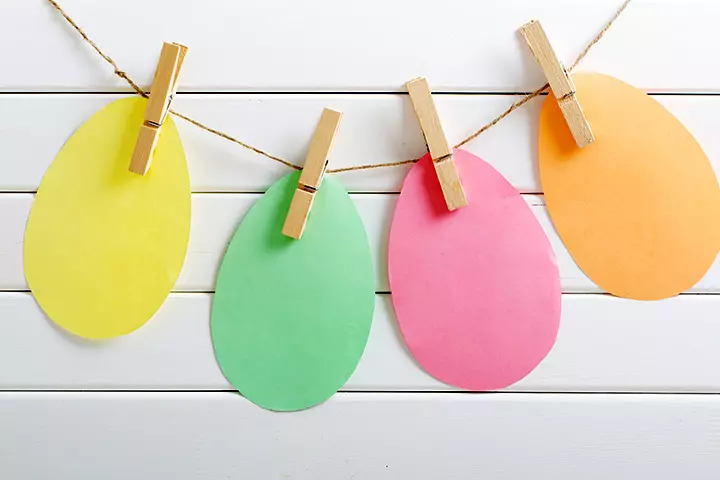
5. Paper Egg Garland Craft
You will need
- Colored card papers – orange, yellow, green, and pink
- Clothespins
- Long string
- Pencil
- Scissors
How to
- Show your child how to draw the shape of an egg on each colorful card paper using a pencil and cut yellow, green, orange, and pink eggs out of the paper with the help of scissors.
- Place the paper eggs on the long string at equal distances and clip each one of them to the thread using the clothespins creating a garland of eggs.
6. Emoji Eggs
You will need
- Paint
- Markers
- Eggs
How to
- Paint eggs in yellow and let them dry.
- Use markers to draw different emoji faces. You can even paint extra details with different color paints.
7. Easter Bunny Egg

You will need
- An egg
- Red paint
- Paint brush
- Red card paper
- Scissors
- Wiggle eyes
- Glue
- Black sketch pen
How to
- Paint the egg red using the red color and paint brush.
- Cut bunny’s ears out of the red card paper using scissors and stick them behind the egg.
- Glue a pair of wiggle eyes on the egg.
- Draw nose and mouth of the bunny using a black sketch pen completing the bunny egg. This is one of the simple and easy egg decorating crafts for preschoolers to make and decorate this Easter as creative activities.
Eggshell mosaic is another excellent way of decorating that requires no advanced skills. Try to incorporate as many ideas as possible.
8. Marbled Eggs
You will need
- Shaving cream
- Food colors
- Bowl
- Toothpick
- Eggs
How to
- Fill a bowl with shaving cream and add drops of food colors and swirl with a toothpick.
- Roll eggs in the mixture. Gently press down to ensure the egg is covered in the mixture.
- Wipe off to reveal the marbled design.
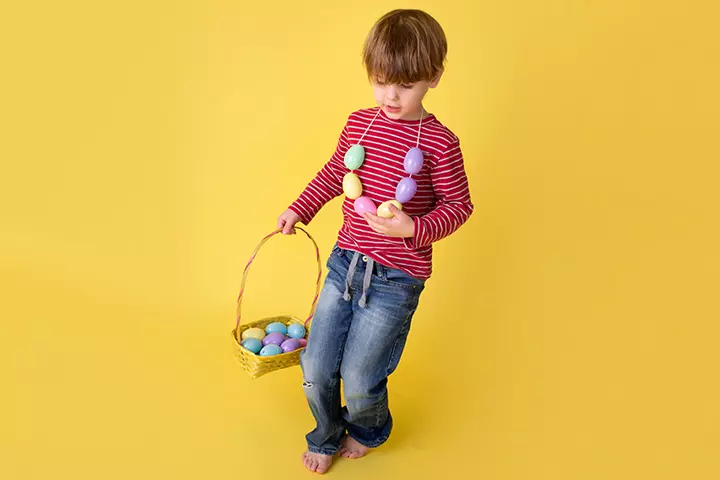
9. Egg Necklace
You will need
- Colorful plastic eggs of yellow, green, blue, pink, and other colors
- A long, thick string
- Bamboo skewer
How to
- Give your child eight to ten colorful eggs and help her make a hole in the top and bottom of each egg using a bamboo skewer and by holding it in a vertical position.
- Thread a long thick string through both the ends of all the eggs.
- Tie the both ends of the twine once all eggs are in the chain.
Egg Crafts For Young Kids
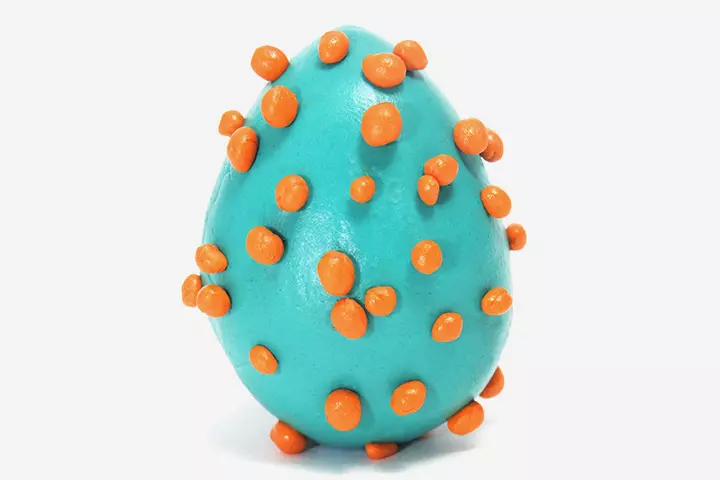
10. Clay Egg Craft
You will need
- Blue and orange clay
How to
- Provide your kid some blue clay, and guide her to shape an egg out of it.
- Form small balls out of the orange clay and stick them on the blue egg craft to decorate it. This is a fun and interesting egg craft for kids to make during Easter.
 Point to consider
11. Eggy Pigs
You will need
- Boiled eggs
- Sausages
- Peppercorn seeds
- Small toothpicks
How to
- Boil the egg till it is hard boiled and peel the eggshell.
- Cut the sausage into a circle and two mini triangles. These will be the pig’s nose and ears.
- Cut the toothpick into small pieces and attach the nose and ears. Make sure the toothpicks are not visible.
- Press the two peppercorn seeds into the egg to make the eyes.
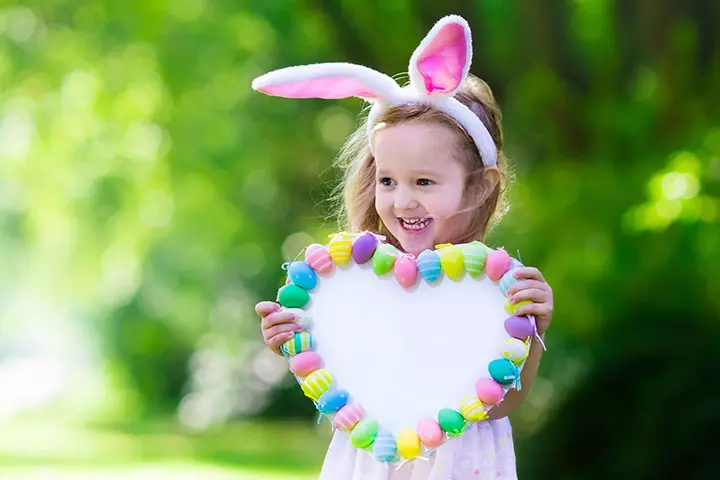
12. Egg Heart Craft
You will need
- Many eggs
- White cardboard
- Pencil
- Scissors
- Different food colors or dye
- Paint brush
- Glue
How to
- Help your child draw a big heart on the white cardboard using a pencil and cut it out using a pair of scissors.
- Give your kid some eggs and tell her to paint each egg artistically using various food colors or dye and a paint brush. Let the colored eggs dry.
- Now, glue the egg dyeing/painting on the outline of the cardboard heart and complete the craft.
13. Eggshell Chalk
You will need
- Eggshells
- Flour
- Water
- Food colors
How to
- Grind the eggshells into a fine powder.
- Mix the eggshells with flour, water, and food colors of your choice.
- Shape into sticks, circles, or any other style, and let them dry.
14. Egg Chalk Drawing

You will need
- Chalks of different colors, namely yellow, pink, green, and blue.
- Plain surface similar to the slate.
How to
- Show your kid how to draw the shape of an egg on a plain surface similar to slate using yellow chalk.
- Decorate the inner area of the egg with the help of blue, pink, green, and yellow chalks.
15. Fairy House Eggs
You will need
- Paint
- Markers
- Eggs
- Paper
- Scissors
- Glue
How to
- Paint the eggs with your favorite colors.
- Draw shapes of windows and doors on the paper with the marker and cut them out. You can even draw other shapes like flowers, mushrooms, or leaves.
- Make sure the size of the windows and doors fit on the egg.
- Paste the windows and doors with glue. There you have it! A little egg house for a fairy.
16. Felt Egg Craft

You will need
- Fabrics of different colors, namely pink, yellow, blue, green, and violet.
- Toy stuffing
- Pencil
- Scissors
- Needle
- Thread
- Glue
How to
- Fold the pink fabric into two halves of equal size, and guide your child to outline the shape of an egg on the upper fabric piece using a pencil, and cut two equal sized fabric eggs out using scissors.
- Sew two pink fabric eggs using the needle and thread leaving a small gap.
- Push in the toy stuffing in the egg through the small space into the egg and sew that area.
- Now, cut some decorative pieces out of yellow, violet, and green fabrics, and glue them on the egg’s surface.
17. Egg Penguins
You will need
- Eggs
- Paint
- Colored markers
- Pencil
How to
- Use a pencil to draw the shape of your penguin on the egg.
- Use black paint to create the penguin’s head and back.
- You can draw the eyes and beak of the penguin with colored markers.
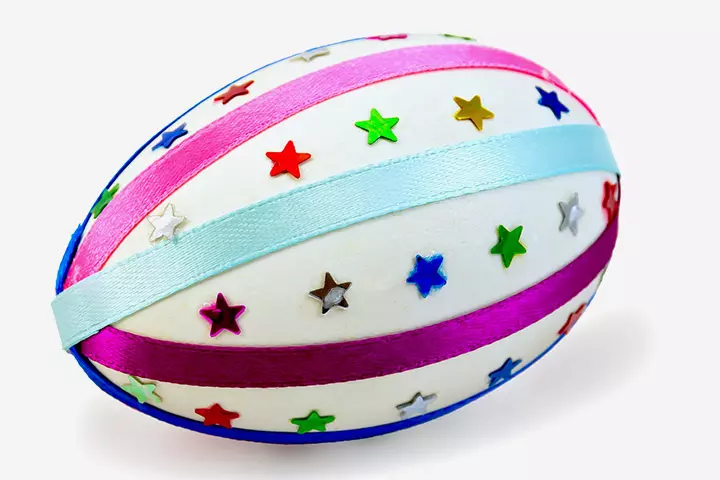
18. Ribbon And Sparkles Egg Craft
You will need
- An egg
- Colorful thin ribbons of pink, blue, and violet colors
- Star-shaped sparkles or stickers
- Scissors
- Glue
How to
- Help your kid to cut out pink, violet, and blue ribbons into small pieces such that each piece can run from the top to bottom of the vertical egg.
- Glue the colorful ribbon pieces on the egg with the help of glue as you see in the image.
- Decorate the space between the ribbons using the star-shaped stickers completing the craft.
19. Chicks In An Egg
You will need
- Colored paper
- Yellow paint
- Yellow feathers
- A fork
- Markers
- Glue
How to
- Cut the colored paper into an egg shape. It can be as big as you want.
- Dip the fork into the yellow paint and start pressing it inside the egg shape to form a circular chicken.
- Cut tiny triangular shapes and paste them as the beak. Cut the yellow feathers in half and paste them to form the wings of the chick.
- Using the markers to draw eyes and legs for the chicks.
20. Washi Tape Eggs
You will need
- Washi tape
- Stickers
- Eggs
How to
- It is one of the simple crafts. Decorate eggs with various washi tapes. You can even use stickers to add more details.
- Keep the decorated eggs as ornaments or paperweight.
DIY crafts are some of the best ways to engage your children and have family fun simultaneously.
Easter Egg Craft Ideas For Kids
With Easter around the corner, the kids are, no doubt, looking forward to the Easter bunny and those scrumptious chocolate-filled eggs. So, if you are looking for some activities or holiday crafts to pique their interest a tad bit more than usual, look no further. Here is MomJunction’s list of some amazing Easter egg crafts for kids to keep them happy and occupied.
21. Easter Egg Greeting Card

You will need
- White card paper
- Pencil
- Scissors
- A set of colorful sketch pens, such as pink, black, orange, brown, green, red, and other great colors.
- One thread
- A punch hole
How to
- Show your kid how to draw a big size egg on the white card paper by using a pencil, and cut it out with the help of scissors.
- Use a brown sketch pen and outline the white egg craft.
- Write ‘Happy Easter’ at the top of the egg in big letters. Write your Easter greetings and messages below it.
- Draw pictures of three small eggs at the bottom of the Easter egg card along with small decorations on the eggs, such as small flowers and leaves.
- Now, use colorful sketch pens and color the eggs and decorative images on them.
- Use a punch hole and make a hole in the top of the card. Thread in a small piece of thread through the hole, tie a knot and make a loop of thread for hanging the Easter card on a nail.
 Point to consider
22. Snow Globe Eggs
You will need
- Transparent plastic eggs
- Glitter
- Glycerin
- Water
- Hot glue gun or super glue
How to
- Open the transparent plastic eggs and make sure they are clean and dry.
- Pour a little amount of glitter into the bottom half of the egg, you can mix different colors to make it pop.
- Fill the bottom half with water and leave some space to prevent overflow when closing the egg.
- Use a few drops of glycerin to make the glitter float slowly, almost like a snowfall effect.
- Close the top lid of the egg and secure it with super glue or a hot glue gun. Let the glue dry completely before shaking your snow globe egg.
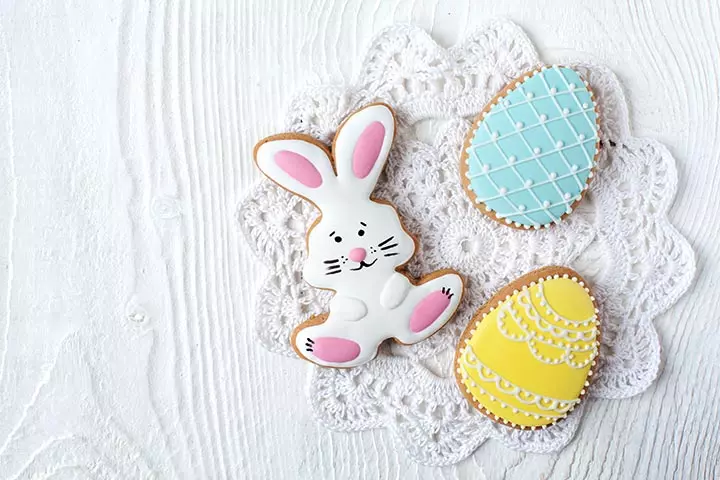
23. Easter Egg Cookies Craft
You will need
- Lots of big cookies
- Knife
- Cream cones of different colors, such as yellow, blue, and white.
How to
- Provide your child lots of big cookies and guide her to draw an image of egg on all cookies with the help of a white cream cone.
- Use a knife and cut out the egg shapes out of cookies.
- Spread the egg-shaped cookies on the table. Use a cream cone of one color, say blue, and make a blue layer of the cream on the entire cookie. Make small decorations on the blue cream layer using different cream cones of colors such as white or yellow. Follow the same decorative tricks for the rest of the egg-shaped cookies.
24. Eggshell Candles
You will need
- Eggs
- Soy wax
- Candle wicks
- Egg cartons
- Saucepan
How to
- Break the egg shells in half so you can fill it with wax. It can be done with a heavy straight edged knife. Ensure you take the help of an adult.
- Fill a few inches of water into the saucepan and place the tin of soy wax for it to melt. Do not put it on high heat.
- When the wax has melted, place the cracked eggshells in the carton.
- Use a tiny spoon to pour in some wax to set the wicks.
- Fill the eggs with melted wax and allow to cool and then harden.
- After they have cooled down, your candles are ready for use or gifting!
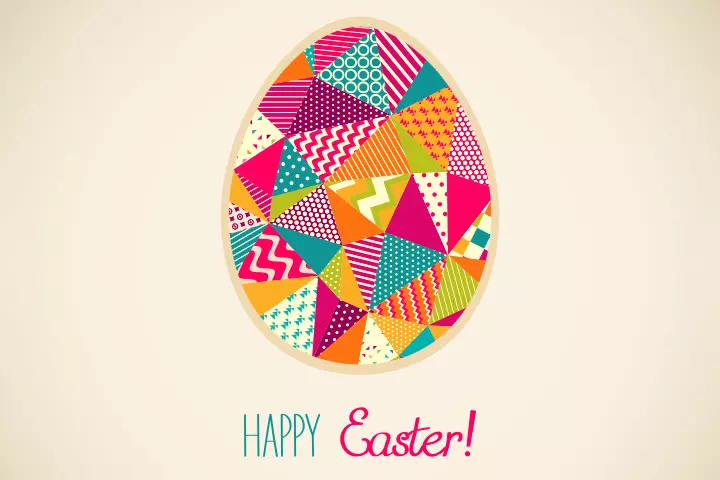
25. Easter Egg Patchwork
You will need
- Lots of colorful rags of clothes
- A black marker
- Scissors
- One sheet of white card paper
- Glue
- Pencil
How to
- Help your preschooler to draw a big shape of egg on the large white card paper by using a pencil and cut it out using the scissors.
- Use a black marker and create lots of small triangles on the colorful rags of clothes, and cut them out using scissors.
- Paste the triangular colored fabrics on the egg paper craft in a random manner applying the glue on one side of the triangles such that it appears to be the patchwork of colorful fabrics.
26. Nature Print Eggs
You will need
- Leaves/flowers
- Dye or food color
- Vinegar
- Eggs
- Glue
How to
- Press leaves and flowers onto eggshells. You can even use glue to stick them.
- Mix half a cup of water, one spoon of vinegar, and 10 to 20 drops of dye or food color.
- Dip the eggs inside the solution to leave natural imprints.
27. Easter Egg Chicken Craft

You will need
- An artificial egg
- Orange food color
- A paint brush
- Small pieces of orange feather
- Orange foam
- Pencil
- Scissors
- Glue
- Black marker
How to
- Guide your kid to paint the entire white artificial egg orange using the orange food color and paint brush.
- Use a black marker and create a pair of chicken’s eyes on the painted egg.
- Cut a small triangular shape out of the orange foam and glue it below the eyes as the beak of the chicken.
- Paste a couple of small, orange feather pieces at the back of the chicken egg craft as the little wings of the chicken. This is one of the easy Easter egg crafts for preschoolers to make.
This activity can be further simplified using a paper plate. Rebecca, a mother of four, and a woman of several passions, guides us through the process of making her paper plate easter chicks in her blog Simple As That. She says, “This week we got together with a couple of cousins to make a fun little Easter craft. We made these cute and super simple baby chicks and I thought I’d show you how we made them. You will need a yellow paper plate, scissors, gluestick, googly eyes, orange paper, and feathers. Here’s how you’ll make your chicks:
Step 1:
Out of orange card stock or construction paper cut two long strips for your chicks legs, a little diamond for a beak and two little chick feet.
Step 2:
Start making the chick’s legs by accordion style folding each strip of orange paper. Next glue the feet to the bottom of each leg.
Step 3.
Attach your legs to the bottom of your paper plate. Fold the orange diamond in half to make the chicks beak and attach to the center of your plate.
Step 4:
Now add googly eyes and attach some feathers to the back of the plate to give your chick some fluffy wings and that’s it. You’re done!
These chicks are easy to make and I think they turned out pretty cute. They were definitely a hit at our little craft day! (i)”
28. Tie-Dye Eggs
You will need
- Cloth
- Fabric dye
- Eggs
How to
- Wrap eggs in a cloth and apply different colors of dye in different areas.
- Let the dye dry and unwrap it to see magnificent colors and patterns.
29. Easter Egg Bunny Craft
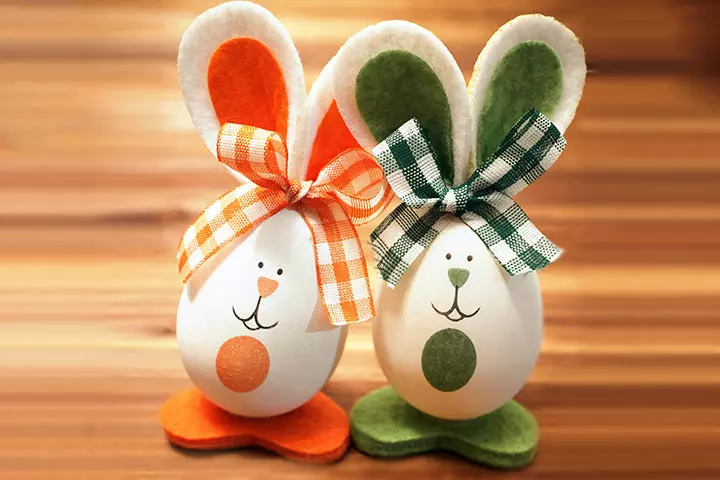
You will need
- One white plastic egg
- A black marker
- Orange and white foam
- Pencil
- Orange ribbon
- Orange sketch pen
- Glue
How to
- Provide your little Easter egg-fan a white plastic egg.
- Use a black marker and create two eyes in the upper section of the egg. Develop a small mouth below the eyes using the pen.
- Create an orange nose below the above the mouth by using an orange sketch pen. Make a small orange circle in the body area of the bunny as its little stomach.
- Draw bunny’s feet on the orange foam and cut them out as you see in the image. Place the egg bunny on the foam feet.
- Now, cut two big ears out of the white foam and small inner ears out of the orange foam.
- Glue small orange ears on the big white ears with their centers coinciding, and paste the two colorful ears on the top rear side of the egg craft.
- Tie an orange colored ribbon bow at the upper part of the egg in the middle of the ears as you see in the image and the bunny egg craft is ready.
A creative way of egg decoration is to incorporate egg carton crafts to create fancy objects using colors and glue.
30. Pinata Egg Bombs
You will need
- Eggs
- Small candies
- Tissue paper
- Paint
- Markers
How to
- Paint the eggs in different colors and design them by doodling with the markers.
- Let the eggs dry, then fill them with small candies.
- Seal the opening with tissue paper.
- Once they are ready, let the kids use them as bombs and then collect the candies.
31. Crayon Painting Of An Easter Egg

You will need
- One white drawing sheet
- Pencil
- Lots of colorful crayons
How to
- Provide a white drawing sheet to your preschooler and help her make an egg on it by using a pen. Outline the egg using a red crayon.
- Now, tell your child to come up with some creative designs and color the egg completely by using different colorful crayons and make beautiful designs, such as waves, zigzag lines, dots, vertical and horizontal lines, and big and small circles, as you see in the image. This is a simple and easy Easter egg painting craft for kids to make.
32. Egg Zoo
You will need
- Paint
- Markers
- Pencil
- Eggs
How to
- Decide what animals you want to add to your animal egg zoo.
- Outline the face and body of the animals with the pencil.
- Paint the bodies with different colors and add details with the marker.
- Arrange them in a garden or in your bedroom. Your animal egg zoo is ready.
33. Easter Egg Of Colorful Tissue Flowers

You will need
- Lots of colorful tissue papers, such as blue, yellow, red, violet, green, orange, and other colors.
- Pencil
- Glue
- One large white paper sheet
- Scissors
How to
- Draw a big egg on the large white paper and cut it out by using the scissors.
- Provide your child lots of colorful tissue papers and help her cut out colored petals and small circular centers of the flowers.
- Arrange the soft petals in a circular manner around one circular tissue paper and the delicate paper flower is ready. Similarly, create several colorful flowers out of the thin paper.
- As an Easter craft, glue all the multi-colored flowers on the egg paper craft such that the arrangement of the flowers forms a unique variety.
34. Egg Maracas
You will need
- Eggs
- Rice or beans
- Tape or glue
- Paint
- Marker
How to
- Poke a tiny hole and drain out the content of the egg.
- Clean the egg and let it dry so it will enhance the sound.
- After it is dried, paint the eggs in your desired colors and design them with the marker.
- Pour in a few grains of rice or beans and seal them with tape or glue.
- Make some new music with your maracas!
35. Handmade Felt Easter Egg

You will need
- Sheets of yellow, pink, and green fabric
- Red, green, and yellow thread
- Toy stuffing
- Pink ribbon
- Pencil
- Scissors
- Needle and thread
How to
- Fold the yellow fabric in halves and draw the image of egg on the upper layer of yellow cloth. Cut the egg shape out of the fabric so now you have two yellow egg shapes.
- Place golden egg pieces on each other and sew them by using a red thread and needle leaving a small gap.
- Insert the toy stuffing through space and stitch it.
- Cut out a small flower out of the pink fabric and center of the flower out of the yellow cloth. Place the yellow fabric center in the middle of the pink flower and sew it by using the green thread.
- Cut two leaves out of the green fabric and sew them below the flower by using the yellow string. Create the leaf stalk by sewing the green thread as you see in the image.
- Sew a small pink ribbon at the top of the felt egg craft.
36. Eggshell Frames
You will need
- Eggshell pieces
- Glue
- Paint
- Picture frames
How to
- Crush the eggshell into pieces, it can be of different sizes and shapes.
- Paint the pieces in different colors to make them attractive.
- Paste the pieces around the frame and voila!
37. Quilling Easter Egg Craft

You will need
- An artificial egg
- Green and yellow strips of quilling paper
- Quilling machine
- Glue
- Green food color
- Paint brush
How to
- Tell your preschooler to color the white artificial egg green completely by using the green food color and paint brush. Let the color dry.
- Use a quilling machine and yellow and green strips of quilling paper and make small artistic coils out of the pieces.
- Glue the beautiful coils on the green egg creating exquisite designs of creepers, flowers, and leaves as you see in the image.
38. Coraline-Inspired Egg Craft
You will need
- Colorful buttons
- Glue
- Eggs
- Paint
How to
- Paint the eggs in different colors and shapes.
- Use the glue and paste two buttons on the egg to resemble Coraline’s button eyes.
39. Clay Easter Egg Craft
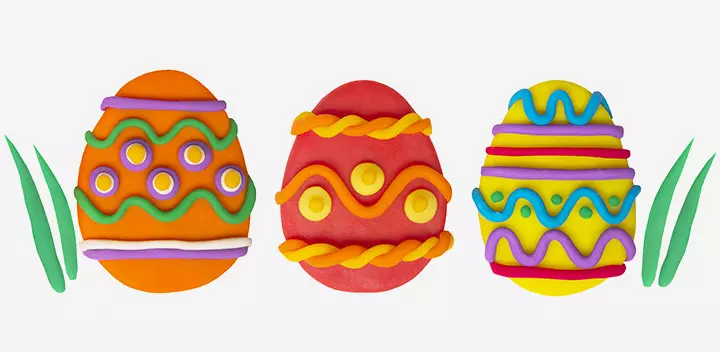
You will need
- Several different colored clay, such as orange, blue, white, green, yellow, red, and other colors
How to
- Provide your kid plenty of orange clay and help her shape an oval egg out of it.
- Give the child green, blue, and white clay, make thin long clay strips, and decorate the clay egg with the help of them by making various beautiful designs.
- Make small waves, lines, spots, small circles, and other small designs out of the colorful clay and decorate the Easter egg craft.
40. Disco Eggs
You will need
- Eggs
- Glitter
- Glue
How to
- Apply glue all over the area where you want the glitter to stick.
- Pour the glitter onto the area and wait for it to dry.
41. Crystal Easter Egg Craft
You will need
- Boiling water
- Borax water
- Craft pipe cleaner in different colors
- A pencil or a wooden chopstick
- Green food color
- Durable string
- Mason jar or any glass jar with a wide-mouth
How to
- Create an oval or egg shape by bending and twisting the craft pipe cleaner.
- Cut off the excess pipe cleaner. Bend the pipe cleaner in a zigzag shape and tie it to the oval shape you created.
- Attach a craft pipe cleaner to it and tie it to a wooden pencil or chopstick.
- Place the wooden chopstick on the rim of an empty Mason jar and suspend the oval shape in it. Ensure that it does not touch the base.
- Pour the boiling water into the jar. Ensure that the oval shape is fully submerged in the water.
- Add three to four tablespoons of Borax powder to the water and stir it lightly to ensure it dissolves in water.
- Keep the jar aside, where it remains undisturbed for at least 24 hours.
- Remove the oval shape from the water and see how the Borax powder has formed crystals around the egg making a crystal egg.
42. Paper Sunny Side Up
You will need
- White paper
- Yellow colored paper
How to
- Cut the white paper into an unevenly shaped circle, resembling a fried egg.
- Cut the yellow paper into an imperfect circle and smaller than the white paper.
- Paste the yellow paper on top of the white paper, and there you have it!
43. Minion Eggs
You will need
- Eggs
- Paint
- Black wool or string
- Googly eyes
- Glue
- Marker
How to
- Paint half the egg yellow and the other half blue to resemble Minions.
- Paste the googly eyes, you can use one or two, depending on your choice.
- Use the marker to outline the eyes so they resemble the goggles that they wear. You can also draw their mouth in different expressions.
- Use the glue and paste the string around the eyes to resemble the straps of the goggles.
44. Cherry Blossom Eggs
You will need
- Eggs
- Paint
- Pencil
How to
- Use the pencil to draw the shape of the cherry blossom onto the egg.
- Use pink paint to fill in the colors of the cherry blossoms.
45. Pasta Egg Craft
You will need
- Colored paper
- Different shapes of pasta
- Glue
How to
- Cut out the colored paper into the shape of an egg.
- Using glue, you can combine different shapes of pasta and paste them on the inside of the egg-shaped paper.
46. Egg Dinos
You will need
- Brown cardboard box
- Eggs
- Scissors
- Markers
- Glue
How to
- Cut the brown cardboard box into different shapes to resemble a dinosaur’s head, tail, legs, frills, and tusks.
- Use the marker to draw the eyes of the dinosaur and if you wish, add more detail to other body parts as well.
- Place the body parts on the egg, turning the egg into the main body of the dinosaur.
Did your kid take up any of these crafts? Which activity did she enjoy the most? Tell us about it below. Besides these Easter crafts ideas can be adapted for various other festivities or celebrations like spring crafts.
Infographic: Engaging Egg Craft Ideas For Children
Engaging and fun, egg crafts utilize easily available materials to ignite creativity and inspire endless hours of joy and artistic expression. This infographic is a delightful collection of imaginative projects to ignite your child’s creativity. Discover various ‘eggcellent’ activities to keep children entertained while exploring their artistic talents. Illustration: Momjunction Design Team
Frequently Asked Questions
1. What are some benefits of doing egg crafts with kids?
Egg crafts can help teach the importance of Reduce, Reuse, and Recycle for kids. In addition, the crafts help enhance their creativity and imagination. Also, children feel rejuvenated, calm, and more confident. Egg crafts also help them improve their fine motor skills, and they also learn to be more patient as they wait between the steps of each project.
2. How can I store eggshell art made by my kids?
You can save some of your children’s crafts in a folder, hang others on the walls of their bedrooms, or display some of their works in a showcase. If their work is appropriately stored, they will feel valued and appreciated.
3. How can egg crafts be used to teach colors and patterns to young children?
Egg crafts foster creativity and imagination among children. Different types of egg crafts that involve cutting colorful papers, painting, and other creative elements teach children about various color combinations, patterns, and textures and how they can create them.
4. Can egg crafts be a fun way to teach children about different animals and their eggs?
Yes, egg crafts are an amazing and fun way to teach children about different egg-laying animals, their habitat, egg size and color, and their young ones. It can help children enjoy making crafts while learning new information.
5. What unique and unconventional materials can be used in egg crafts for children?
Unique materials that you can use for doing egg crafts are shaving cream for marble dye art on eggs, colorful rice, dry grass, confetti, natural materials like flowers, leaves, and twigs, and googly eyes.
6. What are some tips for crafting with kids?
To craft with kids, set up a dedicated crafting spot to minimize the mess. Use as many recyclable materials as possible to teach them to be sustainable and not wasteful. Keep a close eye on your kids, especially younger ones, so they are safe and do not hurt themselves with scissors or other sharp objects. Moreover, encourage them to add personal touches to their crafts to keep them engaged.
7. What are some ways to customize egg crafts?
To customize egg crafts, you can encourage your kids to paint them with different colors, patterns, and themes. They can use techniques like tie-dye, decoupage, or simply go crazy with glitter and stickers. However, if these are not up your alley, get your kids to upcycle with recyclable materials like egg cartons, newspapers, tissue paper rolls, and broken egg shells. Not only will kids be able to personalize their crafts with these, but they will also learn how to be more creative while being sustainable.
Illustration: Amazing Egg Crafts For Preschoolers And Young Kids

Image: Stable Diffusion/MomJunction Design Team
Personal Experience: Source
MomJunction articles include first-hand experiences to provide you with better insights through real-life narratives. Here are the sources of personal accounts referenced in this article.
i. Simple Easter craft: Paper plate Easter chick;https://simpleasthatblog.com/simple-easter-craft-paper-plate-easter-chick/
Community Experiences
Join the conversation and become a part of our nurturing community! Share your stories, experiences, and insights to connect with fellow parents.
Read full bio of Erin DeCarlo
Read full bio of Manjiri Kochrekar
Read full bio of Harshita Makvana


