Image: ShutterStock

We all have fond memories of flying kites in our childhood. If your children show an interest in flying kites, we give you some easy step-by-step guides on how to make a kite for kids.
Making a kite isn’t complicated, and we’re pretty sure you must have made plenty of kites yourself in your youth. So, if your children share a love for kites and want to make some at home, we have a list of some fun kite-making ideas for you and your little ones.
Dante Dalabajan, a father and an activist, believes that kites can be shaped into various designs using recycled items and a little creativity. He says, “Sioti (his son) and I made an elegant kite made out of outdated calendars and left over bamboo stick from our recent barbecue party. It’s shaped like a bat with a 4-feet wingspan, and it has a Batman insignia, just as I promised (i).”
We’re sure your children will turn into kite-flying pros with the ideas we’ve provided in this post.
Key Pointers
- Various materials such as newspaper, two-ply plastic bags, parchment paper, vibrant sheets, and bulletin paper can be used to make kites.
- Kites can come in different sizes and shapes such as micro kite, delta kite, diamond kite, and multicolored paper kite.
- Making kites is a fun and educational activity for children to learn about symmetry, shapes, and fundamental physics principles like lift and wind resistance.
11 Different Kite – Making Ideas For Kids
Here are fun and easy kite-making ideas for kids, each with a materials list and simple, step-by-step instructions.
1. Newspaper kite
You Will Need:
- 1 sheet of newspaper
- Kite string
- Strips of a sheet or scrap fabric
- Two sticks of bamboo or doweliA thin, cylindrical short piece of wood, plastic, or metal that goes through a hole to keep different parts of a structure together
- Tape and glue
How To:
- Cut the bamboo stick or dowel to the length of the newspaper. One stick should be stiff, and the other should be a bit bendy.
- Use the string to tie together the sticks. It will appear as a cross.
- Tie the string around the ends of the stick and cut small notches in it to keep the thread in place.
- Spread the newspaper over the dowel frame, fold the edges over the string and stick in place.
- Now tie a long string or flying line to the kite where the dowels cross. It’s ready.
2. Mini kites
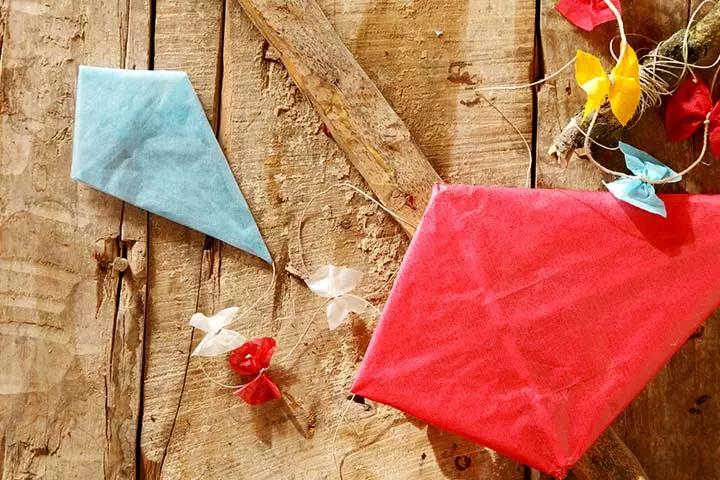
Image: Shutterstock
You Will Need:
- Parchment paper
- Wooden skewers
- A piece of stick
- Yarn
- Glue or tape
- A long strip of paper
- Scissors
How To:
- Cut the parchment paper to a square and lay out the skewers to make a cross.
- Now lay the paper in diamond and place the skewers on it. Cut off the excess skewer to make it fit into each corner.
- Now tell your kid to take the piece of stick and wrap some yarn around it. Take one end of the string and cover the intersection of the skewers with it. Tape or glue the skewers to the paper.
- To create the tail, take a long strip of paper and tell your kid to cut out triangles from it. Tape or glue the tail to one end of the paper. Have fun by making kites with kids.
3. Delta kite

Image: Shutterstock
You Will Need:
- A ruler
- Scissors
- Black marker
- HacksawiA saw with a thin fine-toothed blade mounted in a frame, used primarily for metal cutting
- Hardwood dowel
- Electric tape
- 2 feet wide and 1 meter tall, two-ply plastic bags
- Flying line
How To:
- Show your kid how to place the plastic bag flat on the floor, keeping the closed end at the top. On the top-left corner, measure and mark three dots on the plastic bag.
- Ask your kid to connect the dots using the black marker. Flip over the plastic and tell him to trace over all the black lines.
- Now help your kid to cut the right and top side of the bag, open it to see the complete sail outlines.
- Once you have cut along all the black lines. The sail is ready.
- Take a 5mm and 27-inch long dowel. Place the dowel on the centerline of the sail.
- Cut two more 32 inches long dowel sticks and place on the leading edges of the sail.
- Take 2-inch long pieces of tape and stick them down. Fold the tapes to the underside of the plastic.
- Take a 28-inch long dowel and lay it on the sail, around 31 cm from the nose.
- Now tell your kid to take two, 8 inches long tape, and place it at the crossing points.
- Wrap the tapes around the dowel, without letting them stick on the sail. Your kid can add an extra tape to keep the sail in place.
- Ask your kid to poke a hole in the sail, just where the vertical and horizontal dowels cross each other. Thread the flying line through the hole and tie it around the vertical spariA thick, robust pole used to support the sails of a ship .
- If you have some strips of sail plastic left, take a long, narrow, 2 inches wide strip and stick at one end of the kit.
4. Diamond kite

Image: Shutterstock
You Will Need:
- Bulletin paper
- Scissors
- Dowel or skewer
- Glue, string or tape
- A strip of cloth
How To:
- Here’s a simple and easy idea for making a kite for kids. Take a big piece of paper, draw, and cut out a perfect square from it.
- Tell your kid to fold the paper to get a triangle. Open and fold again, but from the other side.
- Now he has to open the paper and place the dowel vertically on the folded line.
- Place another piece of dowel above the center of the paper to make the spar. The spine has to run through the center of the spar, with equal widths on its both sides.
- Tell your kid to secure the dowel with a tape or string. He can even use the hot glue gun to make sure that the frame is attached.
- Now ask your kid to put the dowels along the edges and attach to the paper. Tape or glue the string to the folded edge and cut off the excess. He can even reinforce the kit by taping its center and edges.
- Make two holes an inch above and below the center point to string to the dowel.
- Thread through the flying line through the holes and tie to the dowel.
- Take a strip of cloth and attach to the bottom of the kite to make the tail.
- Tie a string to the keel string and your diamond kite ready to fly. Try this simple kite making for kids at home.
5. Colorful paper kites
You Will Need:
- 36″ wide sheet of paper
- Two wooden dowels, one 12 long and the other 22 inch
- Acrylic paints
- Ribbon or fabric scraps
- Twine
- Tape
- Mod Podge, stencils and patterned paper for decoration
How To:
- Ask your kid to start making the kite by painting sheets of paper with spring motifs. Kids can use stencils or anything they like for decorating the kite.
- To make the frame of the kite, make a ‘T’ from the dowels. Reinforce the joint by tying a string or hot glue.
- Now place the kite frame on the artwork and trim the paper to size, leaving a 2-inch border on each side.
- Show your kid how to fold the corners, and secure them with a tape. Now fold the side seams over the string and secure with the tape.
- Cut a small slit 2 inches from the center of the dowel. Reinforce the holes with a small strip of tape.
- Thread through a length of twine from the holes, but make sure that the kids do not pull the string tight.
- Attach some ribbons or scrap fabric from the end of the kite.
- Tie a string or flying line and it’s ready to fly. Try making kites for kids.
 Trivia
6. Butterfly kite
You Will Need:
- Plastic drinking straws, we used neon colored ones
- White glue
- Colored craft paper
- White string or yarn
- Round wooden skewers or toothpicks
- Mod Podge
- Hot glue gun
- Scissors
How To:
- Cut pieces of straws and tell your kid to glue on the craft paper to form the shape of a butterfly. Tell them to fill the inside of the frame with pieces of straws cut to required size. Leave it aside to dry
- After the glue dries, show your kid how to cut the tissue paper along the frame. He can run a wooden skewer through the horizontal cross bar straw pieces to stabilize the kite. Trim off the excess with sharp scissors.
- Encourage your kid to design the front of the kite with Mod Podge. Once the mod podge dries, thread a string through the straws at the top of each wing. The super cute butterfly kite is ready.
7. Kite for preschoolers
You Will Need:
- Paper
- Stapler
- Yarn
How To:
- Tell your little one to fold the paper in half.
- Measure and mark 2 ½ inches, (point A) and 3 ½ inches (point B) on the folded side of the paper.
- Now tell your kid to take two corners of the paper and staple at point A.
- Punch a hole at point B and tell him to tie a piece of yarn through the hole. These easy-to-make kites for kids are ready for flight!
8. Simple paper kite
Image: Shutterstock
You Will Need:
- Duct tape
- A plastic tablecloth or paper
- Crochet thread
- Kitchen twine
- Two dowels about ½” in diameter
- Pen or pencil
- Scissors
- Scroll saw
- A piece of paper
- Pencil
- Ruler
- A hole punch
- Yarn or string
- Stapler
How To:
- How to make a paper kite for kids? Cut the dowels to the intended length. One dowel should be longer than the other. 30 inches and 23 inches would be perfect. Tell your kid to cut a small notch at the end of each dowel.
- Tie the dowels tightly together to give a cross shape. Run a thread through the notches and around the outside of the kite.
- Place the kite frame on the tablecloth or kite paper and trace around the kite, leaving 2 inches on the edges. Cut it out using the scissors.
- Glue or tape the cloth or paper securely around the kite frame.
- Fasten strips of cloth or paper at the end of the cloth.
- Tie an end of the crochet ball thread to the center dowel and insert a ruler or pencil to make a handle.
9. Paper bag kite
You Will Need:
- One brown paper grocery bag
- One 6-inch stick
- Two 12-inch skewers or sticks
- String
- Crepe paper, fabric strips or string
- Tape
- Crayons/ paints/markers
How To:
- Tell your kid to cut the brown paper to 12*16 inches. He has to fold the paper in half, horizontally.
- Now tell him to measure and mark the center 4 inches on both the short ends.
- Ask him to measure 4 inches from the long and open side. Draw a line from the top side to the open 4-inch side mark. Cut along the lines.
- Now open the kite, tell him to color, and decorate.
- Now tape the 12-inch skewers or sticks on the folded 4-inch marks. Put some tape on the corners of the kite where you’ll attach the string. Punch a hole in each corner of the kite.
- Attach the tail to the end of the kite and tie a 16-inch long string through each hole.
- Wrap the remaining string around the 6-inch stick and tie a long string to the end.
10. Plastic bag finger kites
You Will Need:
- House wrap or plastic shopping bags
- Pencil
- Poster paper
- Scissors
- String
- Stick
- Dowels or natural bamboo
How To:
- Cut off handles of the shopping bag and sandwich between two pieces of parchment paper.
- Iron the paper on medium until it’s fused.
- Draw and cut the kite pattern from old poster paper, length 12 inches and width 10 inches.
- Trace the pattern on the material and cut it out.
- Tell your kid to decorate the kite any way he likes.
- Take two pieces of dowel or bamboo and attach to the kite in the ‘T’ shape.
- Tie the string in the center of the kite and wrap around a good length of it around the stick for the handle.
- Attach bits of ribbon or fabric at the end of the kite and it’s done.
 Point to consider
11. Box kite
You Will Need:
- 4 wooden dowels (1/4” x 36”)
- 4 wooden dowels (1/4” x 17”)
- Four straws (fit over 1/4″ dowels)
- Household string
- Carpenter’s glue
- Duct or masking tape
- Lightweight construction paper or similar material (two sheets of 11″ x 64″)
- Kite string
- Pocketknife
- Pencil
- Scissors
- Fine-toothed saw
How to:
- Carve a notch at each end of the 17″ dowels, and cut the 1/4″ dowels to length.
- Halfway through each 17″ dowel, mark it at 8 1/2″. Tie two dowels together with string, coat them in glue, and secure them with tape. Repeat the process for the second crosspiece.
- Make eight lengths of straws that are 4″ each, and slide them onto each 36″ dowel, 6″ from the end. Put the cross pieces into the straws, fasten the joints with tape, bind them with string, and soak them in glue.
- Trim and tape it in place after encircling the frame with the 11″ x 64″ material.
- For reinforcement, affix tape to the sheets’ whole perimeter.
- Attach the kite string to the frame.
Frequently Asked Questions
1. At what age do kids play with kites?
Although kids as young as two might develop an interest in flying kites, they may not have developed the skills needed to hold a kite or grasp the string (thread). Children above five years old might find it enjoyable to fly kites.
2. How do I teach my child to fly a kite?
Children usually learn to fly a kite after observing a parent or elder do it. You may try these steps to fly a kite with kids: Pick a simple diamond-shaped or delta-shaped kite, attach a single string, choose to fly a kite in the right area with favorable weather conditions, and encourage your child to release the kite from a distance.
3. Are there any safety precautions I should take while making a kite with kids?
Safety should be of utmost concern when making kites with children. Utilize materials and tools that are safe for children and don’t have any sharp edges. Give clear instructions and closely supervise to prevent accidents. Select a safe flying location, away from power lines or crowded areas, and maintain a safe distance from others to avoid any potential collisions.
4. How can I incorporate educational elements into kite-making for kids?
Incorporating educational elements into kite-making for children can revolve around fostering art and creativity. Teach them about the significance of colors, patterns, and composition in creating visually captivating kite designs.
5. Can I make a kite that incorporates lights or other special effects for nighttime flying?
Yes, creating a kite with lights or special effects for nighttime flying is possible. You can use battery-powered LED lights attached to the kite frame or tail to provide illumination.
6. How can kite-making be environmentally friendly?
Kite-making can be environmentally friendly by using recyclable materials, helping reduce waste. Encourage children to repurpose household items creatively, teaching them about sustainability while making kites.
Knowing how to make a kite for kids can be an interesting craft activity, and it increases their wish to fly kites. They can upcycle various materials available at home to make a beautiful kite. Newspaper kites, mini kites with paper and wooden skewers, delta kites, and diamond kites can be made at home with little effort. You may also help them make kites in various shapes and sizes, such as butterfly-shaped or bird-shaped. Give them basic instructions and let them use their imagination and creativity. It is one of the best things to do when kids are bored.
Infographic: DIY Kite-Making Ideas
Flying in the sky with birds, the view of colorful and beautiful kites can be enchanting. Almost every country has a kite festival or a specific time of the year when people fly kites. With our list of beautiful kite-making ideas, you can also make a kite with your children at home. Try any of these ideas and have fun.
Some thing wrong with infographic shortcode. please verify shortcode syntaxIllustration: Easy Ideas To Make A Kite For Kids With Paper And Sticks

Image: Dall·E/MomJunction Design Team
Let’s make a beautiful handmade paper kite at home! Follow these simple steps and you’ll be flying your own kite in no time!
Personal Experience: Source
MomJunction articles include first-hand experiences to provide you with better insights through real-life narratives. Here are the sources of personal accounts referenced in this article.
i. Kite-flying, life lessons;https://dantedalabajan.wordpress.com/2014/07/01/kite-flying-life-lessons/
Community Experiences
Join the conversation and become a part of our nurturing community! Share your stories, experiences, and insights to connect with fellow parents.
Read full bio of Erin DeCarlo
Read full bio of Debolina Raja
Read full bio of Harshita Makvana


