Image: ShutterStock
Managing your children during the summer break or on holiday can be troublesome since most parents have to juggle working and to be a parent. With photo frame craft ideas for kids, you would be able to help them be productive and creative at the same time. Also, if you find your children are spending more time at home and getting bored, you should engage them in creative arts and crafts. This can help enhance their imaginative skills. Crafting not only sparks creativity but also enhances fine motor skills, boosts self-esteem, and fosters a sense of motivation and accomplishment in children. Put these handmade photo frames on display in your house and it will boost your child’s confidence. Here, we have created a list of the best photo frame craft ideas with detailed descriptions to make them easier for your child’s understanding.
Key Pointers
- Crafting photo frames with your kids is a fun way to be creative and productive together.
- Displaying these handmade frames at home can make your child proud of their work.
- It’s also a great way to help them practice patience and relax.
- Parents can help children make these frames using simple materials such as sticks, CD covers, old magazines, twigs, colors, and chart papers.
Top 5+ Photo Frame Craft Ideas For Kids
We have compiled interesting DIY photo frame ideas for kids. Don’t worry as you don’t have to spend too much to make these beautiful frames. Most of the material you can easily find in your home! Alternatively, you may also ask your kid to make a scrapbook decorated with photos and gift it to someone.
However, remember to assist your kids, when they are involved in activities like cutting papers or other craft materials using scissors.
1. Basic Photo Frame
Suited for kids aged 6 years and above.
Materials Needed
You have to arrange for materials like:
- Craft stick, at least 4.
- Cardboard
- Glue stick
- Poster paints
- Brushes for painting
- Scissors
- Scale
- Pencils
- A photograph which needs to be framed.
- Strings or magnets for the photo frames.
- Glitters, craft foam, felt material and buttons
How To Do It?
- The first step is to ask your kids to decide on a shape they prefer.
- Make them paint the craft sticks based on their preferences.
- Tell your kids to glue the painted craft sticks in square or rectangular shape as soon as they dry up.
- Your kids can do some designing on these sticks with your help. They can stick some glitters or buttons to decorate it.
- Now ask your kids to trace the outer lines of the frame on cardboard.
- You can also draw a smaller square inside the bigger one drawn on the cardboard.
- Help your kids to cut the board out along its inner outlines.
- Now stick the cardboard on the craft sticks to represent its base.
- Now your kids can stick a photograph in the center of the photo frame. It can be an individual photo or even a family photo.
- After that, ask your kids to stick the strings or magnet pieces behind it to hang it on the wall.
 Point to consider
2. The Card Collector Photo Frame

Image: Via Pinterest
This one is an appropriate photo frame craft for kids aged 5 years and above.
Materials Needed
You need:
- CD Cases
- Cellophane Tape
- Construction Paper
- White glue
- Some cards
- Safety scissors
How To Do It?
- The first step is to help your kids to cut a piece of construction paper in square shape to fit the CD case.
- Place the card at its center and trace the outline for your kids.
- The rectangle you trace must be cut in three-fourth of the size of what you previously traced.
- Let your kids use the glue to stick each corner of the square along the opposite sides of the traced lines.
- Your kids have to stick that square inside the transparent side of the CD cover.
- Let them cut one strip from the construction paper of about five inches and one inch in length and width.
- Your kids must also cut another piece of construction paper in the measurements of one and four inches.
- Now tell your kids to lay the cards with its center at the hole that you had cut to the center of the square.
- Next, your kids can lay down the strips of papers at the backside of the cards.
- Let your kids tape down the edges of the strips so that it holds the cards in its right place.
- Now your kids can close the CD cover.
- You can hang up the frame on the walls or place it on the fridge with the aid of magnets.
3. Photo Frame With Old Magazines
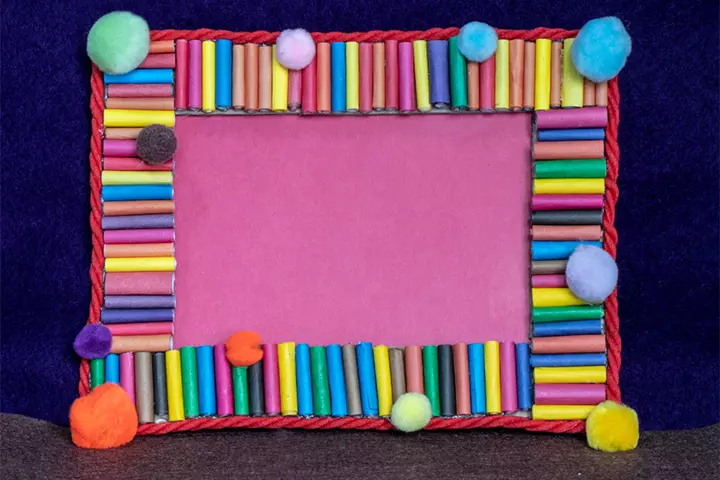
Image: Shutterstock
If your kid is 5 years and above, then this kids photo frame craft is surely going to keep him or her busy for long hours.
Materials Needed
You will need:
- Magazines with bright pictures
- Glue stick
- Scissors
How To Do It?
- You need to help your kids by cutting out rectangles in the dimension of two inch-by-one inch from the magazines.
- Now ask your kids to roll these pictures.
- Next, your kids have to glue these rolls, one against the other in horizontal direction along its sides, while its top remains in vertical direction.
- When your kids paste a favorite picture in the middle, this colorful photo frame is ready!
 Quick tip
4. Personalized Picture Frames
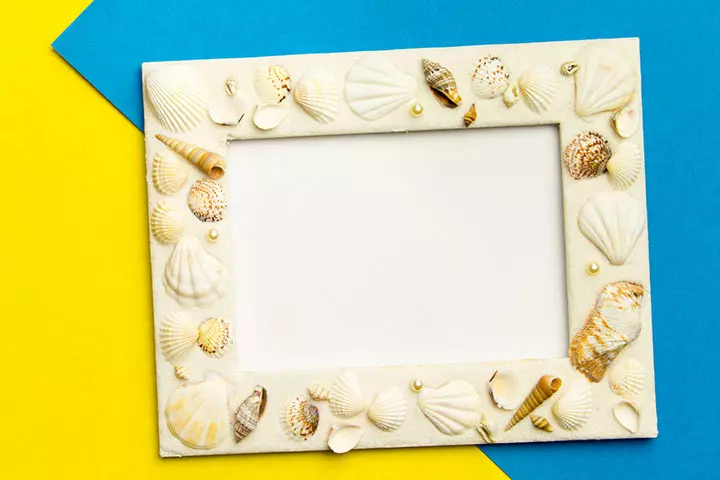
Image: IStock
This one’s for kids aged 3 years and above. Now mommies, don’t worry your toddlers can too have loads of fun while making this photo frame. Don’t forget to assist your little munchkin!
Materials Needed
You will require:
- A picture frame
- Paint and painting brush
- Items of embellishment like seashells, buttons, beads in plastic, gems, stickers, charms etc.
- Craft glue
- A photograph
How To Do It?
- Remove the back of the frame and keep the glass aside.
- Ask your kids to place the frame on some covered surface, as they will have to paint it.
- Once the frame’s paint has dried you can ask your kids to decorate it using embellishment items.
- Next, your kids can stick the photo inside the frame.
5. Handprint Frames
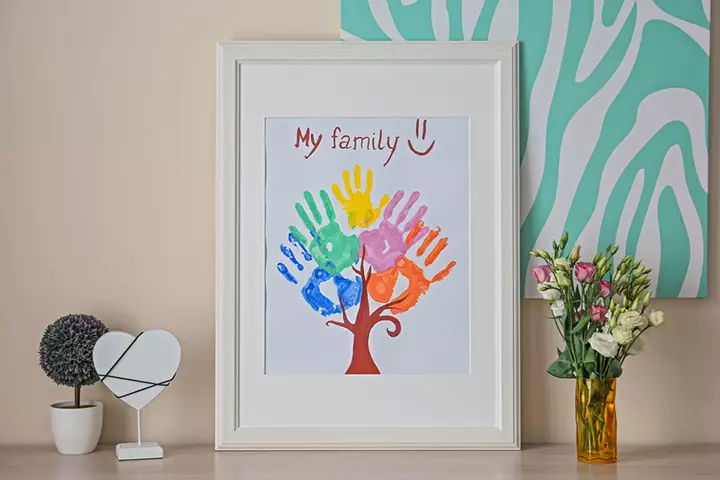
Image: Shutterstock
Get your handprint frame ready to be displayed or gifted. So, what are you waiting for? Lend a helping hand and let your toddler have tons of excitement.
Materials Needed
Your toddlers would require:
- Picture frames
- Acrylic paints
- Paintbrush
- Disposable plates
- Cardstock papers
How To Do It?
- Help your kids remove the glass and any backing from the picture frame, and let them select the colors they want to use for the handprints.
- Squeeze a small amount of paint onto the disposable plates. Dip your child’s hand into the paint.
- Now, carefully allow your kids to press their painted hands onto the cardstock paper, making sure to cover the entire surface of the palm and fingers and help them lift them off.
- Give adequate time for the handprints to dry and reassemble the picture frame. Your kids can even add names, dates, or other designs around the handprints to make it more creative.
6. Photo Frame Using Twigs
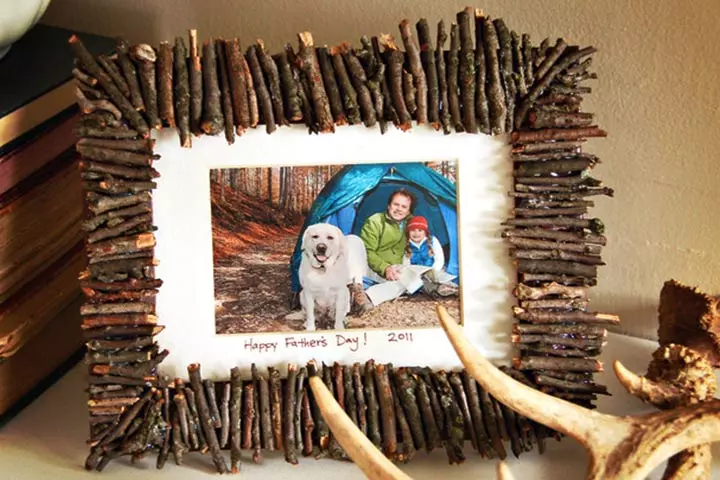
Image: Via Pinterest
This one’s for kids aged 5 years and above.
Materials needed
Your kids would need:
- Some dried twigs
- An old photo frame
- Glue
How To Do It?
- If you have a backyard, you can ask your kids to collect some twigs or grab a few from a nearby park.
- Make sure that you remove the outer glass of the frame before handing it to your kids.
- Ask your kids to fix the twigs on the frame with some glue.
- Once the glue dries up, your kids can fix the picture and rearrange the frame.
Frequently Asked Questions
1. How can photo frame crafts help children improve their creativity and artistic skills?
Photo frame crafts encourage children to use their imagination and creativity. It also increases resilience and patience. Creating photo frames is a fantastic pastime and is one of the most entertaining things to do when kids are bored. It also makes a creative party craft for kids.
2. How can children personalize their photo frames to make them special and meaningful?
Children can make the photo frames unique by painting them or using recycled materials for decoration. They can also choose a theme and add elements according to it. For instance, if the theme is the ocean, they can use sand, seashells, stickers, and other ocean-related items. If the theme is the forest, they might use twigs, dry and fresh leaves, and dried flowers.
3. What types of embellishments can kids use to decorate their photo frames?
Children can use glitter, ribbons, mirrors, colors, beads, feathers, leaves, and other embellishments they can find at home to decorate their photo frames.
4. How can kids make a photo frame representing their favorite hobby or interest?
They can collect things that reflect their interests. For example, if your child loves gardening, they can collect leaves and twigs to make a frame. On the other hand, if your child loves gaming, they can collect and refurbish game CD covers for a photo frame.
5. How can kids incorporate nature into their photo frame craft projects?
Children can use leaves, flowers, twigs, and even pinecones for making photo frames. They can also use pictures from magazines featuring nature. If you live near a beach, your children can use sea shells to decorate their photo frames.
6. What are some ways to display a collection of photo frames created by kids?
You can set the photo frames on a table near the entrance to your home. Make sure you include happy family pictures within the frames so that a visitor’s eyes are immediately drawn to them. If you have a blank wall, you could also create a photo wall to display your child’s photo frames.
7. What are some tips for choosing the right photo frame craft project materials?
The materials should be easy to procure and clean before use. They should also reflect your child’s interests. For example, if your child wants to make a traditional photo frame, you can help them source materials they will find easy to work with. The things used should be cleaned and dried before sticking them on a photo frame.
8. What materials are needed to make a DIY photo frame for kids?
Your children can use any material they are comfortable with and can easily source. Plastic, wood, paper, cardboard, and cloth can be used to make photo frames.
9. How can kids make a photo frame using natural materials like leaves or flowers?
Wash and dry the leaves and flowers. Then, cut out a cardboard frame and color it with the colors of your choice. Paste the dried leaves and flowers on the frame to create the magic.
10. How can kids make photo frames as gifts for friends and family?
Children can include a photo collage of their friends’ or family’s photos. Also, remember that the photo frame must reflect the personality of the receiver. For example, if the receiver is a coding enthusiast, your children could include lines of code on the frame.
Photo frame craft ideas for kids will keep your children entertained on days when they cannot venture outdoors. You can assist your child in creating lovely photo frames with materials found around the house, such as craft sticks or ice cream sticks, CD covers, old magazines, twigs, colors, and chart papers.
Tina, a pre-primary teacher, shares how she created a photo frame using ice cream sticks and had fun with the children. She says, “This was a fun activity I did with my friends’ children using the materials available at home at that time. I love collecting colorful ice cream sticks for craft purposes. So I had a cardboard on which the children arranged ice cream sticks and stuck them. Then we stuck a colorful paper over the ice-cream sticks. Stuck their favorite picture and some lace or colorful strips for the border. It was a memorable activity (i).”
These activities will also assist in developing your child’s creative skills and allow you to spend quality time with them at home. They also serve as a beautiful piece of memory for your child and you. So gather everything you’ll need and create a masterpiece with your child to decorate your home.
Infographic: Unique Photo Frame Craft Ideas for Children
Photo frame crafts can be a great way for children to express their creativity and make something special for someone they care about. These crafts can be made for various occasions, including birthdays, Mother’s Day, Father’s Day, and Teachers’ Day. Photo frame crafts also make for unique yet inexpensive decor for their rooms. Check out this infographic for easy child-friendly craft ideas. Illustration: Momjunction Design Team
Illustration: Top 5+ Photo Frame Craft Ideas For Kids
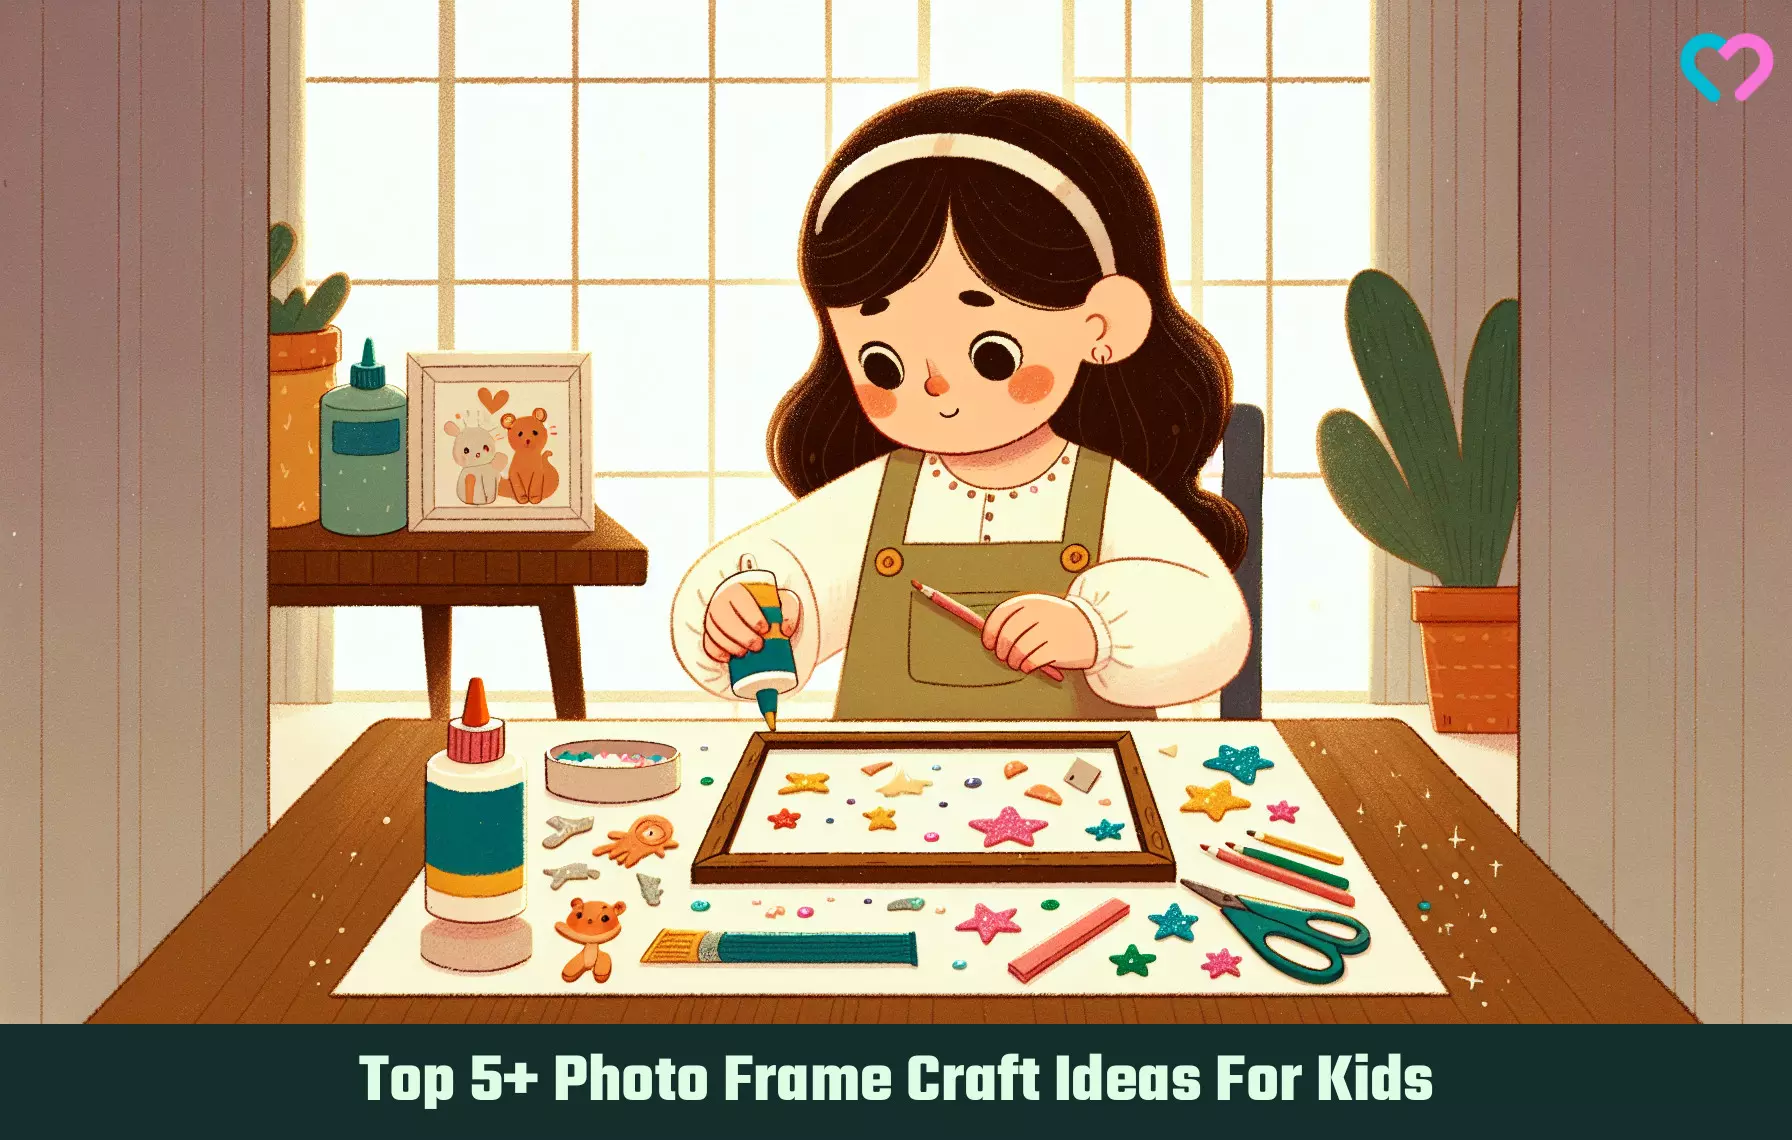
Image: Dall·E/MomJunction Design Team
Make your own unique photo frame with this easy DIY tutorial! Learn how to craft a beautiful frame with popsicle or ice cream sticks.
Personal Experience: Source
MomJunction articles include first-hand experiences to provide you with better insights through real-life narratives. Here are the sources of personal accounts referenced in this article.
i. Photo frame using colourful ice-cream sticks;https://juhuartcraftphonics.wordpress.com/2017/06/21/photo-frame-using-colourful-ice-cream-sticks/
References
- The benefits of art making for kids.
https://www.playkettering.org/the-benefits-of-art-making-for-kids/
Community Experiences
Join the conversation and become a part of our nurturing community! Share your stories, experiences, and insights to connect with fellow parents.
Read full bio of Erin DeCarlo
Read full bio of Harshita Makvana
Read full bio of Deepa Thomas
Read full bio of Vaswati Chatterjee


