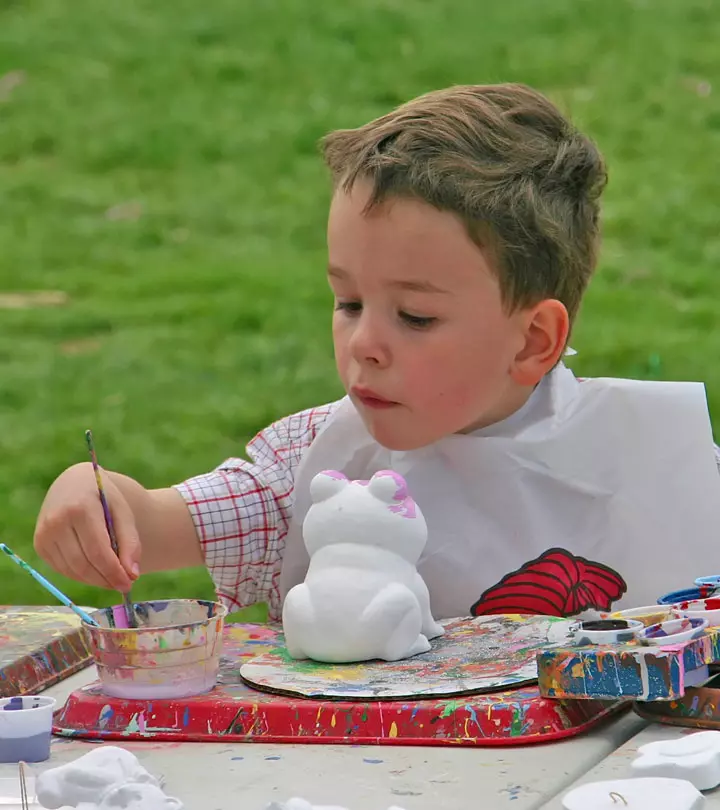
Image: iStock
It is a powder that turns into a gooey mixture when mixed with water.
You can mold this smooth, malleable mix into any shape you want. And when you leave that molded lump of plaster to dry for a while, it hardens just like that!
What are we talking about?
Plaster of Paris! Also referred to as POP, it is one of the most flexible raw materials you and your kids can use to make beautiful artifacts, decorations, and sculptures. Pop can also be used for educational purposes.
We have compiled a list of easy-to-do plaster of Paris crafts for kids.
Read, learn, and create!
Key Pointers
- Using plaster of Paris for crafts and sculpting is easy, but it’s important to use the mixture immediately after adding water.
- The optimal ratio for the mixture is two portions of POP to one portion of water, or 2:1.
- Children can work with POP, but they must follow proper instructions and have adult supervision.
- POP can be painted and decorated with beads, feathers, sequins, etc., for creating home decor, toys, and other crafts.
- Plaster of Paris crafts for children include figurines like houses, minions, ghosts, and pen stands.
Tips To Mix Plaster Of Paris
POP is a tricky substance.
You need to add just the right amount of water to get the right consistency so that it will stay intact when you mold it. Here are a few tips that you should keep in mind when you mix POP.
- Plaster of Paris can become hard sooner than you know. So do not mix it with water unless you are going to use it immediately.
- The ideal ratio of POP to water is 2:1 or two portions of POP to one portion of water. Always use a measuring cup to mix. Make the POP fine, without lumps, using a spoon or spatula.
- Pour a cup of water in a bowl, wide enough to mix the POP. To that, add the powder. Sprinkle the powder into the bowl – do not pour the powder in one place. Keep adding the powder slowly, while tapping the bowl in between to remove any air bubbles.
- Spread it as much as possible in the container. When you see that the powder has almost reached the surface, which is around the 2:1 ratio, it is your cue to stop adding the powder.
- Now mix the POP slowly to get a smooth consistency. Vigorous mixing will create air bubbles, which you do not want.
- For color, you can add poster paint or acrylic and continue to mix, while ensuring that there are no lumps.
- Wait for a minute, but no more, before pouring the mix into the molds.
Sounds like a daunting task, right? Well, it won’t be once you get the hang of it. But do note that Plaster of Paris is an extremely fine powder and can quickly disperse into the air as dust. Make sure that you are around to keep the children safe when they work on these crafts with Plaster of Paris.
When working with Plaster of Paris, supervise children closely to ensure they follow safety measures while crafting. Always provide proper ventilation in your workspace. It’s also crucial to use gloves to prevent skin irritation. Also, use a dust mask when mixing it to stay safe from inhalation of the powder.
11 Simple Plaster Of Paris Crafts
The crafts you choose for your children should be encouraging, not overwhelming.
Keeping in mind a child’s levels of patience, cognitive skills, and hand-eye coordination, we have chosen these crafts.
1. Plaster of Paris beads
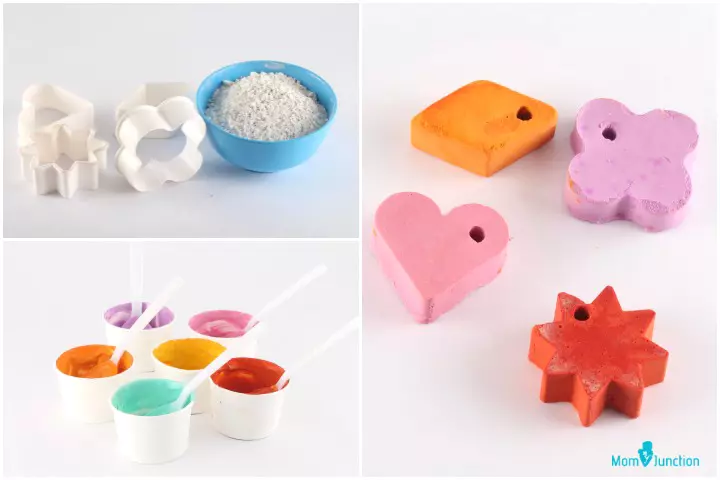
You can make POP beads alright, but they are going to be big. Here is a fun way to make them.
You will need:
- Molds of different shapes
- Plaster of Paris
- Water
- Drinking straws
- Scissors
- Petroleum jelly
- Poster paint
How to:
- Mix the plaster of Paris in a bowl or two, depending on how many colors you want to use.
- Spread a sheet of wax paper on a tray.
- Grease the insides of the molds with petroleum jelly and place the molds on the wax paper.
- Using a spoon or ladle, pour the plaster of Paris mix into the molds.
- Let them dry at least for 24 hours before removing the POP shapes from the molds.
- Remove the straws from the POP shapes and tie a ribbon through the tiny holes.
Colorful beads are ready.
 Point to consider
2. Cupcake candle stand
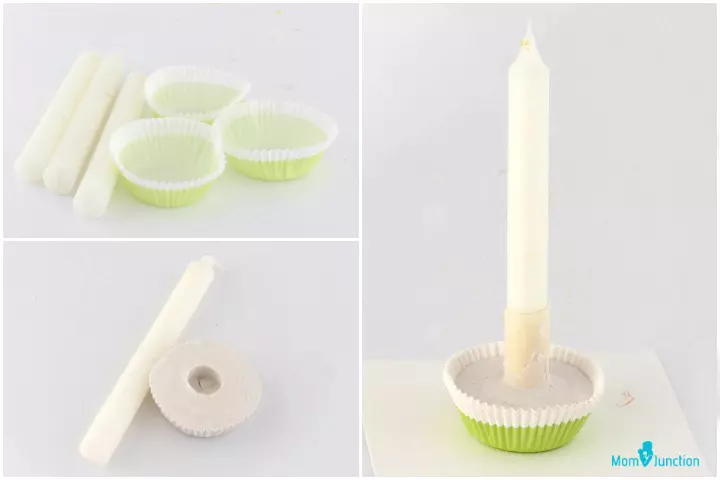
Need a candle stand? Why not make one then?
You will need:
- Plaster of Paris
- Water
- A candle
- Sticking tape
- Cupcake wrappers
- Cupcake or muffin trays
- Petroleum jelly
How to:
- Mix the POP with water – mix just as much as you need, for as many candle holders as you want to make.
- Place the cupcake wrapper in the muffin tray and fill half of it with the POP mix.
- Wrap the bottom part of the candle with tape and place it in the center of the POP, slightly pushing it in.
- Holding the candle, pour the remaining POP until the cupcake wrapper is filled to the brim.
- Hold the candle for a few minutes or until the POP is hard enough to hold the candle on its own.
- Set it aside to dry for at least 20-24 hours.
Deck them with beads or anything else you want. Your candle holders are ready for use.
3. POP leaf
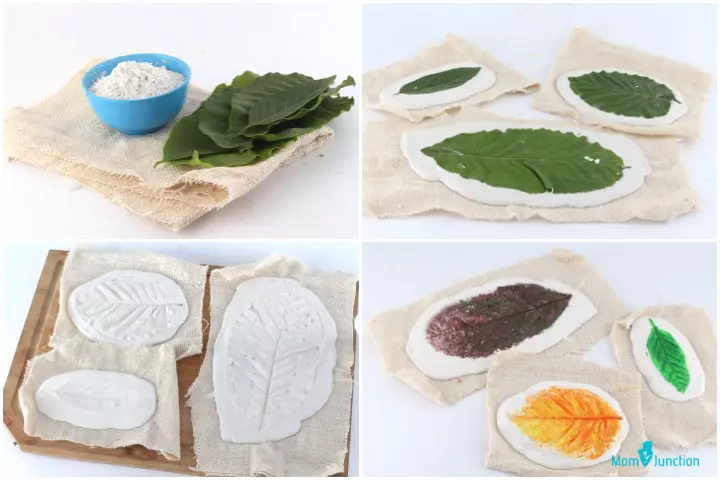
When you want to create an impression, using POP is one of the best options. In this tutorial, we tell you how to make leaves using plaster of Paris.
You will need:
- Leaves of your choice – pick leaves that are neither too small or too big
- Plaster of Paris
- Water
- Water or oil paints
- Glue
- Painting brushes
- Gunny cloth or burlap
How to:
- Mix the plaster of Paris and make flat frames as shown in the image.
- Press the leaves into the fresh mold of POP (see the image). Let it stay that way for a few hours or bake it under the sun.
- Once they have hardened, remove the leaves from the POP.
- Before you paint the leaves, apply glue over the area that you wish to color. This prevents the paint from being absorbed by the POP frame.
- Once the paint dries, the leaf prints are ready.
 Do remember
4. Plaster of Paris ice cubes
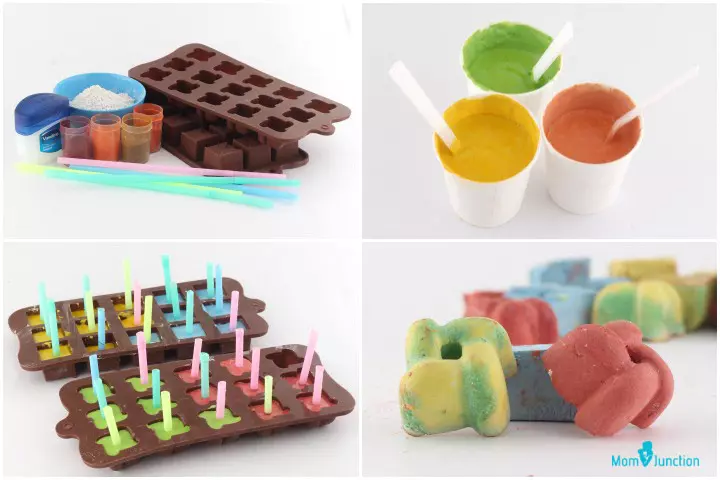
Another way to make shapes using plaster of Paris is by using designer ice trays. These trays will allow you to make a larger quantity of POP crafts that can be used as gifts for children or to raise money for charity!
You will need:
- Plaster of Paris
- Water
- Oil paints or acrylic color
- Drinking straws
- Petroleum jelly
How to:
- Mix the POP, and put it in different bowls or cups.
- Add the colors you want to the individual cups and mix them well.
- Grease the ice trays with petroleum jelly.
- Pour the plaster of Paris mix into the trays.
- Cut the straws in half and insert one in each section of the tray.
- Let it dry overnight or longer if needed.
- Once the cubes are completely dry, remove the straws and voila the colorful ice cubes are ready.
5. Sidewalk chalk
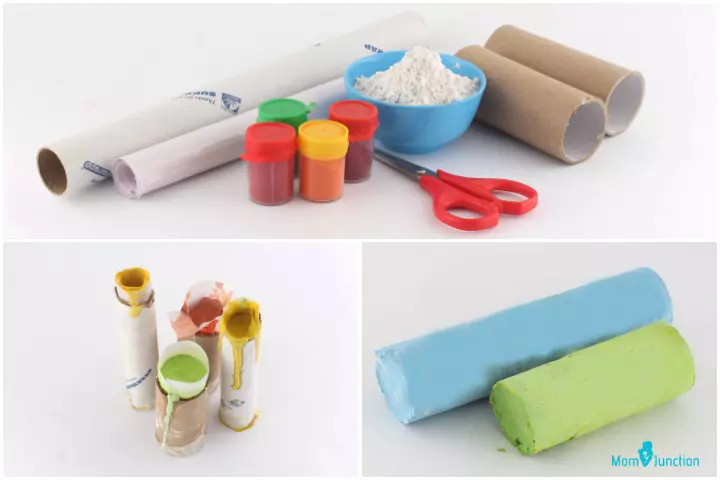
Chalk is perhaps the easiest thing you can make using POP. You could add color if you like or just leave it white.
You will need:
- Plaster of Paris
- Water
- Empty toilet roll
- Wax paper
- Scissors
- Acrylic color or oil paint
How to:
- Cut a piece of the wax paper and roll it into the toilet paper roll. Seal it at one end and let the other end be the opening.
- Mix the plaster of Paris adding whatever colors you want.
- Pour the POP mix into the wax paper inside the toilet roll through the opening.
- Press the rolls to flatten the bottom and let them dry for at least a day.
- Once they are dry, cut off the toilet rolls and the wax paper.
- The chalk is ready to be used.
6. POP ghosts
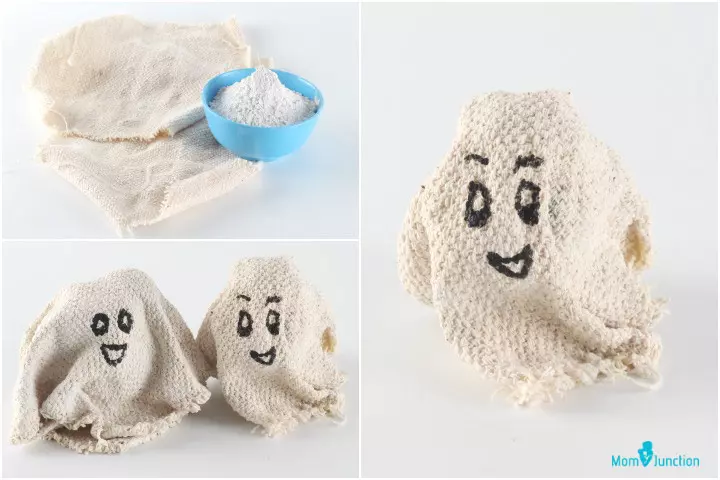
Need some more cavalry to scare your guests at Halloween? Try making these DIY POP ghosts.
You will need:
- Plaster of Paris
- Water
- Cheesecloth
- Black markers
- Newspaper
How to:
- Cut the cheesecloth into small 5×5 inch squares.
- Take some waste paper or newspaper and make balls out of it. The size of these paper balls must be as big as you want the little ghosts to be.
- Mix the plaster of Paris with water and make the mix slightly loose, like pancake batter.
- Dip the cheesecloth in the plaster of Paris mix and take it out.
- Drape the POP-dipped cloth over the paper rolls or balls, and straighten the fabric towards the bottom.
- Let it sit for at least ten minutes or until the POP hardens.
- Use the black marker to draw the eyes and mouths of the ghosts.
Let the ghosts dry a little longer and then place them where you want to spook the guests!
7. ‘POP’sicles
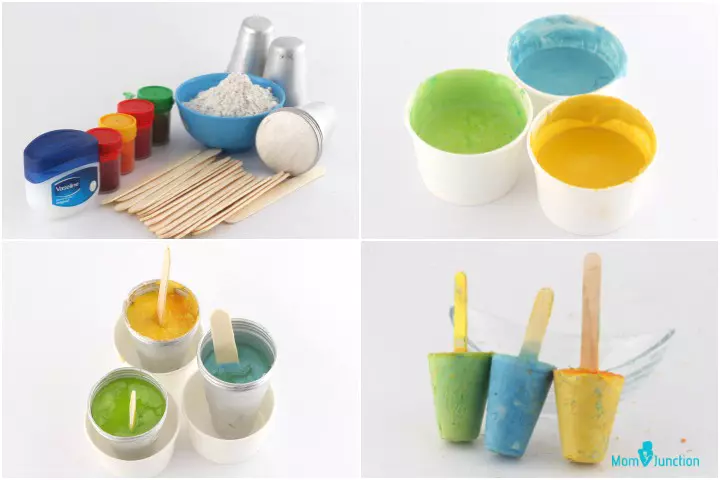
A popsicle made from plaster of Paris will never melt! So, do you want to know how to make it?
You will need:
- Plaster of Paris
- Water
- Ice cream sticks
- Popsicle molds
- acrylic or oil colors
- Bowls
How to:
- Mix the POP with your choice of oil or acrylic colors in different bowls.
- Grease the popsicle molding tray with petroleum jelly.
- Pour in the plaster of Paris and put an ice cream stick in the center.
- Leave it to dry for 24 hours.
- Remove the popsicle mold once it is completely dry and you have the craft ready.
8. Funny Minions
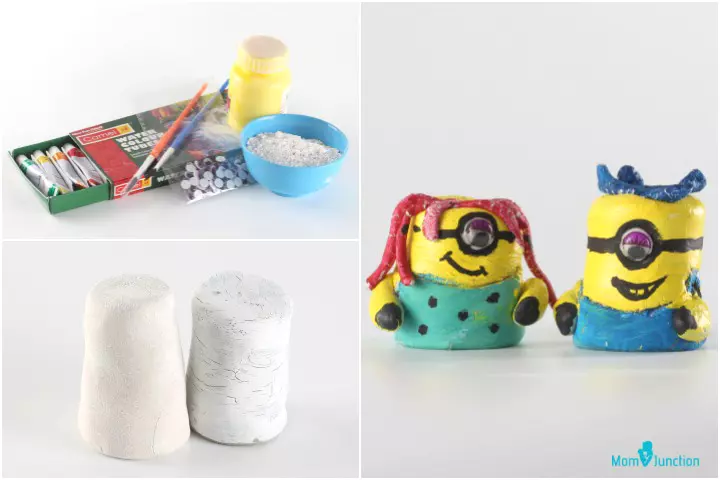
Minions are funny. But these plaster of Paris molds of Minions are more comical!
You will need:
- Plaster of Paris
- Water
- Oil or acrylic paints
- Paintbrushes
- Clay powder
- Googly eyes
How to:
- Mix the POP and mold it into the shape of a small cylinder using a toilet paper roll or a PVC tube.
- Leave it aside for at least 24 hours to let it dry completely.
- Use clay powder, which is more malleable than POP, to make Minions’ hair.
- Color the Minions yellow and blue, or in any other color. Make sure you leave a spot for the eye.
- Make hands using the clay powder and paint them. Once they are dry, attach them to the body.
- Add the googly eyes after the paint dries.
Aren’t these Minions funnier than the real ones?
9. Cup houses
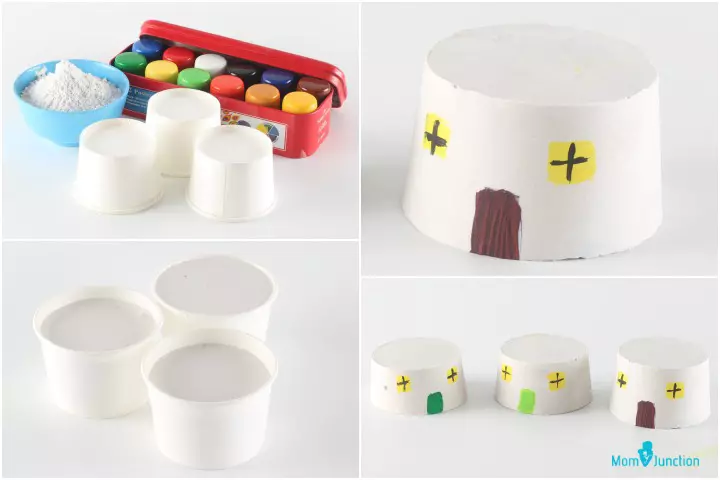
Cup houses are easy-to-make and look like igloos.
You will need:
- Plaster of Paris
- Water
- Paper cups – small
- Watercolors or acrylic paints
How to:
- Mix the POP with water.
- Grease the inside of the paper cups and pour the POP mix into them.
- Leave it to dry for at least 24 hours. As this is a solid form, you want to make sure it has dried completely before taking it out of the cups.
- Take the molds from the cups – cut them out if needed.
- Place them upside down such that the bottom part is the top or roof of the house.
- Paint the POP molds as shown in the image.
A cute, igloo-like house is ready.
10. Pen stand
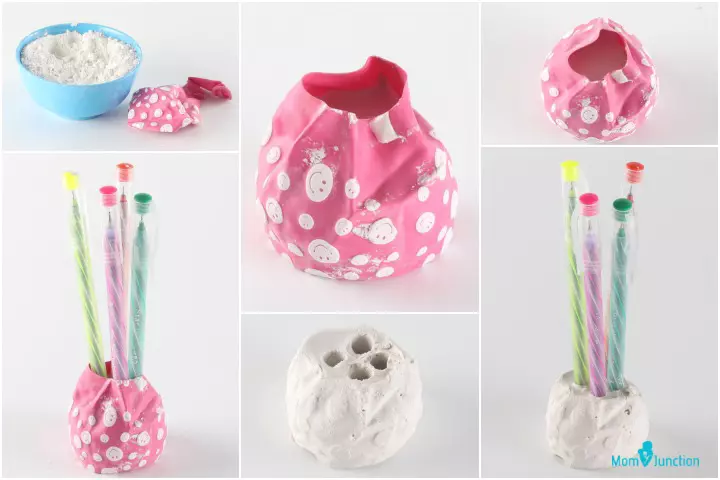
Where is that pen when you need it badly? Look in the pen stand!
Wait, you don’t have a pen stand? Let’s make one then!
You will need:
- Plaster of Paris
- Water
- A big sized balloon
- Pens
How to:
- Cut the balloon across, leaving three-fourth of it at the bottom, so that it can be used as a base for the mold.
- Mix the POP and pour it into the balloon. Let it dry for a few minutes, until it is slightly hardened.
- Poke the top of the POP mold with four pens, as seen in the image.
- Set it aside to dry for 24 hours.
The four-pen stand is now ready to use!
11. Picture frame
Encourage your child’s creativity and see the beauty unfold.
You will need:
- Plaster of Paris
- Water
- Cardboard frame
- White paper
- Watercolors or acrylic paints
- Toothbrush
How to:
- Mix the POP with water in a 2:1 ratio.
- Dip the petals and leaves made of white paper in the paste and let them dry.
- Coat the cardboard frame with POP and let it dry.
- Once dry, apply a second coat of POP on the frame with a toothbrush to create a textured effect.
- Paste the petals in flower arrangement and the leaves on the left top corner of the frame.
- Color the flowers and the frame.
Paste your favorite photo in this beautiful frame.
Frequently Asked Questions
1. Is there an alternative to Plaster of Paris?
Some alternatives to Plaster of Paris include Papier-mâché, self-hardening clay, air-dry clay, and gypsum-based casting compounds. These materials are often used for crafting and art projects and can be molded and shaped when wet, then hardened over time.
2. Is Plaster of Paris toxic for kids?
Plaster of Paris is not toxic if used as intended, but it can be harmful if ingested or inhaled in large amounts. Therefore, children should be supervised when using Plaster of Paris and wash their hands thoroughly after handling it. In addition, they must avoid using large quantities of POP powder, as it can irritate the eyes, skin, and respiratory system if inhaled (1).
3. Are there any educational benefits to engaging kids in Plaster of Paris crafts?
Engaging in making Plaster of Paris crafts aids in sensory exploration and hands-on learning. It also enhances their self-esteem, creativity, patience and perseverance, and artistic expression. Thus, Plaster of Paris crafts are a great idea for things to do when kids are bored.
4. How can Plaster of Paris crafts help develop children’s fine motor skills?
While making crafts, your child grasps pencils, crayons, chalk, and paintbrushes; these actions help develop their fine motor skills. These skills will enable them to perform controlled movements required for tasks like writing (2).
5. Are there any specific maintenance or storage tips for preserving Plaster of Paris crafts in the long term?
To preserve Plaster of Paris crafts for a long time, handle the craftwork carefully, avoid heat exposure, and damp or moist places, dust them regularly, apply a protective coating against the moisture and the dust, and store them in a sturdy box or container.
Getting kids involved in hands-on Plaster of Paris crafts can be an affordable and creative way to stimulate their imagination and encourage them to explore their creative potential. The mixing and setting time of the material may be tricky for kids to handle initially. But, once they get their hands on it, finding sculpture ideas for kids and having them sculpt and model using POP can be really fun. The props needed to make these craft pieces are also not too expensive. These pieces can be used as home decor or as gifts for their friends or cousins.
Infographic: How To Prepare Plaster Of Paris For Craft?
Plaster of Paris (POP) is a popular quick-drying material that can be used for several craft projects, from decorative pieces to molding. However, it can be tricky to prepare the right consistency when preparing. Explore the stepwise instructions to mix the POP in the infographic below to help your children prepare for their crafts and activities.

Illustration: Momjunction Design Team
Illustration: Easy-to-make Plaster Of Paris Crafts For Kids
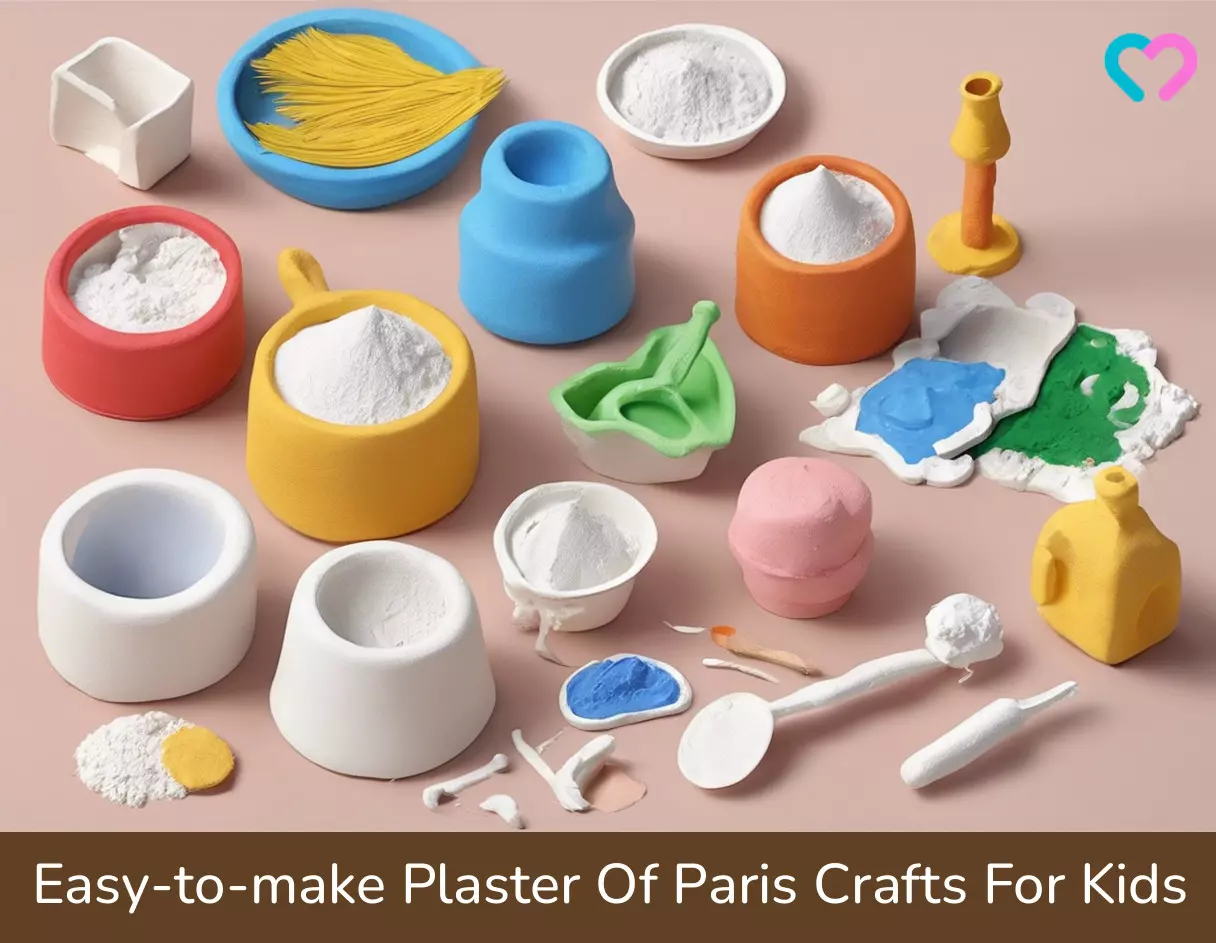
Image: Stable Diffusion/MomJunction Design Team
Bring out your child’s inner artist. This insightful video from Tate Kids guides you through creating a mesmerizing plaster cast sculpture. Learn step-by-step techniques and explore your creativity with this engaging and educational tutorial.
References
- Rooh- Allah Yegane; (2006); Gastrointestinal obstruction due to plaster ingestion: a case-report;NIH
https://www.ncbi.nlm.nih.gov/pmc/articles/PMC1386707/#:~:text=Plaster%20or%20Gypsum%20 - The art of creating: Why art is important for early childhood development
https://www.canr.msu.edu/news/the_art_of_creating_why_art_is_important_for_early_childhood_development
Community Experiences
Join the conversation and become a part of our nurturing community! Share your stories, experiences, and insights to connect with fellow parents.
Read full bio of Erin DeCarlo
Read full bio of Harshita Makvana
Read full bio of Deepa Thomas
Read full bio of Vaswati Chatterjee


