Image: ShutterStock
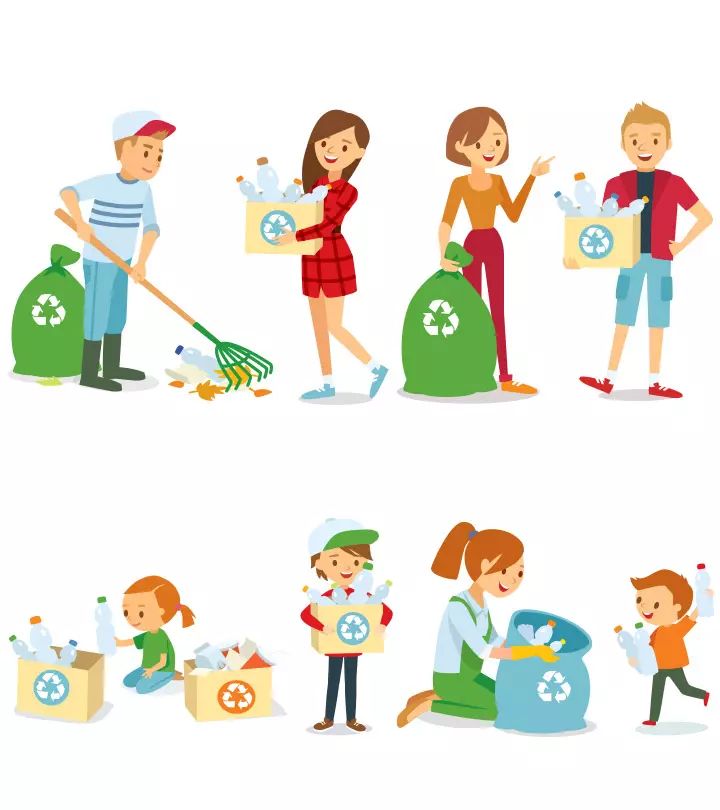
Recycling games and activities for kids can help them learn about the hazards of pollution and ways of reducing it. Did you know that a plastic bottle you throw out today will sit in a landfill for thousands of years or drift in the ocean? It’s true, as harsh as it may appear. In a thousand years, we have no idea what the earth or people will look like, but plastic bottles will still exist. So, is there a way out? Recycling, on the other hand, may provide an answer.
To safeguard the earth’s natural resources and the environment, preserve the ecosystem, and keep waste to a minimum, we must all recycle. Taking something old and turning it into something useful is what recycling is all about. Here are some activities and games to help your little eco-warrior understand the concept of recycling.
Key Pointers
- Teaching children about recycling and its benefits is essential.
- Introducing children to recycling through exciting recycling games is recommended.
- Motivating children can be achieved by incorporating these games into their day-to-day activities.
- Examples of recycling activities include making a glass flower vase, a pencil holder from an aluminum can, a bird feeder, and a recycled notepad.
20 Interesting Recycling Games For Kids
1. Waste no water
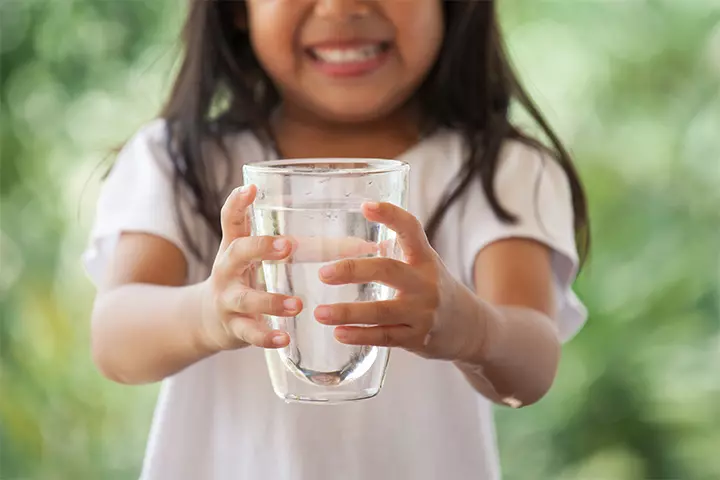
Image: IStock
You Will Need:
- Non-breakable containers (soup can, or a plastic spaghetti sauce jar will work)
- Water
How To:
- Divide the kids into two teams.
- Fill a clean container with water for each team. Ensure that the containers are of the exact size and are filled to the brim with water.
- Now set a start and finish point.
- When you signal ‘go’, the first player from the team has the run for the finish line, turn around, go back to his team and pass the container to the next person in line.
- The team with the most water in the bowl or container will be the winner.
 Quick fact
2. Trash Ball
You will need:
- Recycle bins
- Trash cans with trash
How to:
- Divide the kids into two teams.
- Arrange the trash cans on two opposite sides. The idea is to resemble a basketball court.
- As you say go, everyone needs to pick up the trash and throw it in the correct recycling bin.
- The team that finishes first wins.
3. Bottle bowling
You Will Need:
- 2-liter soda pop bottles or dishwashing detergent bottles and small bleach bottles
- Lightweight balls
- Sand
- Funnel
How To:
- Wash and dry the bottles before upcycling them.
- Ensure that the bottles are thoroughly dried before proceeding with the next method.
- Put an inch of sand in each bottle using a funnel. The sand will weigh down the pins, making it harder for the kids to knock down. If you want to create a set of bright bowling pins, fill the bottle with scraps of colorful tissue or crepe paper.
- Set up the plastic bowling pins on the lawn or playing area and hand over the ball to the participants.
- Now give five chances to each child to knock down the pins.
- The player who bowls down the pins fastest will be the winner.
4. Sorting Recycle Items
You will need:
- Paper
- Crayons
- Scissors
How to:
- Draw two recycle bins and write ‘plastic’ and ‘paper’ on each.
- Ask the children to draw different types of paper and plastic items.
- Color the items that they have drawn and cut them out.
- Mix the items and ask each child to come forward and sort them into the correct recycle bin.
5. Scavenger hunt
You Will Need:
- Recyclable items like bottles, plastics, various paper items and so on.
- Pen
- Paper
How To:
- This scavenger hunt requires children to find recyclable items. Make a list of all the recyclable items that the players have to find. You can even assign a time limit for the task. 30 minutes would be more than enough.
- Alternatively, children can go through a pile of recyclable items and ask them to get one of each item. It won’t just educate them on what can be recycled, but will also make them consider things that may not have actually been recyclable.
- The player who manages to get the most number of recycled items will win.
 Point to consider
6. Recycling Basketball
You will need:
- Recyclable items (plastic bottles, cans, paper balls)
- Recycling bins or baskets
How to:
- Put the recycling bin or baskets at a distance.
- Let the kids take turns trying to throw recyclable items into the right bin.
- Each successful shot scores a point. Keep different scores for different items.
- The player with the most points after a set number of rounds wins.
7. Tumbling tows
You Will Need:
- Recycle bin filled with clean aluminum cans
How To:
- Divide the children into 2 to 3 teams. You have to play this game one team at a time.
- Give each team a recycle bin filled with aluminum cans.
- As you say go, the children have to stack the cans one upon the other within two minutes. Each teammate has to take a turn at building the tower.
- The player who builds the tallest tower will represent his team in the final match against team stacking competition. The final game will decide the winner.
8. Bottle Cap Tic-Tac-Toe
You will need:
- Paper
- Bottle caps
- Marker
How to:
- You can use two different colored bottle caps or just draw X’s and O’s to differentiate the caps.
- Draw the tic-tac-toe grid on the paper.
- Start playing.
9. Recycling relay
You Will Need:
- 3 labeled boxes: 1 recycle, one reuse, and one trash
- Two boxes of clean trash
How To:
- You have to gather a pile of recyclable, reusable, and landfill items. 20 would be enough.
- Place three boxes at the end of the playing area. The reuse box should be placed the closest; the recycling box should be midway, and the landfill box the farthest.
- The playing teams have to figure out what they have to do with each item, run, and place them in the appropriate box. It will reinforce the idea that reusing is cheaper and requires fewer resources than recycling. Recycling, on the other hand, uses fewer resources than land filling.
- At the end of the game, you have to review each item in the bin. The team members have to explain how they would reuse an item in the reuse bin to confirm that the items put in the recycling bin are actually recyclable in the community.
- You are even free to deduct the points if you feel the item put in any bin is incorrect.
10. Can Pong
You will need:
- Tin cans
- Ping pong balls
How to:
- Align the empty cans however you wish but at a distance.
- Establish a barrier line that the kids cannot cross.
- Let each kid try to throw the ball inside the can.
- Play till there is one child left standing.
11. Newspaper dump
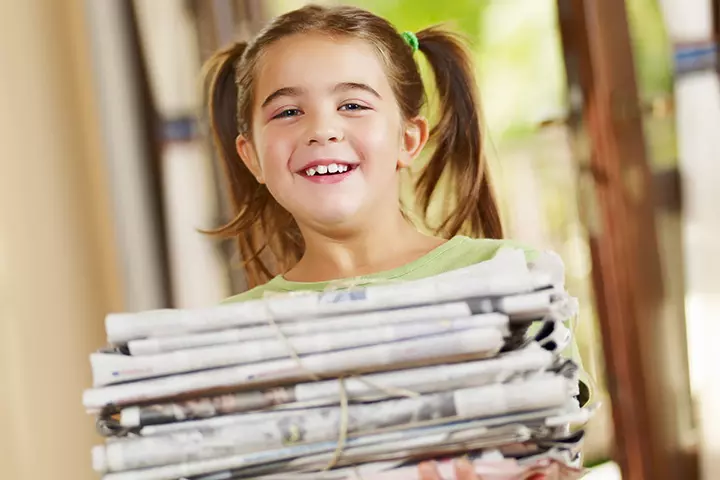
Image: IStock
You Will Need:
- A stack of newspaper for each team
- Recycle bin
How To:
- Divide the players into each group and hand them their stack of newspapers. The teammates have to split the newspaper stack equally among the team members.
- Set up a recycling bin at the finish line.
- As you signal, the first player of the team has to carry his stack of newspapers to the finish line and deposit it in the container. Now he has to run back to his team and tap the next player in line.
- The team that deposits the newspaper first will be the winner.
 Quick tip
12. Recycling Monster
You will need:
- Recycling bin
- Paper
- Colors
- Scissors
- Glue
How to:
- Draw different shapes such as eyes, nose, mouth, ears, or whatever body part you wish to add to your monster.
- Color these body parts and paste them on the recycling bin, and your recycling monster is ready.
- This can be done at home or in school. Make sure you feed a recyclable item every day.
13. Recycling bin race game
You Will Need:
- Paper
- Pen or marker
- Scissors
How To:
- For this eco-friendly game, now you have to call out the items one at a time. The children have to run and stand under the sign corresponding to the recycling bin they belong to.
- Gather the child in the playing area. Tell them that they have to play the roles of the item that can be recycled and have to get to the correct recycling bin as quickly as they can.
- Ask the kids to make three signs- ‘Plastic’, ‘Glass’ and ‘Paper’. Hang the signs in different parts of the meeting room.
- Here’s a list of the items for you to call out:
- Milk jug
- Pickle jar
- Magazines
- Newspaper
- Junk mail
- Jelly jar
- Cereal box
- Water bottle
- Ketchup bottle
- Olive jar
- Kids will have a thrilling time trying to get to the right bin as fast as they can.
14. Sustainable Sounds
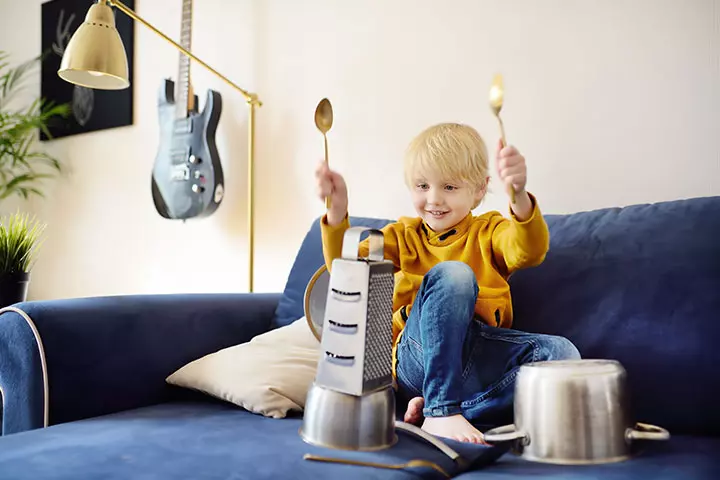
Image: Shutterstock
You will need:
- Discarded items such as buckets, tin cans, pans, and boxes
- Sticks or wooden spoons
How to:
- Choose an item to turn into your very own sustainable musical instrument.
- Turn a bucket into a drum, an empty tin can into a shaker, and more.
- Start a sustainable band.
15. Trash can relay
You Will Need:
- Five trash cans
How To:
- Divide the kids into two teams.
- Arrange the five trash cans to create an obstacle course. The first player of each team has to run the course, weaving in and out the garbage cans.
- When the player reaches the last can, he has to turn around and twist back to the team.
- The first player will tap the next player in line, who will take his turn off running the course.
16. Memory Match
You will need:
- A large cardboard
- Paper
- Scissors
- Colors
How to:
- Draw a square and then draw your recyclable item inside the square. Color the item after you are done. You can draw leaves, paper balls, and bottles.
- Make sure the items are in pairs. Cut the squares so they look like cards.
- Place one pair of the cards face down on the cardboard.
- Let the kids take turns flipping the cards to find the match.
- If they find a matching pair, they keep the items and get another turn.
- The game continues until all pairs are found. The kid with the most pairs wins.
17. Passing the trash
You Will Need:
- Trash can with trash
- Recycling bin
How To:
- Divide the kids into teams and tell them to form a form. Place a garbage can or recycling bin at the end of each line.
- As you say go, the team members have to pass the recyclable items down the line, saying what kind of item it is. Each of the teammates has to move the item in a way other than how they got it. They can pass it under the legs, over the head or around the back.
- Once the trash gets to the end of the line; they have to put it in the correct container.
- The team that gets the most items in the proper container in a specific time limit will win.
18. Craft Race
You will need:
- Clean recyclable items (plastic bottles, cans, paper)
- Glue, tape, scissors, markers
- Colors or paint
How to:
- Divide the kids into teams and give them a set of recyclable items.
- Set a timer of 15-20 minutes.
- Each team must create something out of the recyclable materials. It could be a robot, a car, or a ship.
- At the end of the time, judge the creations based on creativity and use of materials.
- The team with the most creative items wins.
19. Let’s recycle sorting games
You Will Need:
- Template
- Paper bags
- Dice
How To:
- Print one template for each team.
- Divide the kids into groups of 4. Give each of them a dice, a paper bag, a game mat and a set of game cards. Tell the teams to cut the game cards and place them in the bag.
- Instruct the teammate to take turns at taking out a game card and placing it in the appropriate category on the mat.
- On each turn, the teammates will also roll the dice to determine how many points they get by placing the card in the right category.
- When they have sorted the cards into the appropriate categories, tell the players to total the points. The team with the most points will win.
20. Bottle Cap Race
You will need:
- Plastic bottle caps
- A large piece of cardboard or a smooth surface
How to:
- Make a start and finish line on the board or the surface.
- Line the bottles at the starting line. Each child gets a bottle cap.
- The kids have to blow on the bottle caps to get them to the finish line.
- The one who gets to the finish line first wins.
20+ Fun Recycling Activities For Kids
1. Recycling or garbage
You Will Need:
- 2 to 3 containers
- Card stock paper
- Magazines
- Double stick paper
- Scissors
How To:
- This game is ideal for preschoolers. Prepare for the game by cutting the recyclable and non-recyclable items.
- Now affix the pieces onto the card stock paper.
- Now ask your kid to make simple garbage and recycling signs on the card stock paper. Place the signs in the containers.
- It’s time to start playing. Tell your child to sort the cut outs. He has to place the garbage in one container and recyclable items in the other.
2. Superhero Cuffs
You will need:
- Toilet paper rolls
- Paint
- Glitter stickers
- Scissors
How to:
- Paint the toilet paper rolls in any color you want. Metallic paint looks great.
- Let them dry and then with the help of an adult, cut the roll in a straight line and round the edges.
- Paste the glittery stickers onto the roll.
- Put them on your wrist and choose a superhero name for yourself.
3. Make a pencil holder from aluminum can
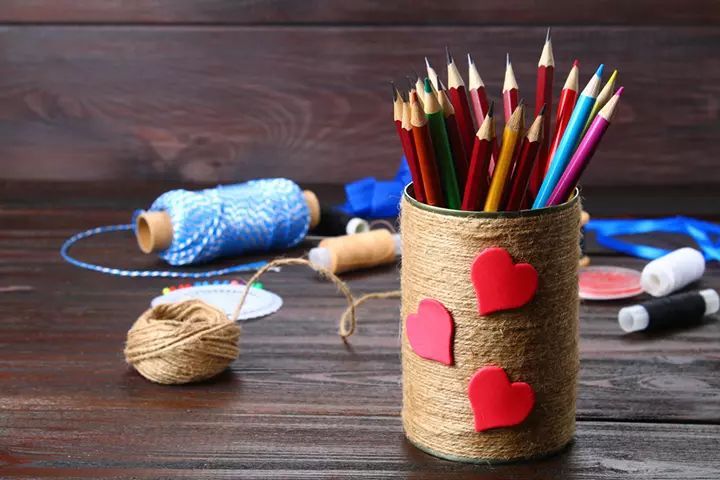
Image: Shutterstock
You Will Need:
- An empty aluminum can or glass jar
- Can opener
- Yarn
- Clear glue
- Scissors
- Decorations (such as sequins, bead, pebbles, dried flowers, buttons leaves and so on
How To:
- Tell your child to cut off the top of the aluminum can with a can opener. If your kid is too young, you can cut it for him. If your child is using a glass jar, wash and rinse it and leave it to dry.
- Ask your child to turn the container upside down and stick the yarn around the container, starting from the bottom. Ensure that your child keeps the yarn close together so that the jar or can does not show through. The yarn should fully cover the container. Brush a coat of acrylic finish all over the holder.
- Now tell your kid to decorate the pencil holder any way he likes once the glue dries.
 Be watchful
4. Plastic Kites
You will need:
- Small plastic bags
- String
How to:
- Tie the string to the handle of the plastic bag.
- If it’s a windy day, the child can just hold the plastic bag and the wind will do the job.
- The child can also run and the plastic bag will fly behind like a kite.
5. Glass flower vase
You Will Need:
- An empty glass bottle or jar
- Tissue paper in different colors
- Scissors
- Liquid starch
- Container to hold the starch (A margarine tub would do)
- An old toothbrush or paintbrush
How To:
- Ask your little one to pour the starch into the container and cut the tissue papers into small pieces
- Now he has to put the tissue pieces in the glass bottle and brush liquid starch on it. He has to do it until the bottle is covered completely. Ask him to try the overlapping method to give the vase a beautiful effect. Leave the bottle to dry.
- Your child can use it as a vase, pencil or candy holder, or a container for putting the small collectibles.
Tip-
Kids can even use pictures from books or magazines instead of tissue paper.
6. Box Camera
You will need:
- A shoe box or a medium-sized box
- Shampoo bottle caps with lids (for lenses)
- Small bottle caps
- Marker
- String
- Glue
- Scissors or box cutter
- Stickers
How to:
- Paste the shampoo bottle cap in the center of the box.
- Open the lid and make a rectangular hole from behind the lid to make a viewfinder.
- Paste one of the smaller bottle caps to resemble the shutter button
- Decorate and draw on the box to resemble a camera.
- You can also poke two holes on each side of the camera and insert the string like a strap.
7. Bubble blower and solution
Bubble Blower:You Will Need:
- 1 small, plastic soda bottle, empty and washed. For larger bubbles, you can use a 2-liter plastic soda bottle.
- Scissors
- Masking tape
How To:
- Tell your child to wrap a masking tape around the bottle. It should be at least 4 inches from the top. Even you can help your child cut along the bottom edge of the masking tape. Now your child can recycle the base of the bottle and discard the cap.
- Tell him to remove the masking tape from the bottle. The blower is ready. Your kid can now make his own bubble solution.
Solution:You Will Need:
- 1 cup of liquid dish soap
- ¼ cup of Karo syrup
- 1 ½ cups of water
- A large bowl for making solution
- A container large enough for dipping the end of the bottle
How To:
- In a large sized bowl, ask your child to mix together water, dish soap and Karo syrup. Leave the solution to sit for a day before using. The longer your child leaves the solution to sit, the better will be the bubbles.
- Now he has to transfer the solution into a bigger container.
- Now ask him to dip the end of the bubble blower in the solution and the small end of the mouth. Let the bubble blowing begin.
Note-
Kids can even use it as a bubble wand. They just have to dip it in the solution and then wave the bubble blower through the air.
8. Trash pizza
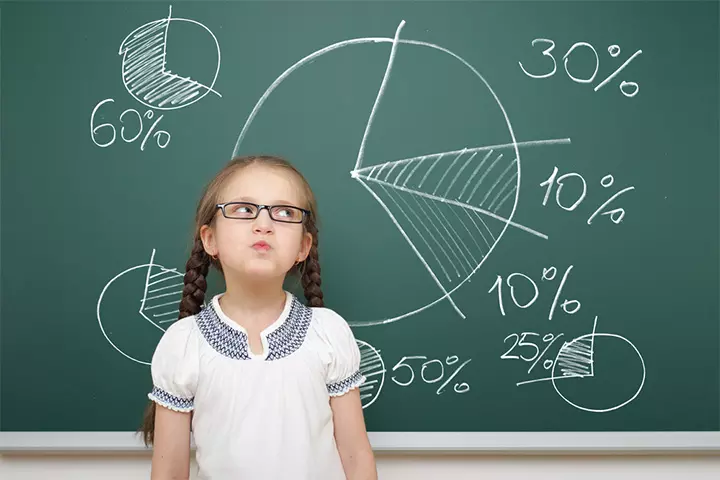
Image: Shutterstock
You Will Need:
- A garbage can
- A chalk and blackboard
How To:
- First and foremost, you have to conduct the waste audit of each trash can by categorizing items by the following types-
- Recyclable paper
- Non-recyclable paper
- Plastic bottles
- Aluminum cans
- Steel cans
- Food waste
- Cardboard
- Now take up the information and make a pie chart. You have to develop percentages of each material. It will guide the children who are looking to launch the recycling program. You can assign this task to the eldest member of your house as well.
- Once the chart is prepared, begin the recycling work.
9. Box Telephone
You will need:
- Different sized boxes
- Colored paper or paint
- Bottle caps
- Marker
- String or wool
- Glue
How to:
- Sort different boxes to resemble the telephone base where the keyboard would sit and a receiver.
- Cover the boxes in colored paper or paint.
- Attach the string or wool from the receiver to the main body of the telephone.
- Paint the bottle caps if you wish. Write the numbers and special characters on top of the caps.
- Paste the caps accordingly and your telephone is ready.
10. Make a parachute
You Will Need:
- A plastic bag or any fabric of light material
- Scissors
- String
- A small object to act as a weight
How To:
- Tell your child to cut out a large square from the plastic bag or whatever fabric he is using. Ask him to trim the edges so that it looks like an octagon.
- Now he has to cut a small hole on each side.
- Take 8 pieces of strings of equal size and attach to each hole.
- Ask him to tie the string pieces to the object he is using as a weight.
- Now comes the testing part. Tell him to take his parachute to a high spot like a chair and drop it. He needs to drop the parachute as slowly as he can.
- Hopefully, the parachute will descend to the ground slowly, giving the weight a comfortable landing.
Note-
Make a hole in the middle of the parachute to allow the air pass slowly rather than spilling it on one side.
11. TP Binoculars
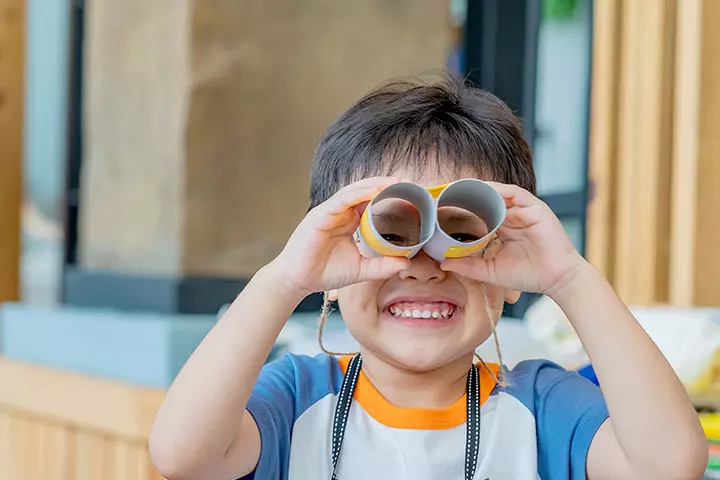
Image: Shutterstock
You will need:
- Two toilet paper rolls
- String
- Glue
- Stickers
How to:
- Glue the two toilet paper rolls side by side to resemble a binocular.
- Use the stickers to decorate your binoculars.
- Poke a hole in the bottom of the toilet paper rolls and insert your string through it.
12. Make a recycled notepad
You Will Need:
- 20 sheets of paper that are used on one side
- A piece of string, twine or ribbon
- Cardboard
- Marker
- Paper punch
- Scissors
How To:
- Ask your child to draw a heart or any shape that he can make, on the cardboard and cut it out.
- Now he has to trace the drawing on a piece of scrap paper. He should stack about 5 pieces of paper below and then cut out the shape. He has to repeat the step until he has cut out all the papers.
- Ask him to punch a hole in the same place on top of each page. Slide the string, twine or ribbon through the holes and tie them together.
- If your child is planning to gift the notebook to his friend, tell him to write a message on the front of the notepad. It will personalize the gift.
13. Make A Microphone
You will need:
- Toilet paper roll
- Aluminum foil
- Ping pong ball
- Colored papers
- Glue
How to:
- Wrap the ping pong ball with aluminum foil neatly.
- Cover the toilet paper rolls with colored paper.
- Fit the covered ping pong ball at one end of the toilet paper roll and secure it with glue.
- Start your singing career with your very own DIY microphone.
14. Make a recycled wind sock
You Will Need:
- Plastic margarine tub or any type of tub, with lid
- Party streamers, leftover crepe paper, string old ribbon, or other materials
- Scissors
How To:
- Tell your kid to cut the bottom of the plastic tub. Now he has to cut out the center of the lid, leaving the outer ring intact. Feel free to assist your kid in this step.
- Ask him to cut the ribbon, crepe paper and other materials that he is using into 3 foot streamers. Tell him to arrange the streamers under the lid to form a hanger.
- Snap on the lid to hold the streamers in place. Now tuck the two ends of a piece of ribbon under the lid to make a hanger.
- Tell him to hang the wind sock outside for the friends and family to enjoy.
Note-
Tell your child to keep an eye on the leftover party materials, especially after Christmas or 4th of July party.
15. Bottle Airplane
You will need:
- Plastic bottle
- Colored papers
- Glue
How to:
- With the help of an adult, cut the colored paper into different shapes to resemble the airplane’s wings, windows, wheels, and propeller.
- Use the glue and attach the different parts, and now your plane is ready for the takeoff.
16. Make a rainstick from cardboard tube
You Will Need:
- Paper towel roll or poster tube
- Aluminum foil or just scraps
- Cardboard scraps
- Uncooked popcorn kernels
- Glue
- Scissors
- Markers, paint, stickers for decoration
How To:
- Tell your child to place the end of the tube on a cardboard piece and trace around it. He has to do it twice to get two circles. Now tell him to cut out the circle. It will be the end caps of his rainstick.
- Now stick one of the end caps to the tube and leave it to dry.
- Roll the aluminum foil scraps or the foil to make into a long snake. The snake should be twice as long as the tube, and the diameter should be about a ½ inch.
- Now tell him to push the ‘snake’ into the tube and zigzag it back and forth to make it fit.
- Pour ½ cup popcorn kernels into the tube and stick the other end of the cap to open the end of the tube.
- Now he’s just left with the decoration part. Allow him to use anything he wants for decoration.
17. Mini Houses
You will need:
- Paper cups
- Colored paper
- Paint or crayons
- Markers
- Glue or sticky tape
How to:
- Cut a circle from the colored paper and turn it into a cone. Secure it with glue or sticky tape. It is the roof of the house.
- Turn the cup upside down and draw windows and doors on the paper cup with the markers. Color them.
- Attach the roof to the bottom of the cup.
- If you have many kids doing this activity, you can create an entire mini village.
18. Bird feeder
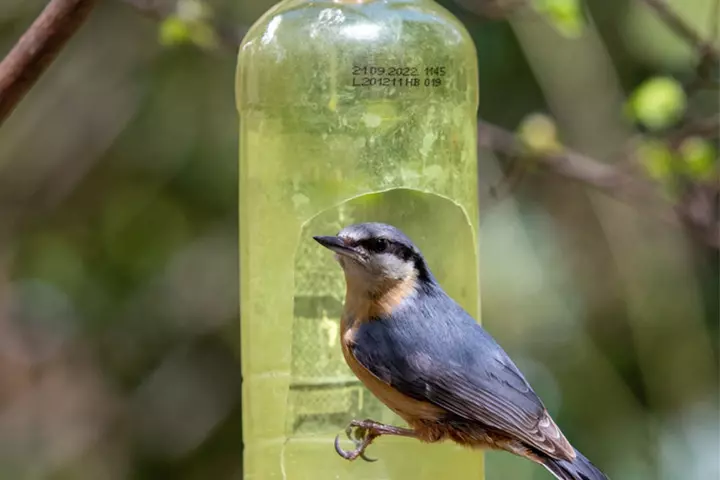
Image: Shutterstock
You Will Need:
- One-gallon plastic milk jug or a two-liter soda bottle
- 12-inches long stick or dowel
- A 12-inch piece of used wire, string, or fishing line
- Permanent markers or stickers
- One nail
How To:
- Tell your child to cut one side and the top of the soda bottle or milk jug.
- Now he has to poke a hole in the front and back of the bottle using a nail.
- He now has to push a dowel or stick through the holes, so that it pokes out both the ends. The stick will work as the birds perch.
- Now tell your child to poke two holes at the top of the milk jug or bottle from one side to the other using the nails.
- Have him insert a string, wire or fishing line and tie it together to make a hanger.
- Lastly, ask him to put the birdseed into the bottom of the bird feeder and hang on the tree.
19. Bottle Cap Flowers
You will need:
- Bottle caps
- Sticks
- Green or dried leaves
- Glue
- Plain paper
How to:
- Arrange the bottle caps on plain paper to resemble the petals of a flower and secure them into place with glue.
- Place the stick below the caps to resemble the stem and secure it with glue.
- Paste the leaves on the side of the stick for leaves.
20. Recycled robot
You will need:
- Discarded boxes, paper tubes, buttons, straws
- Metallic-type duct tape
- Scissors
- Masking tape or clear tape
- Glue
How to:
- Find suitable boxes for the robot body and head.
- Collect paper tubes for arms and legs.
- Gather various items for eyes, mouth, and antennae, and get creative with what you have.
- Seal all ends of the boxes with masking tape, then attach the head to the body with more masking tape.
- Cover the body and head with clear or metallic tape for a shiny look. Additionally, wrap the arms and legs, attaching them to the body with tape. Cover any remaining tape with metallic tape for a cohesive look. Attach eyes, mouth, antennae, and other decorative elements using glue, allowing them to dry. Voila! You now have your adorable little robot.
21. Coin Collector
You will need:
- Tin can
- Colored paper
- Marker
- Glue
How to:
- Wrap the tin can with the colored paper
- Draw the head of your favorite animal on a piece of paper and cut it out.
- Attach the head to the other side of the can.
- Every time you have some loose change, pop it inside the can.
When choosing any activity, make sure it’s suitable for the kids’ age range and adjust the activity’s complexity accordingly. For younger children, give simple tasks, simplify instructions, use large items, and ensure adult supervision. However, older children can handle more intricate tasks that require critical thinking.
Frequently Asked Questions
1. How can I motivate others to recycle?
You may motivate people and generate awareness in them about recycling by incorporating it into day-to-day activities. For instance, plastic bottles of showpieces or pieces of art. Milk cartons can be exchanged at some places for money. Old phones can be exchanged at recyclers for discount coupons on new phones. When recycling becomes purposeful and easy to conduct, it generates interest among people. Education about green living and the conservation of natural resources is a must and can become a part of Earth Day activities for kids.
2. What are the benefits of recycling?
Recycling promotes sustainability by helping to reduce pollution, preserving precious natural resources, decreasing energy consumption, and helping protect flora, fauna, and the earth’s biodiversity.
3. How can recycling activities promote environmental awareness in children?
Recycling games and activities teach children real-life experiences regarding the hazards of plastic and non-biodegradable waste, help them take ownership of their own waste in school and at home, teach them about different types of waste and the importance of recycling for saving the environment, etc. These activities make learning fun while instilling a sense of responsibility towards the environment, encouraging them to think of ways to contribute to a sustainable future.
4. How can recycling games and activities foster creativity in kids?
Recycling games and activities can foster creativity in children by encouraging them to think outside the box and find innovative ways to repurpose materials. For example, a game could involve creating art using recycled materials, where children have to think creatively to transform ordinary items like plastic bottles into visually appealing plastic bottle crafts for kids. These activities promote problem-solving skills and encourage children to explore their imagination.
5. What are some recycling-themed songs or rhymes for young children?
There are several engaging and educational recycling-themed songs that can inspire young children to care for the environment. Some of them include “The Earth is Our Home” by Jack Hartmann, The Kiboomers’ “Reduce, Reuse, Recycle,” The Owly Bird’s “Save the Earth!” and Harry Kindergarten Music’s “Recycle Rap.” These songs, available on platforms such as YouTube, provide a fun and interactive way for children to learn about recycling and make a positive impact on the environment through music.
6. What are some recycling-themed role-playing games that children can enjoy?
Children can enjoy various recycling-themed role-playing games that promote environmental awareness and creativity. The Eco-Friendly Chef game allows them to become imaginative chefs, using recycled materials like empty containers and cardboard to create unique dishes while learning about reducing food waste. For a fashion-forward experience, the Recycled Fashion Show lets children design and showcase their own outfits made from recyclable materials, encouraging them to think creatively and sustainably.
7. How can recycling games and activities be incorporated into birthday parties or special events for children?
Incorporating recycling games and activities can be a fun and educational way to raise awareness about environmental responsibility. For instance, you could organize a “Trash to Treasure” craft activity, where kids use recycled materials to create unique party favors or decorations. Another idea is to host a “Recycling Scavenger Hunt,” where children search for specific recyclable items in the area and earn points for each item found.
Children could know the importance of reusing waste and waste reduction when you involve them in activities and making fantastic items from unused. This process can be more enjoyable with creative recycling games and activities for kids. These games and activities are perfect for a lazy afternoon or a fun outing day. All you will need is some readily available waste materials and knowing the intriguing techniques to use them for playing or creating distinctive waste material crafts for kids. Choose your favorite ones and watch your child engage in these games and fun activities.
Infographic: Recycling Games And Activities For Children
Recycling is all about making old things useful again. Recycling games can teach children about pollution and waste reduction. The infographic below presents various exciting games for children to learn and have fun while recycling. Save and share it with your friends too!
Some thing wrong with infographic shortcode. please verify shortcode syntax
Illustration: Top 21 Recycling Games And Activities For Kids
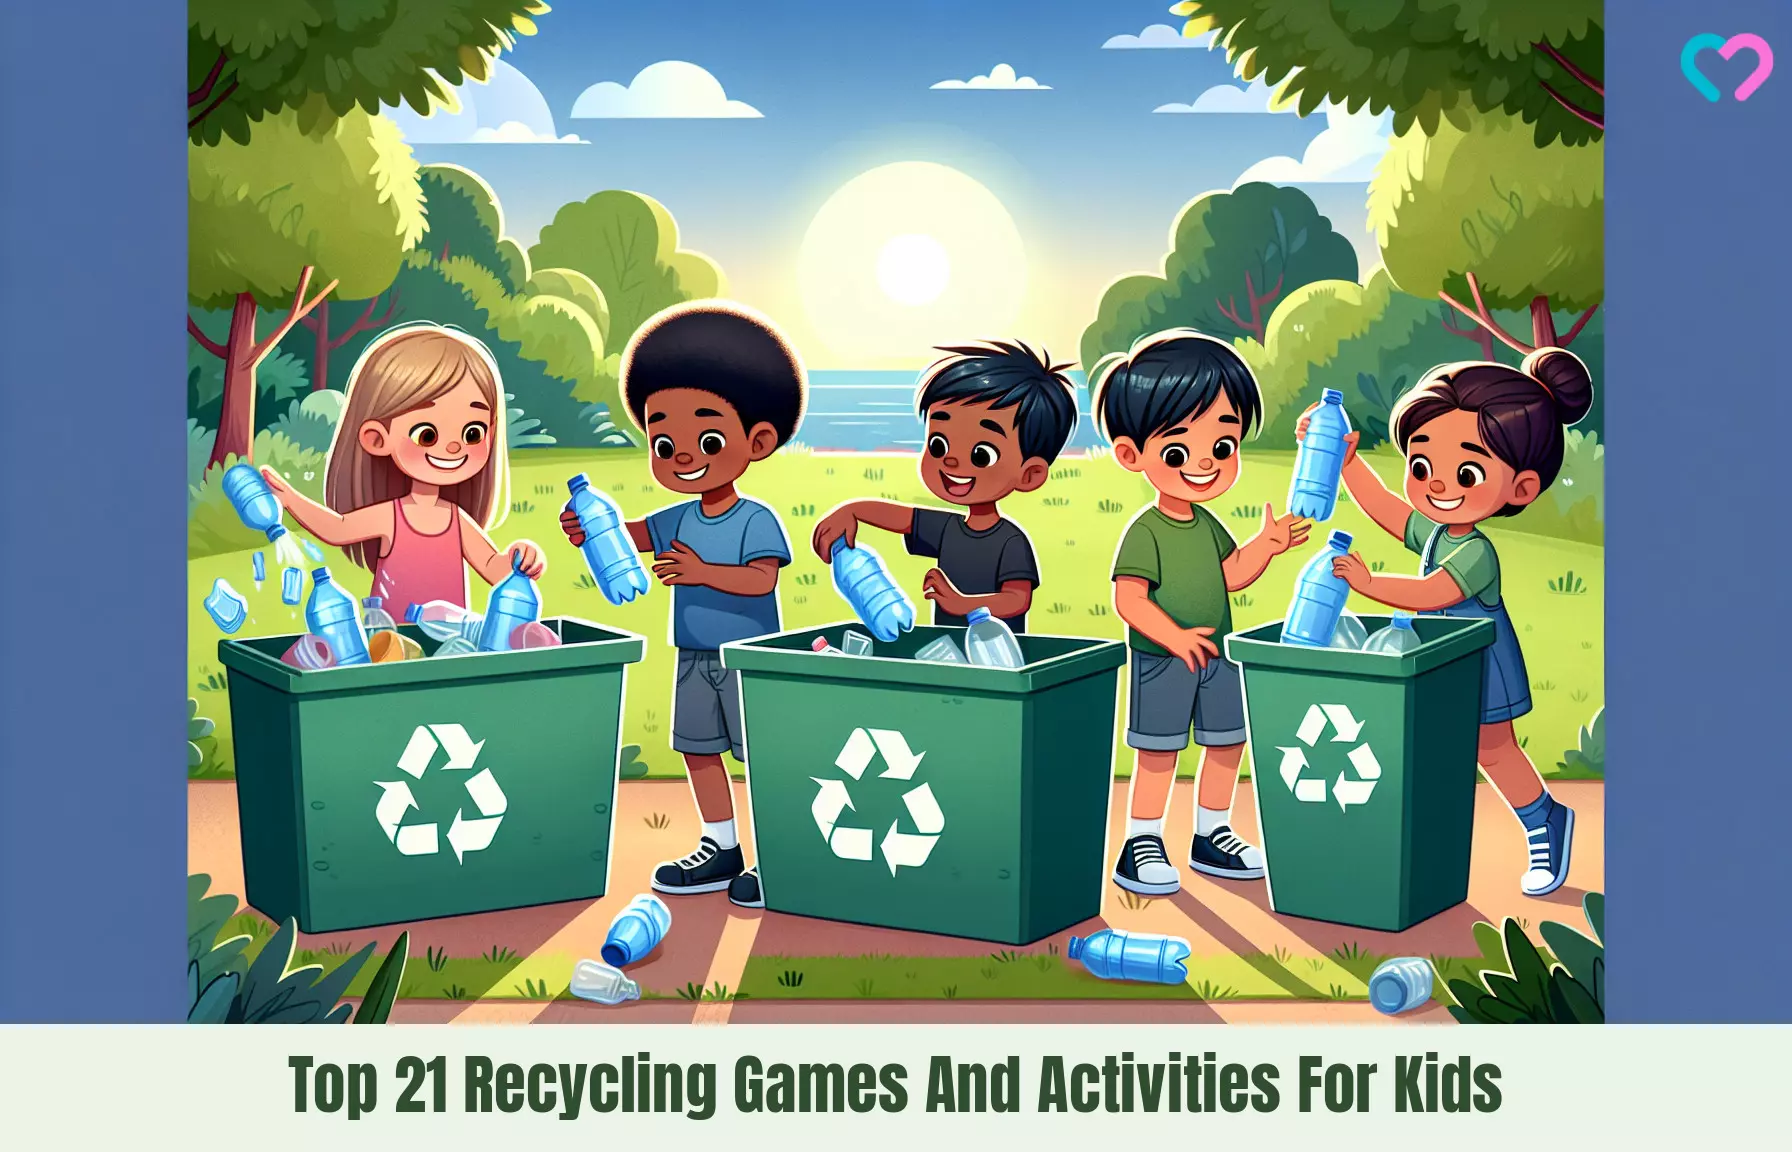
Image: Stable Diffusion/MomJunction Design Team
Teach children the importance of waste management and recycling. Learn with Eddie and join in on the beach recycling game. Have fun while helping the environment by sorting trash into the right bins.
References
- Frequently Asked Questions: Benefits of Recycling
https://sustainable.stanford.edu/campus-operations/waste/sorting-guidelines - Benefits Of Scavenger Hunt.
https://educationaladvancement.org/blog-benefits-scavenger-hunts/
Community Experiences
Join the conversation and become a part of our nurturing community! Share your stories, experiences, and insights to connect with fellow parents.
Read full bio of Manjiri Kochrekar
Read full bio of Harshita Makvana
Read full bio of Nisha Bharatan


