Image: ShutterStock
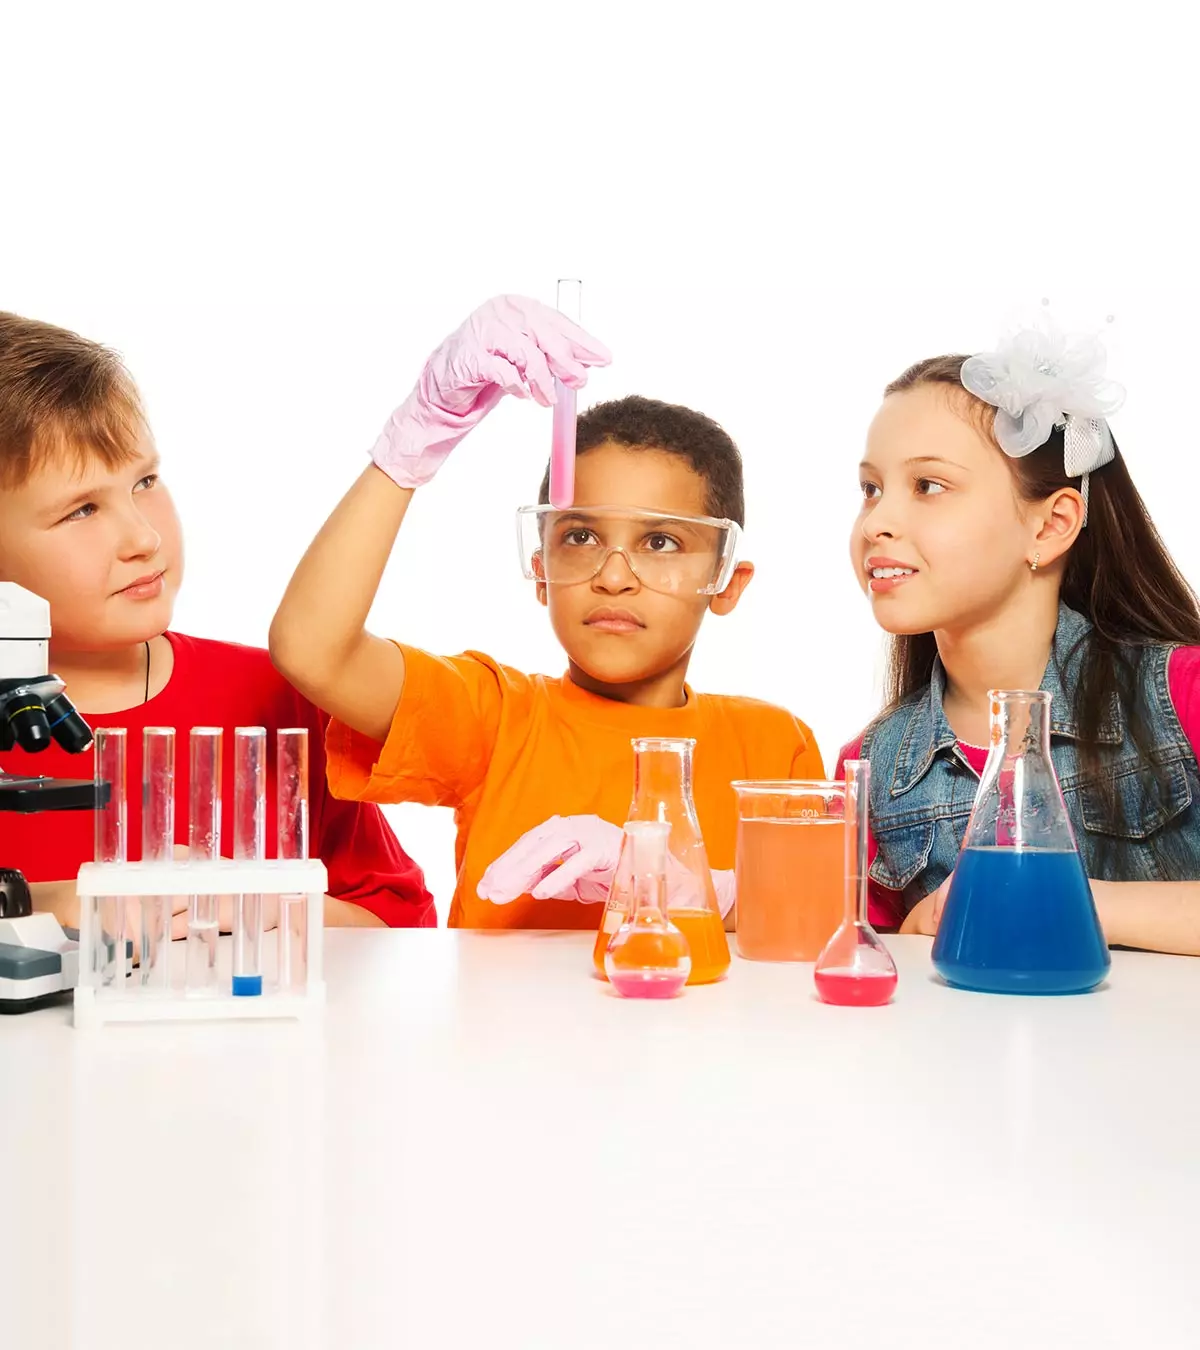
You could probably try hundreds of science experiments for children, but if you are confused about which one to pick for your child’s science fair or exhibition, you’ve arrived at the right place. In this post, we tell you some exciting hands-on science experiments for kindergarten students.

As a child, you might have loved taking up science projects. And it doesn’t always have to be a struggle to get your children’s curiosity up about scientific facts. Working on experiments can help instill a love of science in them and encourage them to have a scientific bent of mind.
Here are a few popular and easy science experiments that your children will love to do. We have included the detailed steps and materials required for each experiment. So, try these simple science experiments for kindergarteners to develop your child’s interest in science. Also, ensure you extend a helping hand when they struggle so it doesn’t get messy or complicated.
Key Pointers
- Science experiments can spark children’s interest in science and enhance their comprehension of scientific concepts.
- Kindergarten children can develop intellectual curiosity by engaging in fun experiments like Sink or Float, Invisible Writing, Magnet Play, and Color Play.
- Glow in the Water, Grow Your Bacteria, and Cloud in a Bottle are some experiments that can help children improve their analytical and observational skills.
- Experiments like Homemade Plastic, Rock Candy, and Homemade Volcano can encourage children to formulate hypotheses and predictions.
- By conducting these experiments, children can gain hands-on experience and develop a deeper appreciation and understanding of science.
20 Easy And Fun Science Experiments For Kindergarten
Here are some interesting science experiments to break your preschooler boredom.
1. Sink or float
- Write ‘sink’ and ‘float’ on a piece of paper and make two columns.
- Ask your kindergartener to collect different objects from around the house, such as pins, rubber ties, paper, pens, spoons and such.
- Make sure your kid knows the meaning of both the words ‘sink’ and ‘float.’
- Fill a pan with water and ask your kid to put the objects in the water one by one. See which ones float and which ones sink and write your conclusion down on the paper. It can be one of the best and interesting science activities for kindergarten.
Science: Heavy objects will sink while the lighter ones will float.
2. Bean sprout
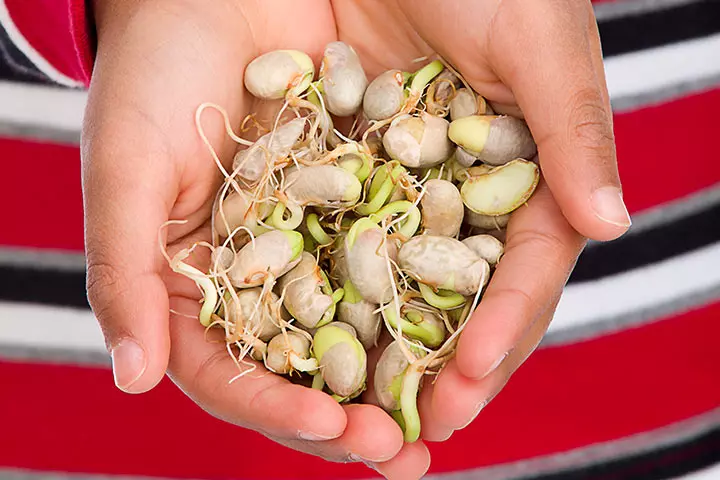
- Show your kid a few bean seeds and let him inspect the hard shells.
- Ask your kid to dampen a few paper towels and place them on a cookie sheet. Place the bean seeds and cover them with some more damp paper towels. Keep the cookie sheet in mild sunlight.
- Ask your kid to check the seed daily and sprinkle some water on the paper towels.
- In about five to six days, the beans will sprout. This is an easy science experiment for kindergarten that can be done using simple ingredients found around your house.
Science: Sunlight, air, and water will help a plant to grow.
 Do remember
3. Bottled waves
- Help your kid fill up a bottle with two-thirds castor oiliThis oil is derived from castor beans that aid in digestion and skin and hair care and the rest with water.
- Add some food coloring and close the lid.
- Let your kid turn the bottle from side to side and make a discovery about how the water forms waves.
Science: As the earth rotates on the axis, the gravitational pull leads to waves.
4. Floating egg
- Let your kid pour water in a glass till halfway.
- Add about six tablespoons of salt and stir well.
- Help your kid pour more water into the glass until it is almost full. Remember to add the water gently.
- Now submerge the egg in the water, and see how it floats.
Science: Salt will make the water dense and make it easier for the egg to float.
5. Invisible writing

- Let your kid add some drops of dishwashing detergent in a cup of water and stir it.
- Your kid can dab a cotton swab in the mix and make a drawing or writing on a bathroom mirror.
- At bath time, as the bathroom gets foggy, the message on the mirror will become visible. Invisible writing is one of the easy science experiments for kindergarten that will help them feel like science is engaging.
Science: The dishwashing detergent will prevent water molecules from forming on the mirror and let the message be seen.
6. Magnet play
- Ask your kid to collect some items from around the house and gather them around a magnet.
- Let them form their analysis by observing which objects are pulled in by the magnet and which ones aren’t.
Science: A magnet will pull anything that is made of iron, nickel, and some other metals.
7. Color play
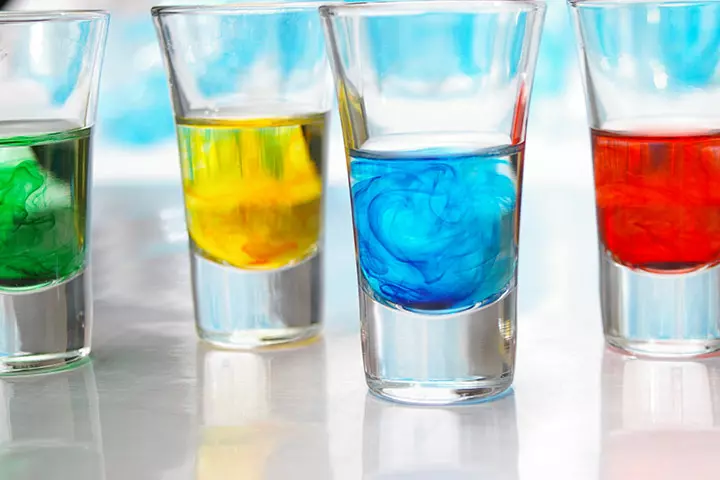
- Fill three glass bowls with water and add red, yellow and blue food coloring.
- Show your kid how to mix the colors one by one to see how new colors form. This is one of the best science experiments for kindergarten students.
Science: Red, blue and yellow are primary colors that can help to create more colors.
8. Ice cool
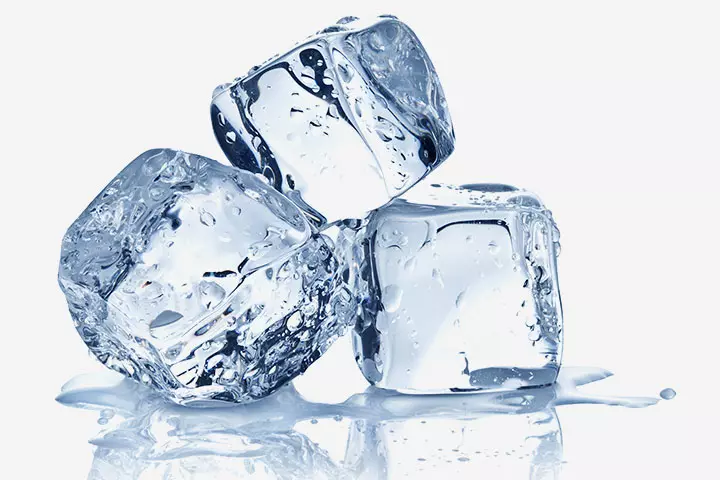
- Ask your kid to fill some plastic cups with water and place a lid on one cup.
- Place all cups on a plate and freeze overnight.
- Get him to check the cups in the morning and see if the cups are cracked. Ice cool activity is one of the most fun science experiments for kindergarten that can be tried at home.
Science: When water freezes, it expands and can lead to cracks in the cups.
9. Hearing balloon
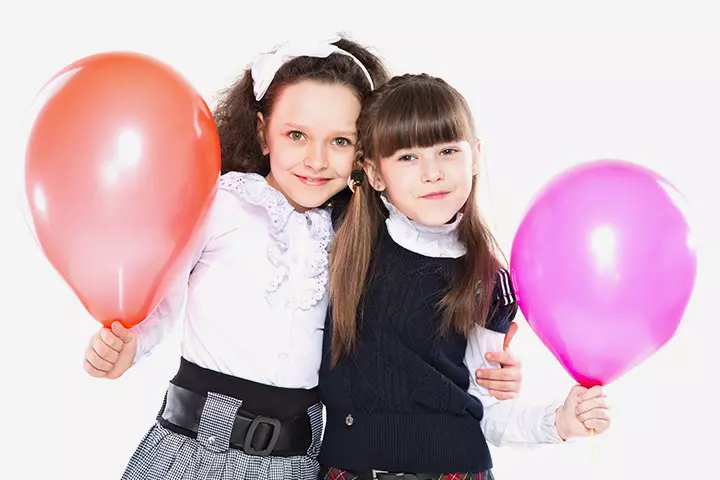
- Inflate a balloon and place it next to your kid’s ear. Tap gently.
Science: When the balloon is inflated, the air molecules inside will move close to each other and increase the sound waves.
10. Magic paint
- Help your kid pour some whole milk into a petridishiA shallow glass or plastic plate used in microbiology laboratories to cultivate microorganisms or shallow bowl.
- Add some food coloring drops to the milk.
- Dip a toothpick into some dish soap and disrupt the color droplets.
- Continue to dip the toothpick and swirl the colors around.
Science: The soap disrupts the surface tension of the milk, pushing the color away from the toothpick.
11. Orange fizz
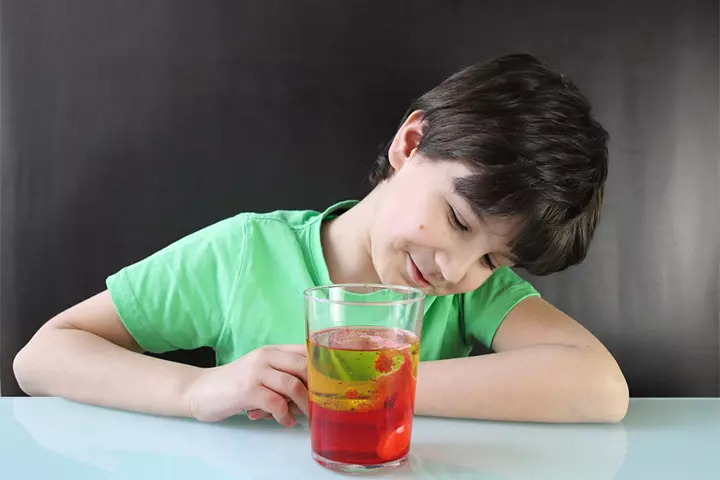
- Help your child cut the orange into wedges or slices using a kids’ knife.
- Coat an orange slice or wedge with baking soda using a spoon.
- Put some orange juice in a glass or bowl, and ask the child to put the baking soda-coated orange slice into the orange juice.
- Let the child enjoy watching the orange juice fizz and bubble.
Science: The fizzing and bubbling of the orange juice result from a chemical interaction between the baking soda (base) and citric acid in the orange juice (acid).
12. Mold test
- Touch one slice of bread with unwashed hands, another with hands washed using water alone, and the final one with hands sanitized using hand sanitizer.
- Place each bread slice in a separate zip-lock bag and seal them. Encourage your child to observe the bags daily and note any changes, particularly the growth of mold.
- Ask your child to label the ziplock bags to distinguish between the slices of bread touched by unwashed hands, washed hands, and sanitized hands.
- As mold begins to grow, discuss the observations with your child.
Science: Bread mold thrives in a moist environment and feeds on the starches and sugars present in the bread. By leaving the bread slices in sealed bags, we create a mini-ecosystem perfect for mold growth.
13. Ink man
- Draw a stick figure or any shape of your choice on a tray using a marker.
- Carefully help your child pour water into the tray until it covers the drawn figure.
- Observe as the ink character floats on the surface of the water, creating a visually captivating display your child will enjoy.
Science: When ink is introduced into water, it does not dissolve or break down due to its insoluble nature. Instead, it remains suspended within the water, giving rise to a buoyant effect where the ink appears to float within the water.
14. Leak-proof bag
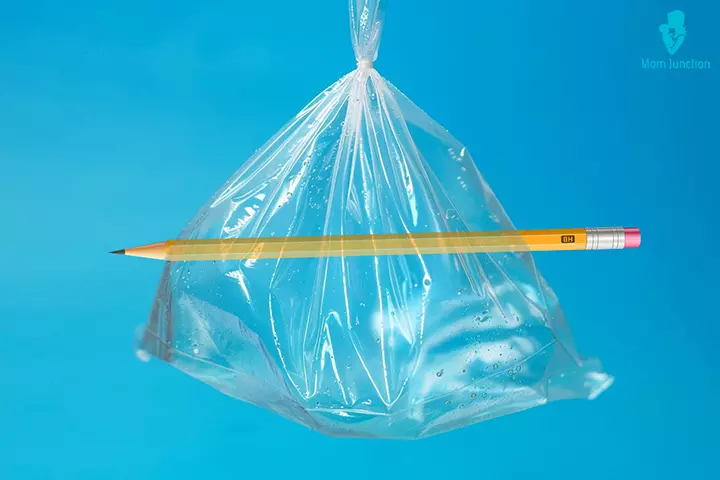
- Ask your child to fill a ziplock bag with water and ensure it is securely sealed.
- Help your child gently push a sharp pencil through the bag, noting how the water doesn’t leak.
- You may let the child insert a couple more sharp pencils into the bag and enjoy the magic.
Science: The plastic bag’s polymer chains stretch and seal around the pencils, demonstrating the properties of polymers and preventing water from leaking.
15. Floating colors
- Combine cold water with blue coloring in one cup and warm water with red coloring in another.
- Fill a container with room-temperature water.
- Pour the cups of colored water into opposite ends of the container with room-temperature water.
- Encourage your child to notice how the red coloring floats while the blue coloring sinks.
Science: This phenomenon is driven by the variation in density between warm and room-temperature water, as warm water is lighter and cold water is denser. As the colder water heats up, it rises, while the warmer water cools and sinks, a process referred to as convection.
16. Rainbow towel
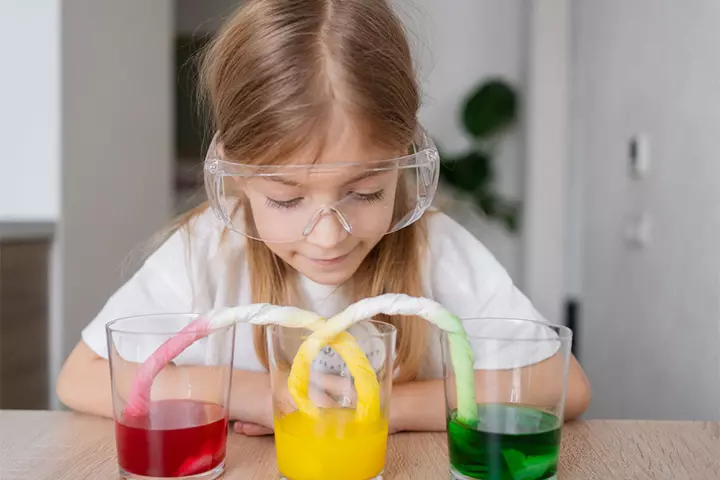
- Place several small cups or containers in a row, and fill each cup halfway with water.
- Add a few drops of different food coloring to each cup, creating a variety of colors.
- Cut a paper towel into strips that are long enough to reach from one cup to the next.
- Place one end of a paper towel strip into a cup containing colored water, and the opposite end into the next cup. Continue this with all cups, connecting them with the paper towel strips.
- Observe as the colored water travels up the paper towel strips and meets in the middle, forming a rainbow effect.
Science: This experiment demonstrates capillary action, a process where water moves up through a porous material due to the forces of adhesion, cohesion, and surface tension.
17. Static comb
- Cut colored paper into small pieces and spread them out on a table.
- Make your child hold a plastic comb over the paper pieces. Make them note that there’s no movement.
- Now, instruct the child to rub the comb against their hair multiple times to charge it.
- Ask them to hold the comb over the paper pieces and observe how they move and stick to the comb.
Science: Friction from rubbing the comb against hair creates an electron transfer, resulting in a static charge that attracts the paper pieces to the comb.
18. Dancing rice
- Pour a cup of water into a clean, transparent container. Add a teaspoon of baking soda to the water and stir until it is fully dissolved.
- Ask your child to sprinkle rice into the solution and observe it sinking due to its density.
- Now, add a teaspoon of vinegar to the mixture.
- After a few minutes, the rice will begin to move and dance in the container.
Science: The carbon dioxide bubbles form as the vinegar reacts with the baking soda. These bubbles stick to the rice and lift it to the surface. When the bubbles pop, the rice sinks back down, creating a dancing effect.
19. Egg and toothpaste
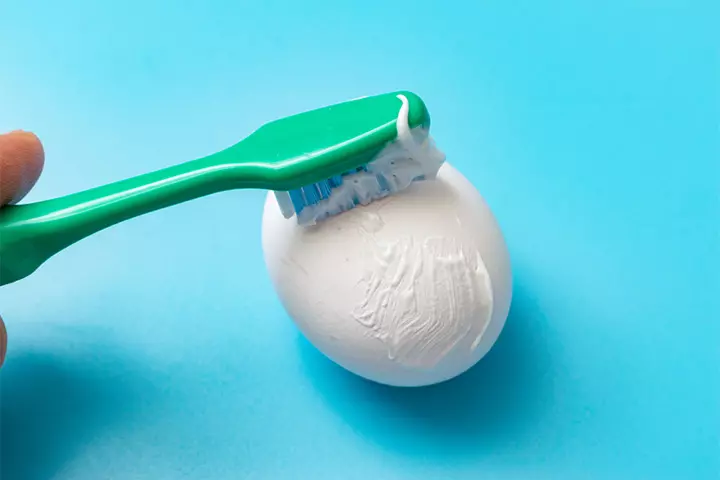
- Put four clean, transparent glasses on the table. Pour black coffee into two glasses and soda into the other two.
- Ask your child to coat two eggs with toothpaste, ensuring that they are completely covered.
- Put one plain egg and one toothpaste-coated egg in two separate glasses containing coffee. Place the other plain and toothpaste-coated eggs in the other glasses of coffee and soda.
- After 24 hours, you will see that the plain eggs have stained, while the ones covered with toothpaste haven’t.
Science: Toothpaste contains fluoride, which forms a shield around teeth (in this case, eggs), preventing acid erosion and staining.
20. Dry tissue in water
- Instruct your child to place a tissue at the bottom of the cup. Ensure it stays in place.
- Now, fill a clear container with water. Ensure the water level is higher than the cup’s height.
- Flip the cup upside-down and gradually push it into the water.
- Pull the cup straight out of the water and ask your child to notice that the tissue is dry.
Science: When the cup is submerged in water, the air trapped inside it creates pressure that prevents water from entering the cup.
30+ Best Science Experiments For Kids
Here are some simple science experiments that your kid can easily do at home and learn more about the subject and its concepts. You can perform these experiments with preschoolers as well as older kids. Make sure you are around and do not leave your kid unattended though and ask your kid to do the following steps.
21. Homemade volcano
You will need:
- A 500 ml empty plastic bottle
- A funnel
- 2 measuring cups
- 1 cup of baking soda
- 1 cup of vinegar
- 1 tsp of liquid dishwashing soap
- Food coloring
- Glitter
How to:
- Put the bottle at the bottom of a sink and place the funnel in it.
- Pour baking soda in the bottle through the funnel.
- In the measuring cup, add the soap, food color and vinegar.
- Add some glitter on the funnel on top of the baking soda and pour the vinegar mix on top. The volcano will erupt from the bottle.
These are some fun science experiments for kids to make STEM education an enjoyable experience.
These are some fun science experiments for kids to learn and enjoy at the same time.
 Do remember
22. Rock candy
You will need:
- A 15 cm long piece of string
- A pencil
- A paper clip
- A cup of water
- A glass jar
- 2 cups of sugar
How to:
- Tie the string around the middle part of the pencil and tie the paper clip at the end of the string.
- Place the pencil on the top of the jar in such a way that the string is inside the jar. Make sure the string does not touch the bottom or sides of the jar, and if it does, roll it around the pencil a little more. It will help you understand how much string needs to be rolled. Once you know the exact measurement, remove it from the jar and keep aside.
- Boil the water and add ¼thcup of sugar. Keep stirring till it dissolves. Once it dissolves, add another ¼th cup of sugar and stir till it dissolves. Keep doing this till the sugar is finished, but make sure you first dissolve the sugar and then add the fresh one.
- Pour the sugar solution inside the jar and fill it to the top. Now place the paper clip and the string in the sugar mix in such a way that the string is positioned in the middle of the jar.
- Let it cool and stay undisturbed for about a week, after which the crystal candy will be ready.
23. Edible bubbles with apple
You will need:
- Apple
- Any fruit juice or even water
- Milk
- Straw
How to:
- Cut the top off the apple and empty out the cores.
- Put one or two tablespoons of juice or water in the apple and ask your kid to blow the bubbles. These will pop out very soon.
- Next, ask your kid to add one to two tablespoons. of milk inside the apple and ask your kid to blow the bubbles. Your kid will be amazed at the large number of bubbles that will be created as compared to earlier.
24. Can the plant find the light?
You will need:
- A shoebox
- Some pieces of cardboard
- A pair of scissors
- Tape
- A bean plant
How to:
- Cut out a huge hole at the bottom of the shoebox. If there are any other cracks in the box through which light can shine in, tape them up.
- Cut out two pieces of cardboard and tape them inside the box on either side. Make sure there is a little space between the two.
- Put the shoebox in such a way that the hole is on the top. Now water the plant and place inside.
- Close the box using tape and place it on a sunny windowsill. Let it sit for about four or five days before opening. The plant will have traveled upwards towards the source of the light.
Can the Plant Find The Light is one of the cheap science experiments for kids.
25. An egg without a shell
You will need:
- 16 ounces vinegar
- 2 glasses
- Raw eggs
How to:
- Slowly place the egg inside the glass and fill it with vinegar to cover it completely.
- It can take about 12 to 24 hours for the shell of the egg to dissolve away.
- Take the egg out the next day by gently tilting the glass to pour out the liquid.
- All you will be left with is a naked egg without a shell.
26. Cloud in a bottle
You will need:
- A mason jar or glass jar
- A pot of boiling water
- Tongs or a hot pad
How to:
- Hold the jar with the help of the tongs or heating pad and tip it over the boiling water in an upside down position.
- The water will start entering the jar as cloud and will collect around the walls.
- Let your kid see the real cloud and see how it vanishes soon.
27. Handwarmer
You will need:
- Jelly crystals
- Water
- Zipper lock bag
- Small cup
- Iron filing
- Calcium chloride
How to:
- Add about 9 oz. of water in the cup and place a scoop of jelly crystals inside. Wait till the crystals grow to their maximum size, by when the water will be completely absorbed.
- Add four tablespoons of the grown jelly to the zipper lock bag. Next, add 1 tablespoon Iron filing and one and a half tablespoons Calcium chloride in the bag.
- Squish the bag from the outside to make sure that the contents are properly mixed. Close the zipper.
- Shake the bag so that the contents mix up some more. It will soon start giving off heat.
28. Mix oil and water
You will need:
- A small empty and see-through bottle of soft drink
- Water
- Food coloring
- 2 tbsp. cooking oil
- Dish washing liquid
How to:
- Add some food coloring to the water. Pour two tablespoons of this water and two tablespoons of cooking oil in the bottle.
- Close the lid and give it a shake.
- Place the bottle back down and see the oil float up to the top.
This is one of the free science experiments for kids where water and oil is easily available at home or school.
29. Static electricity
You will need:
- 1 inflated balloon along with string
- Aluminum can
- Woolen fabric
How to:
- Rub the balloons against the woolen fabric and rub it against your hair while standing in front of a mirror. Gently pull the balloon away. You will notice your hair sticking to the balloon and moving along with it.
- Place the aluminum can on its side on a firm surface and rub the balloon again on your hair. Now take it near the can but don’t touch it. The can will start rolling towards the balloon.
30. Homemade plastic
You will need:
- 1 tsp laundry borax
- 1 tbsp. white glue
- Food coloring
- 2 cups
- Water
- Spoon
How to:
- Mix laundry borax with five tablespoons of water in a cup and keep stirring till it dissolves.
- Add one tablespoon of water and the white glue in the other cup and add a few drops of food coloring. Stir it with a spoon till it mixes properly.
- Take two tablespoons of borax solutioniA powdered white material that is often used as a home cleaner from the other cup and add it to the glue mix. Give it a stir.
- While stirring, it will slowly start to turn to a lumpy texture. You can take it out and feel in your hands, it will feel like plastic.
31. Growth of bacteria
You will need:
- A petrie dish of agariA gelatinous substance made of polysaccharides that dissolves in hot water but is insoluble in cold water
- Cotton buds
- Old newspaper
How to:
- Prepare the petrie dish of agar and swab the cotton bud on any surface area around your house.
- Now rub the swab on the agar, then close the lid and seal the dish.
- Let it stay undisturbed in a warm and moist area for about three days.
- Let your kid open the dish and see the growth of the bacteria. For the next trial, try using the swab on your kid’s skin and see how the bacteria grows.
32. Glow-in-the-dark water
You will need:
- A black light
- Highlighter pen
- A dark room
- Water
How to:
- Break open the highlighter pen, take the felt off and soak it in a little bit of water for a few minutes.
- Make sure that the room is dark. Now turn on the black light near the water and see how it will glow.
33. Dry ice bubble
You will need:
- Water
- A strip of cloth
- A big bowl with a lip on the top
- Soapy mix to make bubbles
- Dry ice
How to:
- Put lots of dry ice in the bowl and add a little water. You will notice fumes coming out of the bowl.
- Soak the strip of cloth in the soapy mix and run it around the lip and the top of the bowl to help form a layer of bubble over the dry ice.
- The bubble will keep growing.
34. Water cycle in a bag
You will need:
- Ziplock bag
- Clear tape
- Blue food coloring
- A cup of plain water
- Permanent marker
How to:
- Help your child draw the sun and clouds on the top of the ziplock bag using a marker.
- Mix a few drops of blue food coloring in a cup filled with water.
- Now, pour the blue water into the ziplock bag and seal it tightly.
- Attach the bag to a sunny window using clear tape.
- Ask your child to observe the bag for a few hours. They can notice tiny droplets forming and moving around.
- You will see some droplets stick to the cloud while others fall down, mimicking the rain.
35. Bubbles with a straw
You will need:
- Glycerin
- Water
- A small clear dish
- A blower to blow out the bubbles
- Straw
How to:
- Mix the glycerin and water to make the liquid that will create the bubbles.
- Pour it in a dish and let the blower soak in it for a few seconds. Soak the straw in the liquid as well.
- Ask your kid to blow out the bubbles and try to touch it with their finger. The bubble will burst.
- Next, ask your kid to blow out the bubbles and use a straw to gently touch it. Your kid will be surprised to see that the straw will go through the bubble without making it burst.
36. Elephant toothpaste
You will need:
- Empty plastic bottle
- Dry yeast
- Liquid dish soap
- Hydrogen peroxide
- Measuring cups and spoons
- Large tray or container to catch the foam
- Warm water
- Safety gloves and eyewear
- Food coloring (optional)
How to:
- Set the empty plastic bottle on a tray or container. You can help your child use a funnel to make it easier to pour the hydrogen peroxide into it.
- Squeeze a good amount of liquid soap into the bottle as well and add a few drops of food coloring to it to make it colorful.
- Combine one tablespoon of yeast with three tablespoons of warm water in a measuring cup and stir the mixture for approximately 30 seconds. Pour the yeast blend into the bottle, step back swiftly, and observe the ensuing reaction!
- The hydrogen peroxide decomposes into water and oxygen gas. The soap traps the oxygen, creating a foamy eruption that resembles toothpaste coming out of a tube (hence the name “elephant toothpaste”).
Note: Put on safety goggles and gloves before starting the experiment, and make sure to conduct the experiment in a well-ventilated area. Also, assist your little ones in this experiment as it involves the use of chemicals and try to use lower concentrations of hydrogen peroxide for safety.
37. Carbon sugar snake
You will need:
- 4 tsp powdered sugar
- 1 tsp baking soda
- Sand
- Pie tin
- Lighter fluid
- Lighter or matches
How to:
- Combine four teaspoons of powdered sugar with one teaspoon of baking soda in a bowl.
- Fill a pie tin with sand, create a small mound in the center, and make an indent in the mound.
- Carefully pour the lighter fluid over the sand mound and into the indent until well-soaked.
- Spoon the sugar and baking soda mix into the center indent of the sand mound.
- Now, carefully light the sand near the sugar mixture. Ask your child to watch as the mixture bubbles, turns black, and forms a growing snake.
- Sugar burns with oxygen to produce gases that lift the mixture. Some of the sugar decomposes into solid carbon and water vapor, whereas baking soda breaks down into sodium carbonate and other gases. These reactions inflate the snake, creating its shape and texture.
Note: Remember to wear safety goggles and gloves during the experiment. Avoid carrying this experiment in a windy place, as it can be dangerous. Also, make sure that adults carry the steps that involve lighter fluids, as they are highly inflammable.
38. Cleaning coins
You will need:
- Dirty coins
- 2 tsp table salt
- A glass bowl
- Clear vinegar
- Lemon juice or orange juice
- Paper towels
- Access to a sink
How to:
- Pour half a cup of vinegar into the bowl and add 2 tsp of salt. Mix well.
- Place some coins into the vinegar and salt solution for about 10 to 15 minutes.
- Remove half of the coins and rinse them thoroughly with water, scrubbing well to remove any remaining salt or vinegar.
- Take out the remaining coins from the bowl and leave them on a paper towel without rinsing them. Allow them to dry.
- You will observe that the coins placed on the paper towel have turned green after some time. On the other hand, those that were rinsed with water are clean.
39. Egg inside a bottle
You will need:
- Boiled and peeled egg
- A glass bottle
- Straw
- Paper strips
- Lighter or matches
How to:
- Light a strip of paper using a lighter or matchstick and insert it into the bottle.
- Help your child place the hard-boiled egg in the bottle’s mouth.
- As the paper burns, you will notice the egg being pushed into the bottle. It happens because when paper burns, it creates high pressure inside the bottle, causing the air to pass out.
- As the paper burns, you will notice the egg being pulled into the bottle. It happens because the burning paper heats the air inside the bottle, causing it to expand and escape. When the strip burns out, the air inside cools and contracts, creating lower pressure inside the bottle compared to the outside, which pushes the egg into the bottle.
Note: Matches and lighters can be hazardous if not used correctly. Always have an adult complete the portion of this experiment that involves lighting.
40. DIY compass
You will need:
- Sewing needle
- A medium-sized bowl
- Water
- Pliers
- Magnet
- Cork
How to:
- Have your child hold the needle and stroke it with the magnet in one direction 50 times.
- Flip the needle around and use the opposite side of the magnet. Stroke the other end of the needle the same way.
- Next, help your child cut the cork to be one to two centimeters thick.
- Assist your child as they insert the needle through the center of the cork. Use a pushpin to make the hole and pliers to push the needle through.
- Fill a bowl with water.
- Place the cork and needle in the water. Now, you can see the needle turning to point North.
41. Invisible ink
You will need:
- Lemon
- Cotton swabs
- A small bowl
- Paper
- Candle
How to:
- Extract the lemon juice into a tiny bowl.
- Dip a cotton swab into the juice and use it to write a secret message on a piece of paper. Let the paper dry completely.
- Hold the paper near a candle and watch as your secret message appears. Ensure that the paper does not come into contact with the flame to prevent it from burning.
42. Solar oven
You will need:
- Empty pizza box
- Plastic sheet
- Tape
- Aluminum foil
- Glue
- Chocolates
- Marshmallows
- Black construction paper
How to:
- Cut a flap from a pizza box to form the oven door.
- Attach black construction paper to the bottom of the box using glue. This will help the box absorb more heat.
- Line the box’s interior with aluminum foil using glue to reflect the sunlight.
- Now, tape a plastic sheet on the oven door so that the air inside the oven stays trapped and heated.
- Help your child place marshmallows and chocolates inside the oven.
- Set the oven outdoors in direct sunlight. Wait for about 90 minutes.
- You will know that your s’mores are ready once the marshmallows are puffed up.
42. Slime at home
You will need:
- Food coloring
- 2 bowls
- Water
- White glue
- Borax
How to:
- Combine one-fourth cup of water with one-fourth cup of white glue in a bowl. You can double the quantities if you want more slime.
- Now, mix a small amount of food coloring with the water-glue mixture.
- Dissolve half a tablespoon of borax in half a cup of water in another bowl until the borax dissolves.
- Slowly mix the borax solution into the glue mixture. Stir continuously, and you will gradually see the slime form.
43. Hot steel wool
You will need:
- Vinegar
- Steel wool
- Thermometer
- Lid
- 2 beakers
How to:
- Place the steel wool in a beaker.
- Pour vinegar over the steel wool and allow it to soak for approximately one minute.
- Remove the steel wool after a minute, and also remove any excess vinegar.
- Coil the steel wool around the bottom of the thermometer and place both the thermometer and the steel wool into a separate beaker.
- Cover the beaker with the lid to trap the heat. Ensure you can still see the thermometer’s temperature.
- Record the initial temperature and observe for approximately five minutes.
- The thermometer gradually warms up due to a chemical reaction. You can also notice the fog forming in the beaker.
44. Snowballs
You will need:
- A bowl
- A tray
- 1 cup baking soda
- Vinegar
- Water
How to:
- Mix baking soda with water until it turns into the texture of playdough. Set the mixture aside for an hour.
- After an hour, roll small snowballs using the mixture. Keep the snowballs on a tray and place the tray in the freezer for about 15 minutes.
- Take out the tray from the freezer and place it on the table.
- Ask your child to drip vinegar onto the snowballs and observe as they begin to fizz and dissolve.
45. Gravity test
You will need:
- A plastic cup
- Playing card
- Water
How to:
- Fill the cup about three-fourth full with water.
- Press a playing card gently onto the top of the glass to cover it completely.
- Carefully flip the glass upside down.
- After a few moments, remove the card. The water will remain in the glass, defying gravity.
46. Inflating a balloon
You will need:
- 2 ounces vinegar
- 1 tbsp. baking soda
- A funnel
- A plastic bottle
- Balloon
How to:
- Pour vinegar into a clean plastic bottle.
- Put baking soda into a balloon with the help of a funnel.
- Attach the balloon to the bottle’s top without letting the baking soda fall in yet.
- Lift the balloon and allow the baking soda to mix with the vinegar and water mixture.
- When the vinegar solution and baking soda mix, they create an acid-base reaction, producing carbon dioxide that fills the balloon.
47. Soap boats
You will need:
- Dish soap
- Milk carton
- A pair of scissors
- Dropper
How to:
- Cut out little boats from the milk carton using scissors.
- Make a small notch in the back of the boat, right in the middle of the rear edge.
- Put the boat close to the edge of a sink or a container that’s filled with water.
- Next, use a dropper to carefully place some dish soap into the groove.
- As soon as the detergent comes in contact with the water, the boat will start moving forward.
48. Bouncy balls
You will need:
- 2 tbsp. white glue
- 1 tbsp. Cornstarch
- Borax
- Food coloring
- Warm water
How to:
- Combine one tablespoon of borax with half a cup of water to create a solution. Stir the mixture properly until the borax fully dissolves.
- Next, combine the glue and cornstarch to make the bouncy ball mixture. Use a one-fourth cup to fill halfway with glue before adding one tablespoon of cornstarch.
- Add a few drops of food coloring to the glue/cornstarch mixture and stir lightly.
- Pour the glue mixture into the borax water and let it sit for 10 to 15 seconds.
- Remove the hardened glue mixture from the borax water with a fork and squish the gooey blob between your hands until it’s no longer sticky.
- Form the blob into a ball. Your bouncy ball is now ready to bounce!
49. Bending water
You will need:
- Faucet with running water
- Plastic comb
How to:
- Ask your child to brush their hair with the help of the plastic comb several times.
- Now, hold the comb near a gentle stream of water flowing from a sink faucet.
- You will see the water bend and move towards the comb.
50. Skin and sunscreen
You will need:
- Black construction paper
- Sunscreen
How to:
- Fold the construction paper in half to make two equal sections.
- Apply a small quantity of sunscreen to one side of the paper and rub it in thoroughly, ensuring that only one side is covered.
- Leave the paper in direct sunlight for most of the day.
- Ask your child to observe that the area without sunscreen has faded, highlighting the sunscreen’s ability to protect human skin.
51. Egg drop
You will need:
- Egg
- Tape
- Cardboard
- Straw
- Sponge
- Cotton ball
- Bubble wrap
- Rubber band
- A pair of scissors
How to:
- Select protective materials from the list and combine them to create a shield for your egg.
- Next, carefully wrap the materials around the egg, ensuring complete protection on all sides. Secure the materials using rubber bands and tape.
- Once you are satisfied with the egg’s armor, trim any excess materials.
- Find a suitable space, preferably outdoors, to perform the egg drop.
- Now, hold the egg above the chosen spot and release it.
- After the drop, evaluate whether the egg cracked, what worked effectively, and what improvements could be made for the next attempt.
Frequently Asked Questions
1. What are the most important science laboratory safety rules?
Prior knowledge about the laboratory equipment is important while performing experiments. Wearing safety gear such as goggles, lab coats, gloves, and the right kind of shoes is also essential. In addition, be very careful while handling the chemicals and other liquids in the lab. Ensure children are always under adult supervision when conducting these experiments.
2. What household items can I use for science experiments?
You can use various household items for science experiments depending on the experiment you’re conducting, for example, vinegar or lemon juice work well for demonstrating acidity. If you’re exploring chemical reactions, baking soda could be ideal. And for experiments related to color theory or how liquids mix, food coloring could be an excellent choice.
3. How do science experiments help students learn?
While performing experiments, students can come up with a hypothesis, choose different variables for their experiment and come up with data. They can put their theoretical knowledge to practice, thereby enhancing their skills. Science experiments can also enhance students’ critical thinking and problem-solving abilities.
4. Why are science lessons important in early childhood?
Young children are naturally curious about the world around them and want to know how things work. To satiate their curiosity, you can encourage them to explore science facts for kids. Additionally, you can check some science shows for kids to make their learning engaging and fun. Help your child understand the essential concepts and the abilities necessary for inquiry-based learning from a young age. It will go a long way in building their cognitive skillsiThe ability of the brain that enables one to think, remember, learn, reason, read, and pay attention (1).
Apart from the simple experiment mentioned above, you can also try another one suggested by the blogger from Sitges, Spain who writes on the blog ‘Field Notes from Fatherhood.’ He executed a few experiments with his students and his students enjoyed them a lot. He says, “I saved the best for last – making a hot air balloon. You’ll need a piece of cardboard (I used an empty cereal box), a toaster, and a plastic garbage bag. (The thin, lightweight ones they have here in Hungary are best – the only time I’ve ever been grateful for crappy bin liners.) Wrap the box around the toaster, secure it with some tape, place the bag over it, and fire up the appliance. After a few moments you’ll notice the bag start to expand, then it will shoot right up to the ceiling. The kids thought this was pure magic, and it’s a clear example of how heated air molecules behave. We did this one over and over until I thought the toaster would melt (i).”
Science experiments for kids can keep them occupied on holiday and enhance their interest in learning science. Sink or float, sprout a bean, floating egg, ice cool, and color play are some preschoolers’ experiments. Older children can try homemade volcanoes, rock candy, edible bubbles with apples, can the plant find light, and cloud in a bottle. You may explain the science behind the experiment for a deeper understanding. Always ensure their safety and supervise while doing experiments with chemicals or tools. You may suggest age-appropriate experiments for kids to have fun while learning science.
Infographic: Fun Science Experiments Using Water
If you have noticed your child’s interest in science experiments, water is one of the most harmless things you can let them experiment with. You can conduct several experiments by utilizing water’s unique properties. So, let’s go over some ideas for fun and simple science experiments with water. Illustration: Momjunction Design Team
Illustration: Easy Science Experiments For Kids To Improve Their Skills

Image: Stable Diffusion/MomJunction Design Team
Discover the wonders of science with these easy yet incredible science experiments that are both educative and entertaining. Watch this video to learn simple scientific experiments for kids.
Personal Experience: Source
MomJunction articles include first-hand experiences to provide you with better insights through real-life narratives. Here are the sources of personal accounts referenced in this article.
i. Easy science experiments for kids: Air.https://tripswithtots.wordpress.com/2013/03/25/easy-science-experiments-for-kids-air/
References
- Karen K Lind; (1998); Science in Early Childhood: Developing and Acquiring Fundamental Concepts and Skills.
https://files.eric.ed.gov/fulltext/ED418777.pdf - 20 Best Science Projects for Kids of all Abilities
https://www.wonderbaby.org/articles/best-science-projects-for-kids
Community Experiences
Join the conversation and become a part of our nurturing community! Share your stories, experiences, and insights to connect with fellow parents.
Read full bio of Theresa Bertuzzi
Read full bio of Debolina Raja
Read full bio of Harshita Makvana
Read full bio of Kavita Kankani


