Image: Midjourney/ MomJunction Design Team
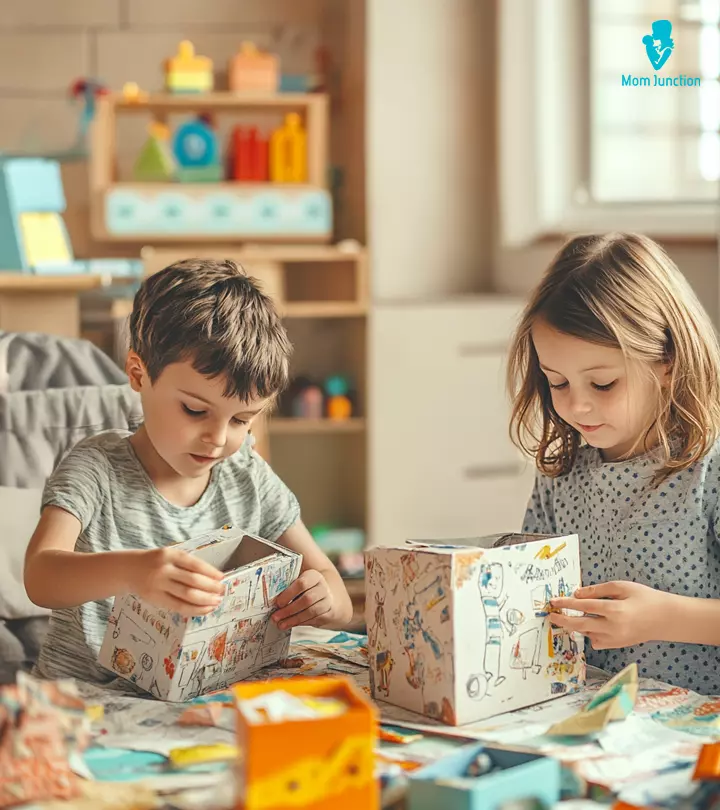
Children need to learn the importance of protecting the environment and recycling and reusing at an early age. And nothing could be better than teaching them through creative waste material crafts for kids.? These crafts are ideal for enhancing creativity and educating children about the importance of sustainability and environmental responsibility. By using waste materials for crafts, they can learn to value resources and think critically about waste management. So, if you have been thinking of engaging ways to teach waste management to your kids, these fun craft ideas are for you. Read through this post to learn more about the materials and preparation required to arrange for these crafts.

 Quick fact
Key Pointers
- Encourage creativity in children and reduce environmental waste with out-of-waste craft ideas.
- Teach the importance of upcycling and recycling through fun activities.
- Use waste materials such as paper, cardboard, bottles, and cans to create unique items such as bracelets, wind chimes, and lanterns.
- Other craft ideas include photo frames, flowers, and bookmarks made from materials that would otherwise go to waste.
26 Waste Material Craft Ideas For Kids
1. Little monsters
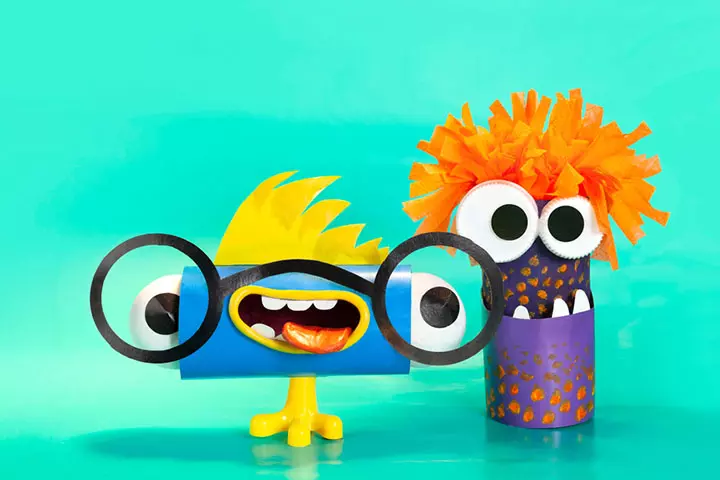
There are so many colorful monster crafts that kids can do using waste material items.
You Will Need:
- Cardboard tubes in different sizes
- Acrylic paint
- Sharpie
- Pompom
How To:
- Cut the cardboard in various sizes.
- Paint the cardboard roll in different colors.
- Now have your child create funny and goofy monster faces on the rolls.
- Add details to the rolls with the sharpie.
- Use pom-poms to add little details to the rolls. Now your kid will have a cool waste material craft on hand.
Pragya Bhatnagar, an artist, shares her experience of making a butterfly pencil holder and a decorative owl using empty tissue paper rolls with her kids. She shares, “My small little artists wanted to make something best out of waste, so we used empty tissue paper rolls for making these beautiful butterfly pencil holders & decorative owl. It was really fun to make all these, very easy & simple art & craft project for kids of any age group (i).”
2. Button bracelet
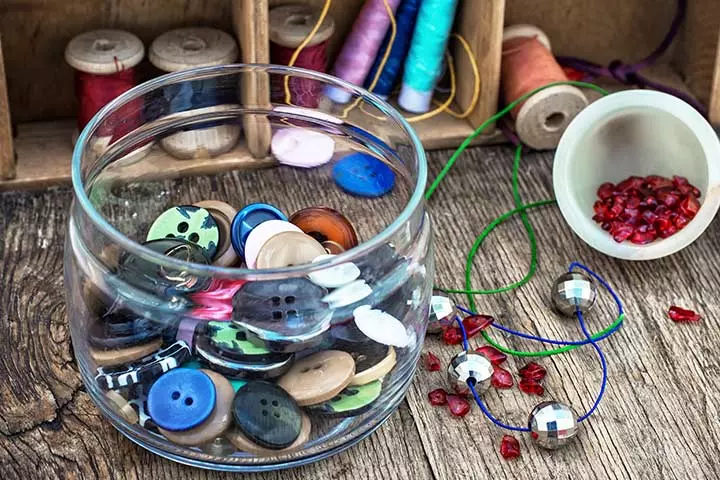
Nothing will compare to your kids’ crazy little imaginations. Here is another creative craft from waste material for kids to make.
You Will Need:
- Pliers
- Elastic
- Metal crimp tubeiA flattened metal tube used to secure two pieces of material together
- ShanksiA small loop under the button that provides space between the button and the garment
- Buttons
How To:
- Thread the elastic through the shanks, turning the buttons upside down to overlap.
- When you think you have threaded enough buttons to reach around the wrist, thread the ends of the elastic through a metal crimp tube.
- Squeeze tightly with the pliers and trim off the excess elastic. This is one of the simplest ideas for making crafts from waste material. Your kid will enjoy doing it.
3. Bottle caps chime
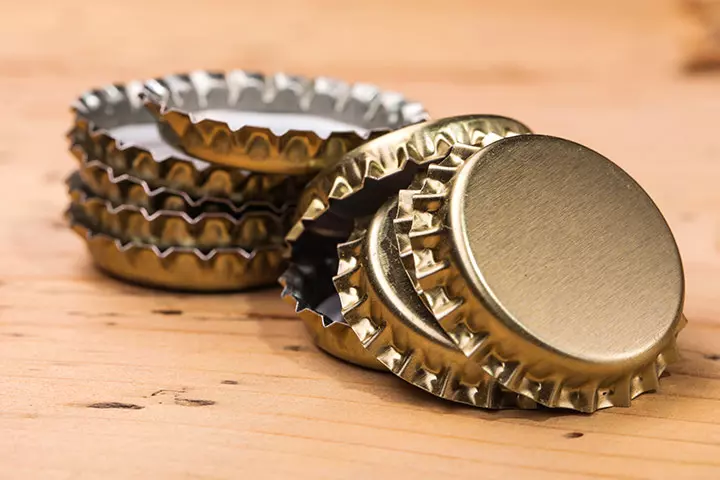
Bottle Caps Chime is a great waste material craft work for children who want to do creative things.
You Will Need:
- 50 to 70 bottle caps
- Metal wire
- A center piece
- Piercing tool
- Drilling tools
- Plier
How To:
- Make two holes on each side of the bottle caps.
- Cut the wires 2 ½ inches long. Now string the wire through one of the holes of the bottle cap. Wrap the wire around itself and secure using pliers.
- Hook the bottle cap to another bottle cap. Wrap and secure with a plier. Continue attaching the links until you get the desired length of the chime. 6 to 7 caps per chain are enough. Attach the chains to the center piece.
- Make a weaving out of fishing wire and tie it at the end. Use the wire to hang the chime. The wind chime is complete. This is one of the fun and creative ways to make waste material crafts for your little ones. They will truly enjoy it.
4. Popsicle stick photo frame
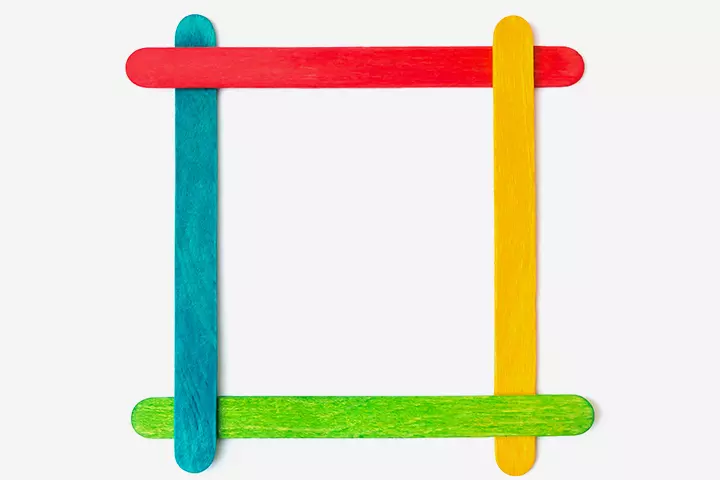
Popsicle Stick Photo Frame is a super fun art and craft from waste material for kids that they will love to make.
You Will Need:
- 9 *12 white papers
- 8 Popsicle sticks
- Scissors
- Glue gun
- Paint
- Crayons
How To:
- Color the Popsicle sticks in one or several colors of your kid’s choice.
- Use two popsicles for each side.
- Kids can either draw or attach a picture of their choice on the white paper.
- Glue the Popsicle sticks in a square on the white paper. It will create the frame. Cut off the excess. This handmade waste material craft for kids will always hold a special charm.
5. Sock puppets
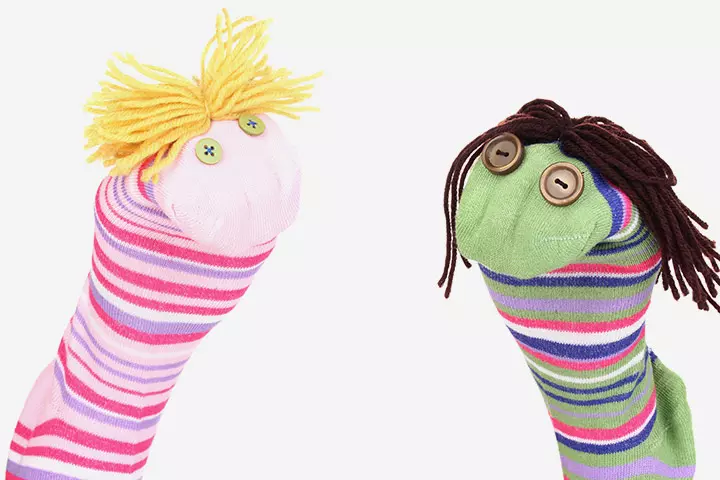
These Sock Puppets are part of the Kids’ hand craft with waste material to improve their creative skills.
You Will Need:
- 2 Socks
- Googly eyes or buttons
- Colored wool
- Black sewing thread
- Wool needle
- Sewing needle
- Scissors
How To:
- Wash the socks properly.
- Sew the googly eyes or buttons on the sock.
- Cut 12, 6-inch strips of wool for the hair. Make the parting of the hair using sewing thread
- Sew on top of the sock, above the eyes. The puppet is ready.
6. Tin can lantern
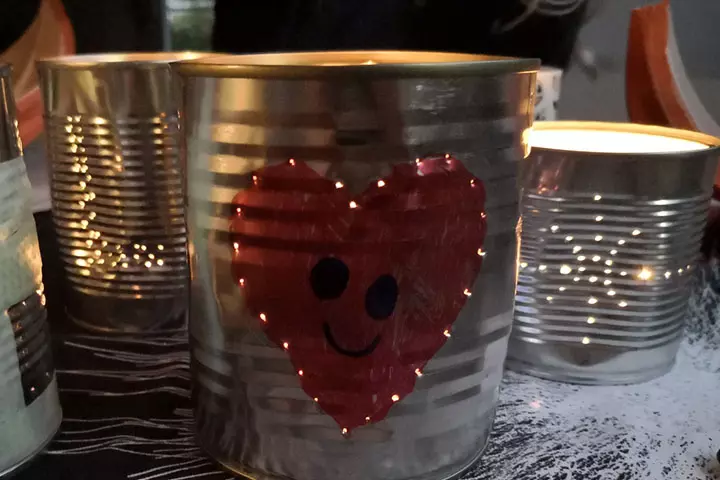
This is such an enjoyable waste materials craft for kids from start to finish and they just adore playing with these tin can lanterns.
You Will Need:
- Tin cans
- Hammer
- Bailing wire
- Nail
- Pliers
- Tea light candle
- Spray paint
How To:
- Remove all the labels and glue from the can.
- Fill the can with water and put it into the freezer. Leave it in the freezer for a few days.
- Now take out the can from the freezer and poke a hole on the top side of the can. Flip and make another hole just across the first hole.
- Now make the holes using the nail and hammer. You do this task for your kids. You can even make the design with the pencil before making holes.
- If the can has a bulge at the bottom, flatten it using a hammer.
- Take a 12-inch strip of wire and curve at the ends to make a hook.
- Affix the handle to the cane and twist the sides to secure it.
- Have your kid paint the tin cans in different colors. Make sure he paints several coats inside and outside. Do not forget handles.
- Once the paint dries, insert tea candles and light them up.
7. Painted bottles
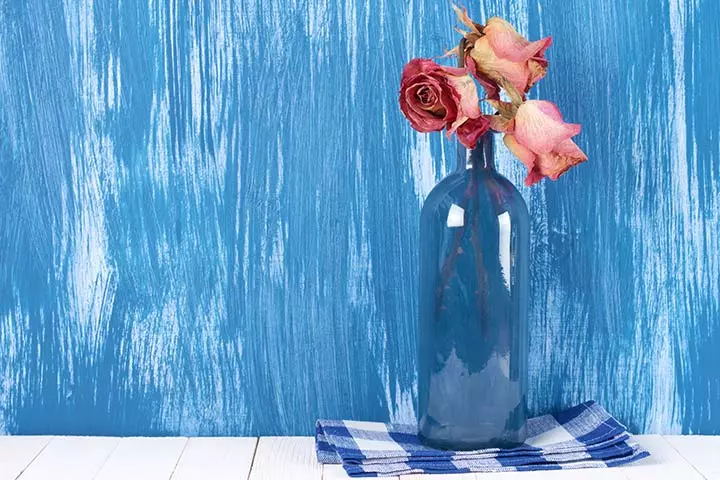
You Will Need:
- Wine bottles
- Syringe
- Latex paint or oil based paint
How To:
- Make sure your kid wears old clothes before doing this craft.
- Clean the bottles so that it is free of grease and debris. Leave the bottles aside so that it dries completely.
- Fill the syringe with paint and insert it into the bottle. Expand and distribute well to cover the sides completely.
- Once every corner has been covered, place the bottle in the oven at 302 degrees Fahrenheit and leave it for 40 minutes. This simple craft with waste material is a great way to make the kid happy and definitely they will love it.
8. Cork photo frame
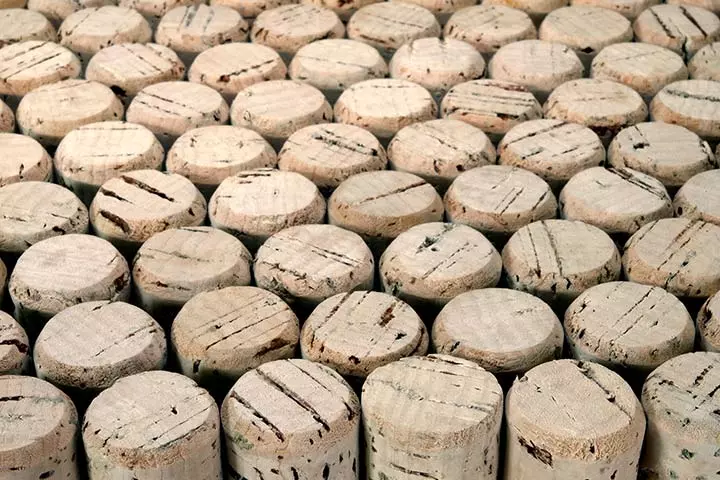
You Will Need:
- Acrylic paints in various colors
- Paintbrush
- Wooden frame
- 14 wine corks
- Hot glue gun
- Box cutter
How To:
- Paint the frame in the color of your choice. Leave it to dry for some time and then apply the second coat. Let the frame dry for a few hours.
- Cut the corks into ¼ inch thick slices using the box cutter.
- Paint the slices in several colors. Leave it to dry.
- Glue the corks to the frame, beginning with the corners.
9. Mason jar snow globe
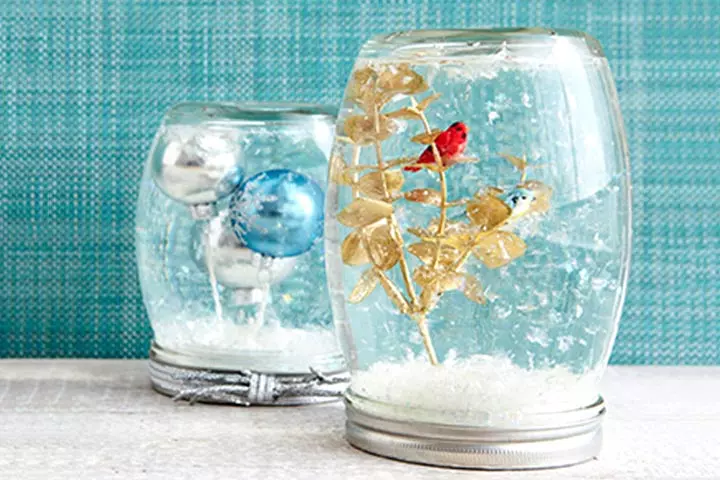
This simple handmade Mason Jar Snow Globe craft work for kids with waste materials, would make a perfect thank you gift for a special teacher or child-minder.
You Will Need:
- Round Mason jar
- Hot glue gun
- Ornaments or any other decorative item like toy animals
- Glycerin
- Glitter
- Distilled wateriPurified water that is free of any impurities or minerals
- Silver acrylic paint
How To:
- Paint the jar in silver acrylic paint.
- Stick the ornaments or other decorative ornaments to the inside of the lid using a hot glue gun.
- Fill the jar up to the brim with distilled water. Add a dash of glycerin and a pinch of glitter to the water.
- Screw the lid tightly. Kids can dislodge the figurines or ornaments, so you do it for them.
- Turn the jar over and let it snow.
10. Spoon vase
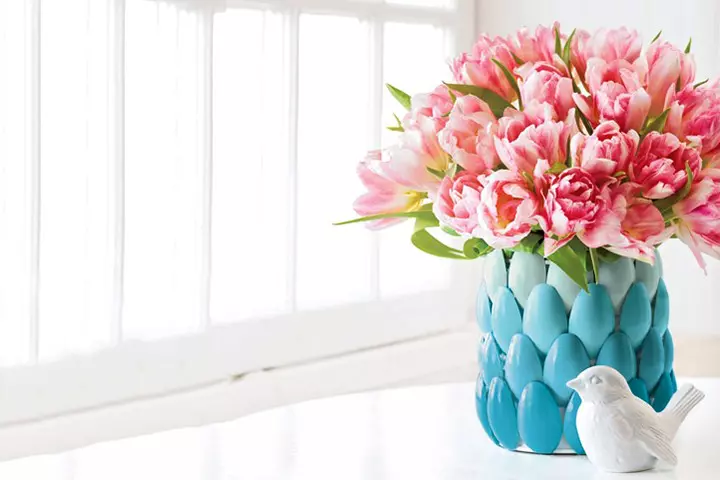
You Will Need:
- A large can
- Paper plate
- Measuring spoons
- Scissors
- Hot glue gun
- White spray primer
- Blue and white acrylic paint
- Plastic spoons
How To:
- Coat the exterior of the can with the spray primer.
- Cut off the handles of all the spoons, except one.
- On a paper plate, pour one tablespoon of blue paint per row.
- Leave the first blob as it is. Add ½ teaspoon of white to the second blob, one teaspoon of white to the third blob and 1 ½ teaspoon of white to the four blobs. Blend with the spoon.
- Apply glue to the outer rim of the spoon.
- Place a row of the lightest color spoon on the top edge of the can.
- For the second row, put the spoons between the previous rows. Continue adding the rows until the can is covered.
11. Yogurt cup wreath
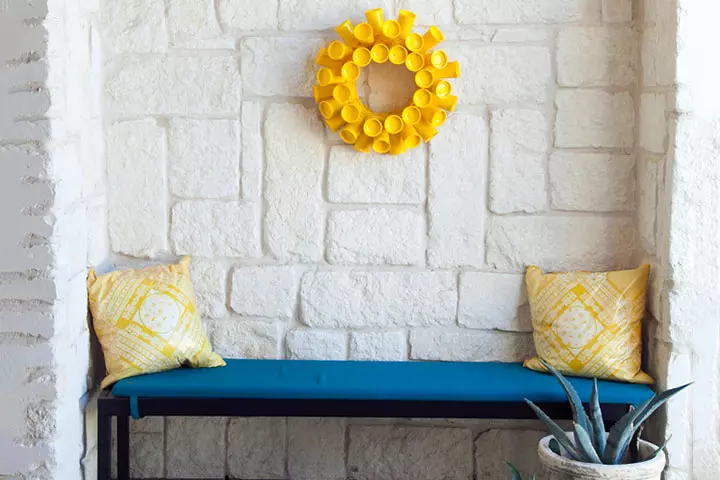
You Will Need:
- 36 yogurt cups
- Hot glue gun
- Yellow spray paint
- Straw wreath
How To:
- Apply hot glue to the brim of one yogurt cup and hold it against the outer rim of the wreath. Affix 11 other cups evenly spaced around the outer edge of the wreath.
- Now have your kid create the second ring inside the previous ring. Kids have to position a new cup between two cups, and brim against the wreath. Keep repeating the procedure until you have 12 evenly spaced cups.
- Create the third ring by placing the remaining cups in a circle, with the bottoms facing straight up.
- Spray paint the wreath in yellow or any other color of your choice. Let the wreath dry and put a second coat if required.
12. Egg carton lamp
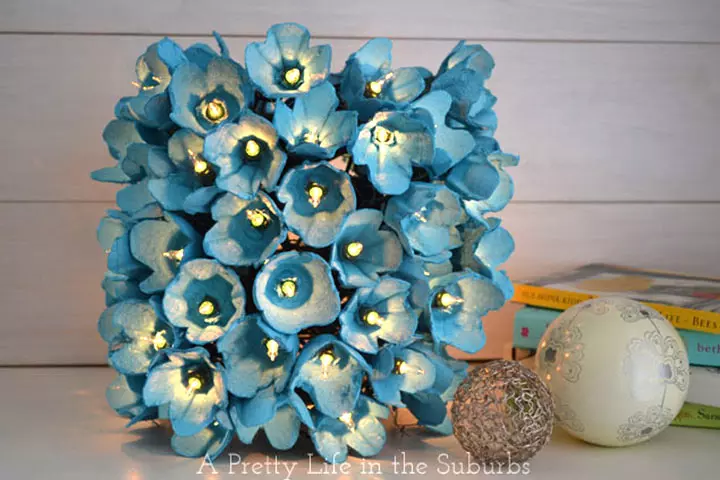
You Will Need:
- 9 dozen-size egg carton
- 1 string of 100 LED lamps
- Spray paint
- Craft knife
- Chicken wireiLight wire netting made of hexagonal mesh
- Floral wire
How To:
- Cut out the cup from the egg cartons. Trim the edges of the cup to make them look like four petals. Children won’t be able to do it, so you do it for them.
- Spray paint the inside and outside of the cup.
- Now push a light bulb through the hole in the chicken wire. Use the floral wire to secure it.
- Roll chicken wire into a cylinder with the lights facing out. Fasten the ends with a floral wire.
- Cut an X through the bottom of each egg cup. Push a cup over the light bulbs.
13. Tin can chimes
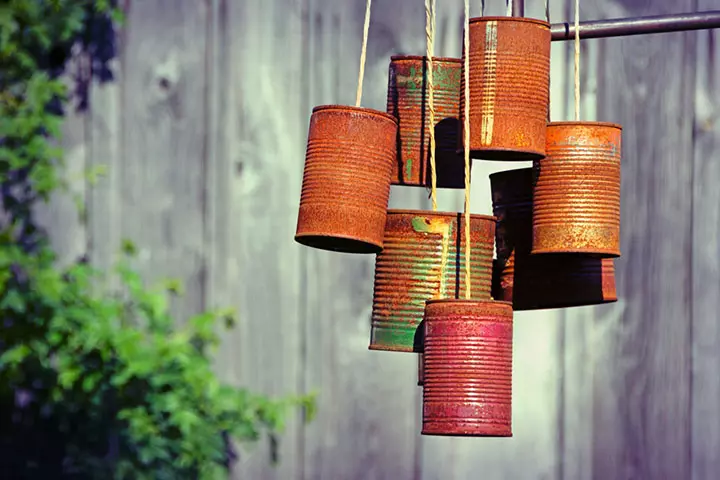
You Will Need:
- Tin cans with lids in various shapes and sizes
- Paint brush
- Tempera paintsiA quick-drying, matte, water-based paint that is mixed with a binder in different colors
- Glitter
- Nail and hammer to make holes
- Washers
- String
How To:
- Tell your child to paint the cans in different colors.
- Dust some glitter on the cans while the paint is wet. Leave it to dry.
- Punch the holes at the bottom of the cans.
- String a long piece of yarn through the holes and tie two washers at the other end of the string, inside the tin cans. One washer will keep the thread in place, and the other washer will make a clinking sound when it hits the cans.
- Hang the tin cans in such a way so that they overlap each other. Now let the wind do its job. This is one of the best out of waste ideas for kids.
14. Glittery CD fish
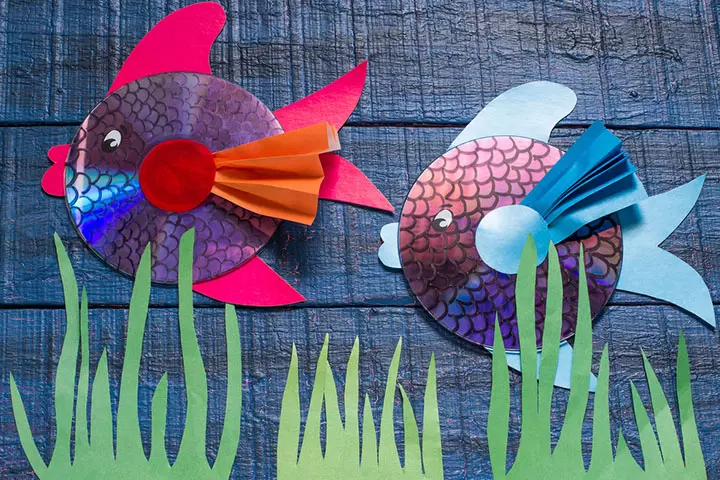
You Will Need:
- A CD
- Sharpies of various colors
- Mod Podge glue
- Colored stock paper
- Scotch tape
- Scissors
- Googly eyes
How To:
- Using the sharpies, color the CD using different colors of your choice to make the most beautiful and colorful fish.
- Trace and cut out the mouth, fins and tail from the colored paper and attach using a scotch tape. Make sure your kid does this part neatly.
- Cut out a circle to cover the inner circle of the CD and fold a square piece of colored paper like a fan. Glue the cutout circle
- into the middle of the CD using Mod Podge glue and attach the fan for extra flair.
- Affix the wiggly eyes with the glue.
15. Snow White dwarfs
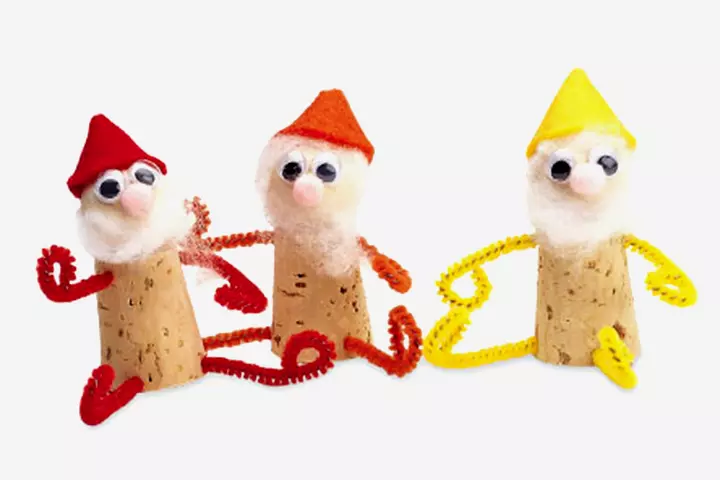
You Will Need:
- Cork
- Wooden bead
- Tiny pom-pom
- Googly eyes
- Pipe cleaner
- Craft glue
- Cotton ball
- Fingernail clippers
- Scissors
- Felt
How To:
- Glue the beads to the cork.
- Now stick the eyes and a pompom for the nose.
- Cut the pipe cleaner into four parts using the fingernail clippers. Cut the ends of the feet and hand.
- Stick the hands and feet to the ends of the cork.
- Pull apart the cotton balls to make the hair, beard, and glue to the cork.
- Cut out a half circle of red felt for the hats. Roll into the cone shape and stick using glue. Hold for a few minutes until it sticks properly.
- Put a little glue on the edges of the hat and attach to the cork.
 Did you know?
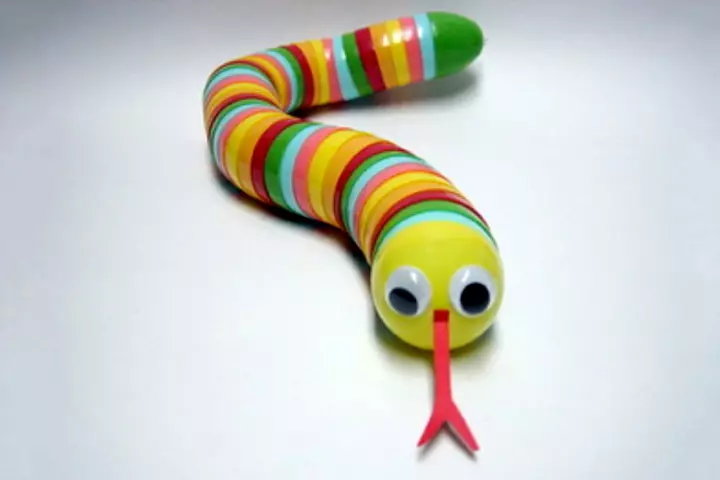
16. Plastic egg snake
You Will Need:
- 30 to 36-inch plastic lacing cord
- Googly Eyes
- Plastic Easter Eggs with two holes on the top and bottom
- Red felt
How To:
- Make a knot at one end of the plastic lacing cord.
- Thread one of the top shell openings through the plastic lacing cord. Continue with all the other plastic egg shells.
- Knot the other end also when you have threaded the top egg shells.
- Decorate the last top shell using the googly eyes. It will make the head of the snake
- Cut out the tongue shape from the red felt and place it between the eyes.
- Slither and bend the egg snake.
17. Milk carton bird house
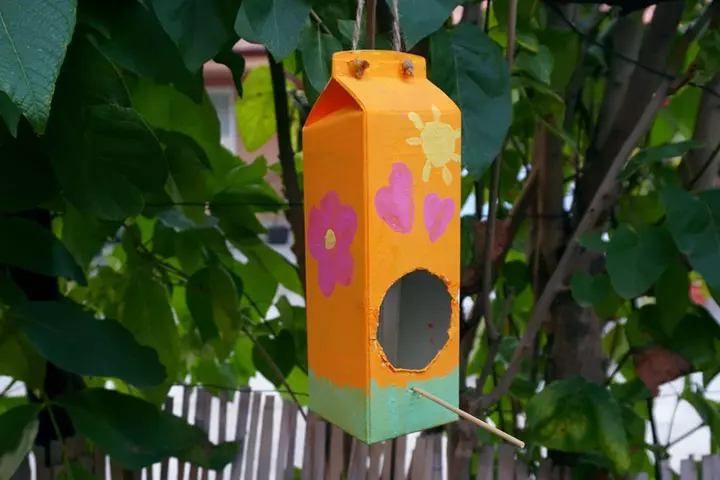
You Will Need:
- Milk carton/Juice carton
- Assorted paint kit
- Paintbrushes
- Small plate
- Utility knife
- Yarn
How To:
- Take your milk carton or juice carton and make beautiful paintings on it using your paints and paintbrushes. Keep it aside to dry.
- Now make small holes in the top of the carton using a utility knife.
- Make another opening for the door. Place a small plate inside on which you will put the bird seeds.
- Thread yarn or whatever you are using to tie the knot.
- Hang it up on a tree in your backyard and watch out for your bird friends.
18. Egg carton tulips
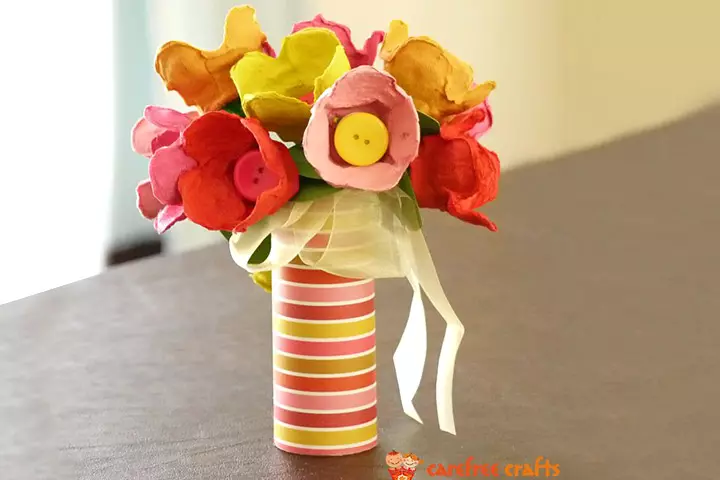
You Will Need:
- Colored egg cartons
- Green pipe cleaner or chenille stem, if you have
- Ribbons
- Glue
- Cardboard paper
- Buttons
- Sticky dots
How To:
- Cut out 12 tulip bases from the colored paper egg cartons.
- Make two holes at the base of each ‘tulip’ using a knife.
- Cut the green pipe cleaners into 12-inch lengths and insert into one of the holes.
- Bring one end of the pipe cleaner down into the second. Twist the pipe cleaner at the base of the tulips.
- Add the sticky dot on the back of the button.
- Now stick the button to the center of the tulip base, above the pipe cleaner. Punch holes in the leaves and thread to the pipe cleaner
- Repeat the same method for other tulips.
- Tie the tulips using a ribbon or trim the stems and roll in the paper cardboard roll.
19. Paper garland
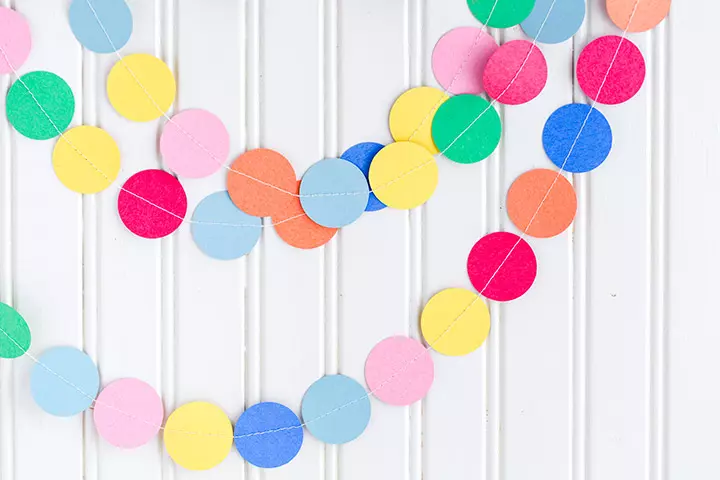
You Will Need:
- Paper scraps
- Tape or glue
- Yarn
- Scissors
How To:
- Cut out the papers in desired sizes and shapes.
- Affix the paper cutouts to a long string of yarn. You can attach the paper cutouts using tape or glue. But make sure that the paper cutouts are secured on the same side.
- The garland is now ready. Tell the children to hang it wherever she likes.
20. Storage box
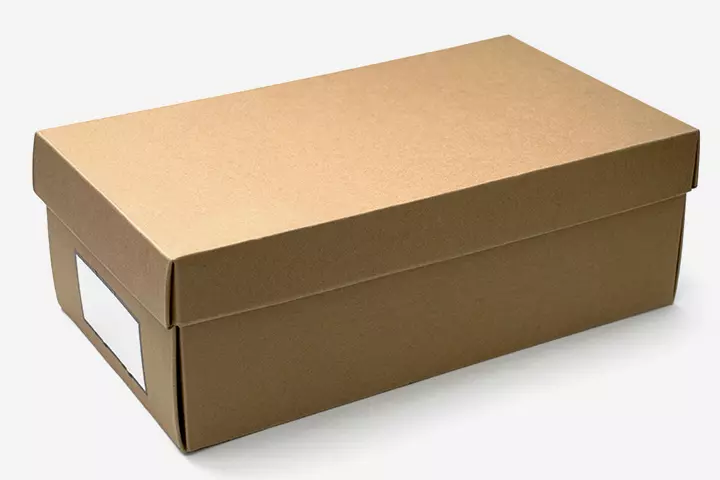
You Will Need:
- Shoebox
- Tape
- Marker
- Comics from the newspaper
- Hot glue
- Scissors
- Aluminum can
How To:
- Wrap the shoe box with comic pages from the comic book or newspaper. Secure on the insides with a tape.
- Cut out collages from the comic strip and stick on the box to create a collage effect.
- Crush the cola can or aluminum can as flat as possible. You have to do it for your child.
- Secure the can to the shoe box’s lid. Use a marker to label the box. You can write your kid’s name or the items your child will store. The box is ready.
21. String tied hair band
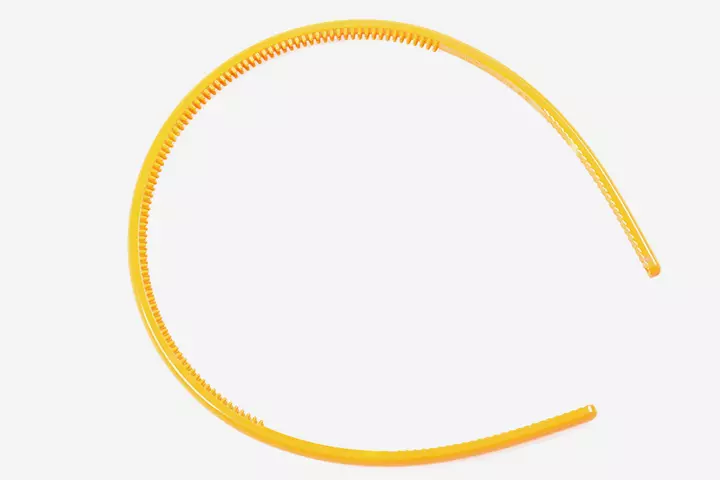
You Will Need:
- Strings in various colors
- Scissors
- Hot glue gun
- Plastic headband
How To:
- Encourage your little one to use the string of her choice and ask her what layout she will prefer for the headband.
- Start by wrapping the strings at one end. Secure the end of the string with hot glue. Help your kid when using hot glue.
- Now take another colored string and start wrapping until you come to the end of it. Secure with the hot glue. Repeat the same procedure with other colored strings.
- Continue wrapping and securing until you have covered the entire head hand.
22. Cardboard tube coiled snake
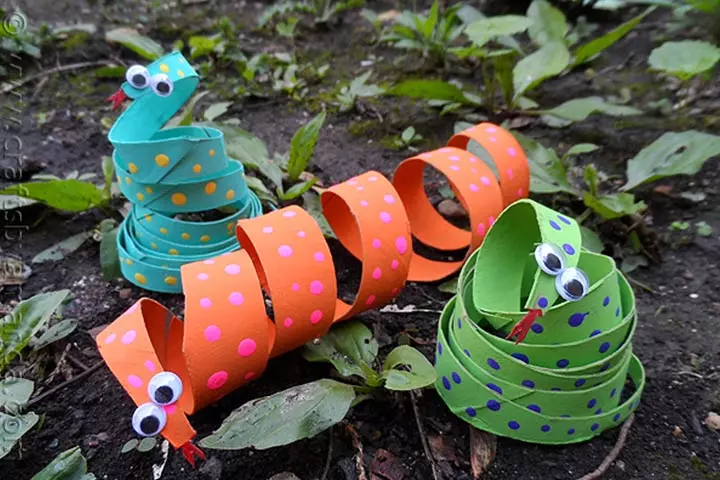
You Will Need:
- Toilet paper rolls
- Acrylic paints in different colors
How To:
- Paint the inside and outside of the toilet, paper rolls in various colors. Leave it to dry for an hour and apply the second coat.
- Make some small dots on the coil using contrasting colors. Leave it to dry overnight
- Now wrap the cardboard around a wrapping paper tube and cut the tubes into coils.
- Wrap the painted cardboard like a coil around your finger. Let your kid position it any way they like. Paint the end tips red and leave it to dry.
- Now glue the googly eyes using a toothpick.
- Snip the red end like a forked tongue. The snakes are ready.
23. Superhero bookmark

You Will Need:
- Jumbo craft sticks
- Acrylic paints.
- Paintbrushes
- Acrylic sealeriA clear sealer used to protect a variety of surfaces, such as furniture, floors, and painted walls or modge podge
- Pencil and pen
How To:
- Have your child sketch the design on the stick.
- Now use the skinny brushes to add details to your superhero’s costume. Kids can even decorate the superheroes with glitters if they want. Leave it for a day to dry.
- Use a ball point pen to add details like eyes and mouth.
- Apply a coat of sealer when it dries and leave it for a day.
24. Monster box
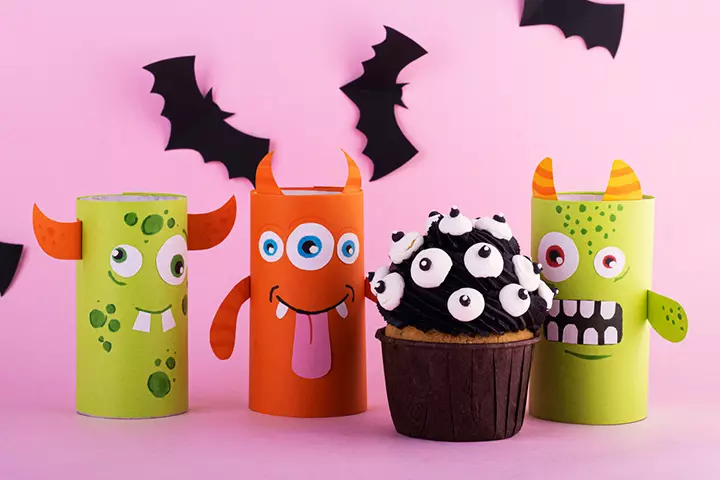
You Will Need:
- An empty cardboard box
- Scissors
- Tape
- White or colored paper
- White glue
- Poster or acrylic paint
- Felt pens or crayons
- Other decorative items like cotton balls, pipe cleaners, glitter, googly eyes
How To:
- Empty and clean the carton box. It will act as the body of your monster. The lid or opening will serve as the mouth of the monster.
- Now have your kid make the face of the monster. Tell them to make big eyes, long teeth, messy hair, and a big nose.
- Make hands and toes on the cardboard paper or felt and affix to the sides and base of the box. The monster is ready.
25. Milk carton bus

You Will Need:
- Acrylic paints in different colors
- Paintbrushes
- Markers
- Glue stick and glue guns
- Milk carton
- Black and white construction paper
- Letter stickers
How To:
- Paint the milk carton yellow. Leave for an hour and apply another coat. Leave it aside to dry.
- Cut two strips of white construction paper. Draw two vertical lines on each strip to give the appearance of a window.
- Make figures of boys and girls on each window.
- Glue the windows on each side of the bus using the glue stick.
- Cut out a circle from the construction paper and stick on the front of the opening of the carton.
- Cut a 1-inch strip of the black construction paper and attach the foam letters on it. Kids are free to write anything they like.
- Glue the bottle caps on the bottom of the carton. The bus is ready for a ride.
26. Tin foil sculptures (Tin foil people)
You Will Need:
- Waste tin foil/aluminum foil
- Scissors
- Hot glue gun
How To:
- Scrunch up tinfoil into two long legs, two long arms, a body, and a head.
- Wrap one end of the arms and legs to the torso.
- You can use a little glue at the contact points to secure the limbs.
- Attach the head with glue.
- Cut the limbs to the desired length if they are too long.
- Make hands and feet by folding the ends of the limbs.
- You may decorate your tin foil person by adding objects to it (secure them with glue or rubber bands)
- You can also use pieces of paper dipped in a mixture of glue and water (paper mâché) to cover the sculpture. Once dry, you may paint it.
Frequently Asked Questions
1. What safety precautions should I take when working with waste materials?
While it is wonderful to encourage children to express their creativity and experiment with different materials, always supervise the activities to prevent accidents. You should also encourage them to wear gloves and masks when working and dispose of materials carefully. Keeping the workspace well-ventilated is another essential safety precaution when working with different types of waste material.
2. How can waste material crafts for kids be integrated into classroom lessons?
There are many ways to integrate material crafts into classroom lessons. Teachers can begin by introducing recycling games and activities for kids involving waste materials to teach them the importance of upcycling. They can encourage students to come up with useful innovation and DIY products from waste material. For example, students can make pencil holders or other art pieces after segregating old cans, discarded paper, and other waste materials.
3. How can waste material crafts be used to teach environmental awareness?
Waste material crafts can be a fun and engaging way to teach environmental awareness. By repurposing and upcycling materials that would otherwise end up in landfills, students can understand the importance of conservation, reducing waste and the impact of their actions on the environment by learning about them.
4. How can we encourage children to think outside the box when using waste materials?
You can provide them with opportunities for creative expression, resourcefulness and problem-solving. This can involve art projects, building structures, or designing functional items using discarded materials.
5. What are the benefits of waste material crafts for kids?
Crafting with waste materials promotes children’s creativity, enhances their fine motor skills, and teaches them valuable lessons about sustainability. Through such crafts, kids can express their artistic sides while understanding the recycling process and the importance of reusing items that would otherwise contribute to landfill trash.
The good thing about these waste material craft ideas for kids is that you won’t have to scurry out to the store to buy pricey supplies. Most of the supplies used for these crafts will be stashed in the corner of your storeroom, basement, or attic. So go ahead, collect the used bottles, bottle caps, sticks, buttons, cardboard, and other materials and try any of the above-mentioned crafts with your kids, such as colorful monster crafts out of cardboard and a popsicle stick photo frame. Once your children have finished making it, put it on display in your living room to motivate them further. Hence, recycling these products is a sustainable eco-friendly strategy that encourages sustainability by minimizing waste and saving resources. These crafts also promote education and can be an excellent way to simplify the concept of reduce, reuse, and recycle for kids.
Infographic: Amazing Crafts Made From Waste Materials
Creating crafts from waste materials is an interesting way to teach children about recycling. It will help develop children’s creativity and engage them in hours of fun. Check out the craft ideas in the infographic below to suggest to your children. Since these crafts require only waste or unused materials at home, these can also be a cost-effective fun activity for children.
Some thing wrong with infographic shortcode. please verify shortcode syntaxLet’s get creative! Check out this video for 11 easy and useful DIY Best out of waste craft ideas for kids that will keep them entertained!
Personal Experience: Source
MomJunction articles include first-hand experiences to provide you with better insights through real-life narratives. Here are the sources of personal accounts referenced in this article.
i. Simple craft projects for kids;https://pragyabhatnagarda.blogspot.com/p/simple-craft-projects-for-kids.html
References
- 16 Fun Recycling Facts for Kids
https://recyclingpartnership.org/communitiesforrecycling/16-fun-recycling-facts-for-kids/
Community Experiences
Join the conversation and become a part of our nurturing community! Share your stories, experiences, and insights to connect with fellow parents.
Read full bio of Erin DeCarlo
Read full bio of Debolina Raja
Read full bio of Harshita Makvana
Read full bio of Vaswati Chatterjee

