Science is a subject that fascinates everyone, especially children. Since they also love playing with water, you can introduce them to some interesting water experiments for kids. From understanding the basic properties of water to exploring density and buoyancy, water activities are designed to spark curiosity and encourage hands-on experimentation. With these activities, learning the subject will become all the more engaging. These fun activities make science even more enjoyable and promote exploration. Plunge into this post for water experiments and fun projects that children can try at home.
Key Pointers
- Water experiments are a great way to help kids learn about its properties.
- Teach them oil and water experimentation, water walking rainbow, and many more fun things with water.
- Ensure to keep all safety measures in mind as kids can get clumsy around water.
16 Water Experiments For Kids
1. Oil and water experiment

This chemistry experiment is fun to perform and will help children understand why oil and water don’t mix well.
Aim of the experiment:
The purpose of this experiment is to show that oil and water do not mix because they have different densities, and the oil molecules are not attracted to water molecules.
You will need:
- A few cups
- Baby oil
- Food color
- Water
How to do:
- Start by adding a few drops of food color to different cups of water.
- Stir it and observe the color dissolve into the water.
- Pour some baby oil into the cups with a dropper.
- You will notice that the oil will not mix with the colored water. Since oil is less dense than water, it will remain on top of the colored water.
- It is beautiful to watch the oil form a thin layer on top of colored water.
2. Water walking rainbow
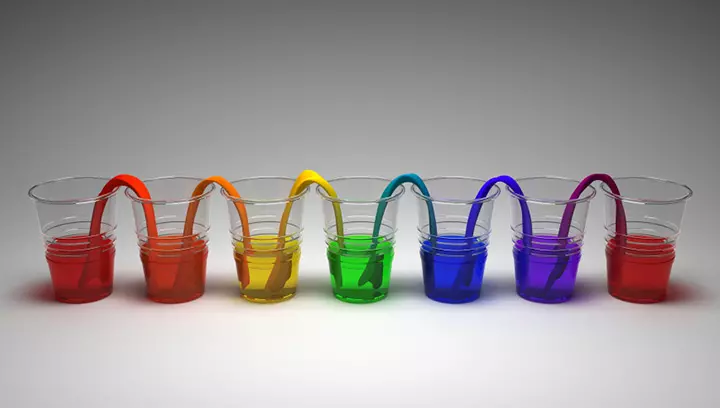
The experiment is visually stunning to the point that it seems almost like a magic trick.
Aim of the experiment:
To show the capillary effectiWhen a liquid flows through narrow spaces without the help of external force such as gravity. of water that causes water to move against gravity into the tissue paper. Water flows into the empty cups, filling them with a mix of two colors from either side.
You will need:
- Water
- Food color
- Seven cups
- Paper towels
How to do:
- Arrange seven cups in a line.
- Fill every alternate cup with water starting from the first. No measurement is necessary. Leave cups number 2, 4, and 6 empty.
- Add red food color to the first and last cup in the line.
- Then add yellow food color to the third cup and blue to the fifth cup.
- Place a paper towel strip between the odd-numbered cups (with colored water) and the even-numbered empty cups.
- There will be a strip of paper between the first and second cup, third and second, third and fourth, and so on. Leave the cups overnight.
- The next morning, you will find that the empty cups are filled with water. The color of the water would be a mix of the colors in the adjacent cups, thus rendering it a rainbow-like appearance.
3. Water suspension experiment
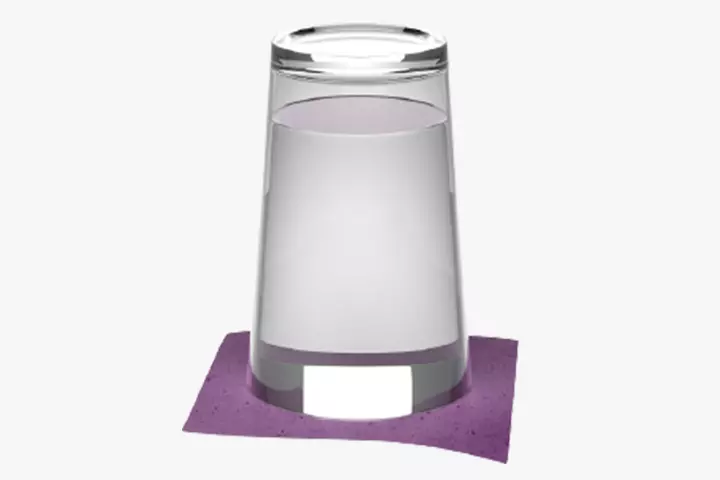
It is probably one of the simplest experiments and will create excitement in younger children.
Aim of the experiment:
To demonstrate a simple phenomenon of air pressure and gravity’s effect on water.
You will need:
- Water
- Transparent glass
- Large bowl
- Mesh screen
- Plastic sheet
- For added visual appeal, you can also add food color to the water
How to do:
- Mix the food color and water in a jar and pour into a glass through a mesh screen.
- Place the laminated plastic sheet on top of the glass and press it down.
- Now, pressing the laminated sheet against the glass, turn the glass upside down.
- Slowly remove the plastic sheet at this point. You would find that the water doesn’t flow outside and will remain in the glass.
- Make sure to hold the glass straight. It works on the principles of water adhesion and cohesion. The air pressure from outside the glass will push up into the glass and keep the plastic sheet in place. This same pressure is maintained even after the plastic sheet is removed, holding the water in place.
- Now that you have demonstrated how this pressure seal is created and maintained, you can slowly tilt the glass over the bowl and watch the water flow out. It happens as the seal breaks, and the air rushes into the glass, thus forcing the water out.
 Did you know?
4. Magic finger experiment
Open a path of discovery with this easy experiment.
Aim of the experiment:
To practically demonstrate the effects of surface tensioniWhen molecules band together to form an impenetrable surface on the body of water. and air pressure on the water.
You will need:
- Dishwashing soap
- Water
- Bowl
- Powdered black pepper
How to do:
- Fill the bowl about three-quarters with water and sprinkle enough pepper to cover the surface.
- The next step is relatively simple but can be visually stunning to watch. Rub dishwashing soap on your fingertip and touch the water in the middle of the bowl.
- You will see the pepper scattering to the sides of the bowl and away from your soapy finger. Some pepper may even sink.
- The result is based on the surface tension of water and how it changes once exposed to soap. Once soap comes in contact with water, the water molecules will try to retain the surface tension and thus pull away from the soapy finger, taking the pepper with them.
5. Liquid density tower
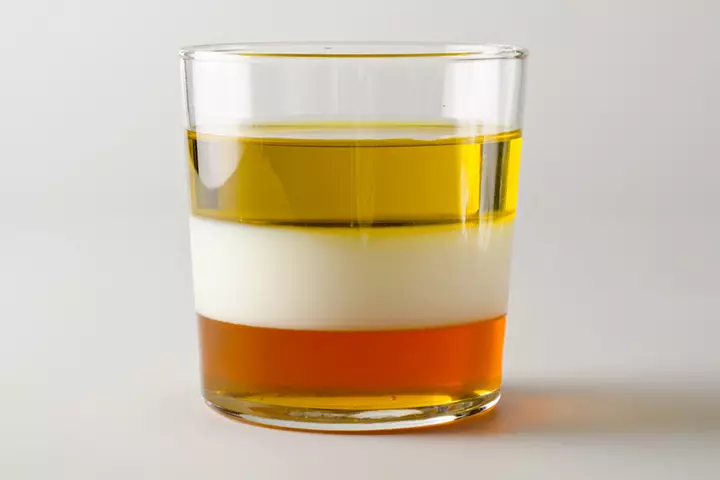
A density tower is a glass or any transparent vessel filled with liquids with different densities, all stacked up in a visually appealing way. It is a simple experiment that explains the most complex scientific phenomena. Also, it is fun to perform.
Aim of the experiment:
To show that different liquids have different densities.
You will need:
- Four to six liquids of different densities
- Glass
- Food color
How to do:
- Pour different liquids into the glass, starting with the densest one.
- You can use something like maple syrup for your base layer, milk for the second one, dishwashing soap for the third, and water for the fourth.
- You can add food color to each liquid to make the layers visually attractive.
- Pour all the liquids into the glass and leave for several hours.
- The liquids would move to their respective place in the glass based on their densities. Thus, you will find neatly stacked layers of different fluids in the glass.
- We recommend using a funnel to pour the liquids so that some liquids, such as dish soap, do not create foam.
6. Water density and salinity

The experiment can help children understand the difference in the densities of seawater and freshwater by using an egg. You can conduct this simple experiment at home and understand the concept.
Aim of the experiment:
To demonstrate that fresh water and saline water have different densities.
You will need:
- Two glasses
- Two eggs
- Water
- Salt
How to do:
- Fill two glasses with water and gently put a raw egg into each of them.
- Unless the eggs are stale or have gone bad, they will both sink to the bottom of the glass.
- Now, progressively add salt to one of the glasses.
- After a certain point, you will notice that the egg will start to rise higher.
- As you add more salt, it will float to the top.
- It occurs because the increased salinity of the water increases its density, eventually reaching a point where the water is denser than the egg
 Trivia
7. Absorption test
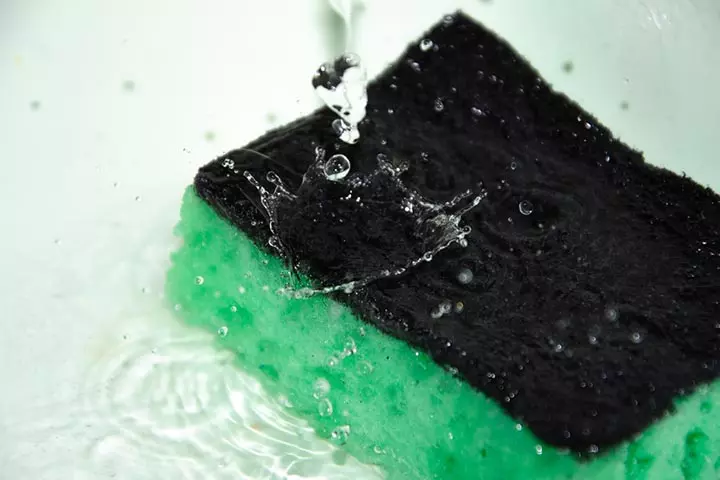
A simple but educational experiment to do at home will let you know which materials absorb, repel, or are neutral to water.
Aim of the experiment:
To test how different materials react when exposed to water.
You will need:
- Five to seven different materials (you may use different textured materials— cloth napkins, tissue paper, aluminum foil, a bath/kitchen sponge, and plastic wrap)
- Water dropper
How to do:
- Ask your child to predict how each of the materials will react to water, and then let them experiment and test out their hypothesesiA supposition that can be tested. .
- Once they’ve noted their predictions, let them slowly add water via a dropper to each material.
- Take note of how (or if) they react to water.
- While something like a sponge will absorb (or even expand) when exposed to water, other materials will react differently.
- The tissue paper will rapidly get saturated with water and become a soggy mess.
- The cloth napkin will absorb the water and get soaked.
- The plastic and foil will not react.
- While this might seem extremely basic from an adult’s perspective, it’s interesting and educational for the children.
8. Different states of water experiment
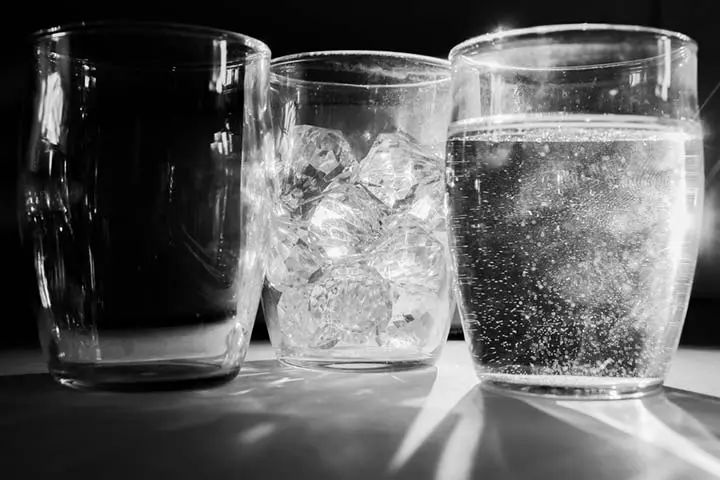
Water makes up two-thirds of the Earth’s surface, but not all of it is in the ocean. Water exists in different states across the Earth, but you can show them all in your kitchen.
Aim of the experiment:
To show various states of water.
You will need:
- Pan with a glass lid
- Ice
- Salt
How to do:
- Put the salt and ice in the pan and light the stove.
- As the ice begins to melt, you will see it changing from solid to liquid form.
- Once it dissolves completely, you will see the salt dissolve.
- If you boil the water, it will eventually start to evaporate, going from liquid to vapor form, leaving only a salty residue on the pan, demonstrating that the water has evaporated.
- If you want to show all the states of water, you can even boil the water with a clear lid on the pan. The evaporated water is collected on the lid and later condensed into a liquid from vapor again.
9. Sink or float experiment

Encourage your child to perform easy-to-do scientific experiments at home and find them fascinated and learn about buoyancyiUpward force on an object that is partially or wholly submerged in a liquid. and density.
Aim of the experiment:
The objective is to determine which objects will sink or float.
You will need:
- Tub, bucket, or glass of water, ideally transparent
- Variety of objects (Avoid anything electrical or made of iron)
How to do:
- Start by putting different objects into the water and observing the results.
- For example, a metal spoon will immediately sink while a heavier plastic plate will not.
- If you are experimenting with a glass of water, you can use a cork, which floats on water, and coins that settle on the bottom of the glass.
- You can do the same with objects of the same weight and material as well, like a crumpled aluminum foil ball, which will sink, and a flat aluminum foil sheet, which will likely float.
 Did you know?
10. Leak proof ziplock experiment
The experiment is visually impressive, technically easy, and educational for children.
Aim of the experiment:
To show how polymersiMaterials made of long chains of molecules. are self-sealing when in contact with water.
You will need:
- Ziplock bag with a seal
- A few pencils
- Water
How to do:
- Fill the ziplock bag with water almost to the top and seal it tightly.
- Use sharp pencils and poke them through the bag.
- Do not hesitate during this stage as it may cause leaks, thereby ruining the experiment.
- To your child’s surprise (and maybe some adults), the bag will leak a bit, but not much, and the leaking may even gradually stop.
- The science behind the experiment is surprisingly simple. As the pencil tip pierces the plastic bag, it pushes apart the molecules that form the polymer chain. These polymers do not remain broken for long and immediately reseal on the pencil, making the bag leakproof again.
11. Bottled tornado experiment
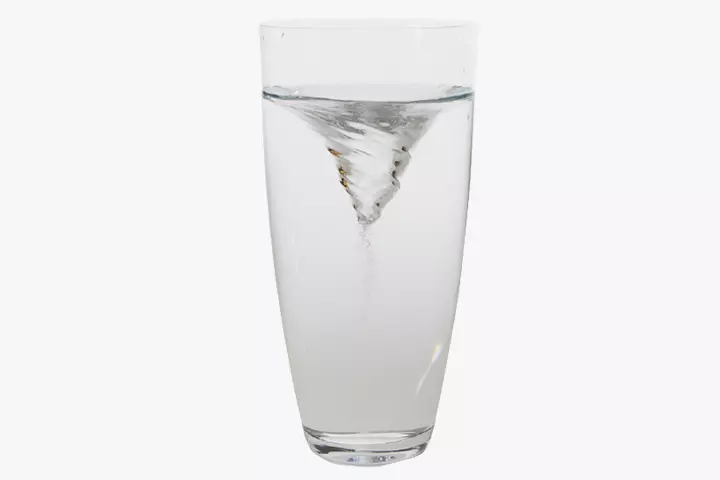
It takes only two minutes to perform this experiment, which helps children learn about the tornado.
Aim of the experiment:
To create a tornado-like effect inside a bottle of water.
You will need:
- A narrow bottle
- Dish soap
How to do:
- Mix the dish soap and rapidly swirl the bottle to create a tornado-like effect inside the bottle of water.
- You should give a swirl over and over to get a tornado-like effect for your child’s enjoyment. You can also use glass for the experiment.
- It is a good visual aid for showing your child as you explain to them about tornadoes, which are caused by the interaction of humid, warm air meeting a cold front.
- Depending on your child’s curiosity and age, explain the difference in temperature and pressure that creates the ‘vortex.’
12. Water displacement experiment
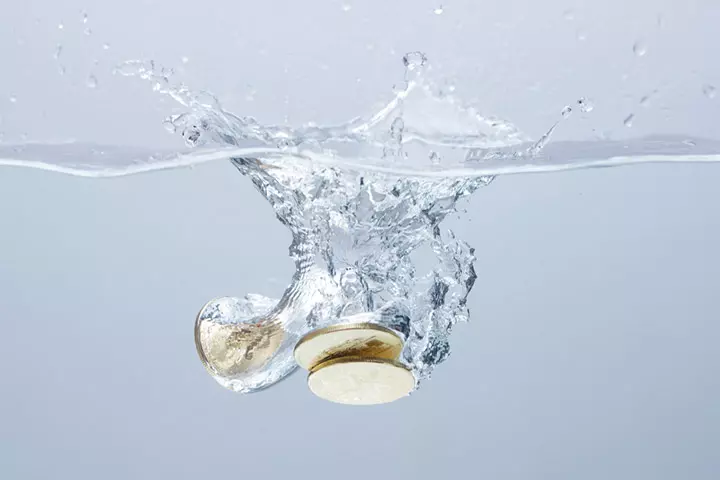
It is another easy experiment to help your child understand how water displacement works. They may already know something about this phenomenon but showing them helps in better understanding.
Aim of the experiment:
To show the displacement of water when objects are put into a container.
You will need:
- Container
- Water
- Beads or coins
How to do:
- Fill the container with water.
- Find a few objects, such as beads or coins, and slowly add them into the water (they should not splash).
- The water level will eventually rise to the container’s brim, indicating the water is displaced by the objects.
- If you can carefully add just one or two more beads once the water overflows, you will notice that the water will create a dome-like effect over the top of the container instead of spilling out.
 Trivia
13. Soluble substances and temperature experiment

It is an interesting experiment that children will be able to perfect with some tinkering.
Aim of the experiment:
To demonstrate the effects of temperature on solubility.
You will need:
- Two glasses
- Warm water
- Cold or room temperature water
- Some sugar
How to do:
- Pour hot water into one glass and cold water into another.
- Ask your child to add sugar to both the glasses in equal amounts and predict how the temperature will affect the solubility.
- You can notice hot water dissolves the sugar faster than the cold water.
- The hot water causes the molecules to move faster and collide with the sugar more quickly, causing the sugar to break down and dissolve faster than in cold water.
14. Magic ice cube experiment
The easy and quick experiment will surprise both adults and children.
Aim of the experiment:
To show how salt lowers the freezing point of water and causes ice to melt.
You will need:
- Water
- Salt
- Ice
- String
How to do:
- Put some ice cubes in a glass with some amount of water.
- Lay the string over the ice cube.
- Now, sprinkle salt when the string touches the ice, and wait for about 45 seconds to a minute.
- Once you pull one end of the string, you will find that the ice sticks to it, making it easy to lift.
- The science behind this is simple but interesting. Salt lowers the freezing point of water, causing it to melt a little once you add it.
- The ice will quickly refreeze the outer layer, thus freezing the string and temporarily attaching it to the ice.
- You can use this technique while making ice arts and crafts.
15. Water xylophone experiment

It is a fun experiment you can conduct right at your dinner table!
Aim of the experiment:
To show how the pitch of a sound is affected by the level of water in the container.
You will need:
- Three to four glasses or ceramic bowls
- Water
- Chopsticks
- Spoon
How to do:
- Ask your child to tap the rim of the glass when it’s empty to see what sound it makes.
- Fill each of the glasses with water at different levels, for example, one-third full, half full, and three-fourth full.
- Now, ask your child to tap each glass again.
- You will notice that they all make different sounds.
- Since sound travels through water, the level of water will affect the pitch of the sound.
- When the levels of water are changed, the sounds change accordingly.
16. Coffee filter flower experiment
Explore the magic of colors with this simple coffee filter flower experiment. Children will love creating their colorful flowers while learning about color separation.
Aim of the experiment:
This experiment aims to demonstrate paper chromatography, the process of separating a mixture using thin paper. It reveals that black ink is composed of a rainbow of colors, providing a fun and educational experience.
You will need:
- Seven coffee filters
- Washable markers in black and rainbow colors (avoid permanent markers)
- Water
How to do:
- Flatten the coffee filters and color them with washable markers. Use different colors for each filter.
- Fold the colored filters into quarters.
- Dip the tip of each folded filter into a small amount of water. Watch as the water travels up the filter, spreading the ink.
- Observe how the colors separate. Notice that primary colors (red, blue, yellow) don’t spread into different colors, while others do (like green into blue and yellow, orange into red and yellow).
- Once the filters are dry, gather them to form a bouquet of colorful flowers.
Frequently Asked Questions
1. What happens when you put sand in water?
When you put sand in water, there will be no reactions. The sand will sit down at the bottom of the vessel or glass. The sand is heavier than water and cannot float in water.
2. What happens when you put carrots in salt water?
A carrot will shrivel up when you put it in salt water. Water leaves the cells of the carrot to enter the salty water, leading to osmosis. Hence, if a carrot is immersed in salty water, it will be less salty than the water.
3. Are there any safety precautions to consider when doing water experiments with kids?
Parental or adult supervision is crucial while conducting water experiments with kids. Conduct the experiment outside, away from electronic gadgets, sockets, or plugs, to prevent mess and accidents. Use non-toxic materials and wear safety glasses, long sleeves, and gloves when experimenting. Also, have towels or sponges ready to clean up any spills.
4. What age group is best suited for doing water experiments?
There may not be an age restriction when it comes to doing water experiments. However, if you are planning to teach children about the basic properties of water and concepts of science, it is recommended that they are of an age where they understand these simple concepts. Moreover, ensure that this is done under adult supervision.
5. How can I adapt these water experiments for different age groups?
You can adjust the complexity of these water experiments depending on the child’s age. For younger children, you could focus on basic observations and hands-on play. For older kids, try challenging them with more complex scientific concepts and detailed hypotheses.
6. What follow-up questions can I ask kids after conducting water experiments?
Ask your children follow-up questions after conducting the experiments to encourage engagement and critical thinking. For instance, you can ask your children questions such as, “What did you learn from each experiment?”, “Can you think of other materials that might react differently with water?”, and “How can we apply what we learned to real-life situations?.” This interactive exercise will help make the learning process interactive.
7. What are the possible risks associated with water experiments?
Water experiments can be educational and fun but may pose certain risks. These include burns or scalds when using hot water, ingesting contaminated or unsafe water, and electrical and chemical hazards. Furthermore, spilled water may increase the risk of slips and falls.
Water is important in all fields of science including physics, chemistry, and biology. Children love to play water games, from water guns to waterparks. Water experiments for kids can provide education and fun. You may teach the properties of water through simple water experiments. Oil and water experiments, water walking rainbow, water suspension experiments, liquid density experiments, and different states of water are some of the interesting water experiments. You may also do experiments to learn the salinity and density of water and sink or float tests with various materials. Always ensure safety and adult supervision while performing science experiments for kids since they can be clumsy and fall into trouble.
Infographic: Fun Experiments For Children Using Water
Water is a versatile element that can provide numerous opportunities for children to have fun while learning about various subjects through water experiments. The infographic below includes some of these water experiments that could promote learning and exploration of scientific concepts in a playful manner. All these experiments are easy and safe and have minimal requirements to conduct.
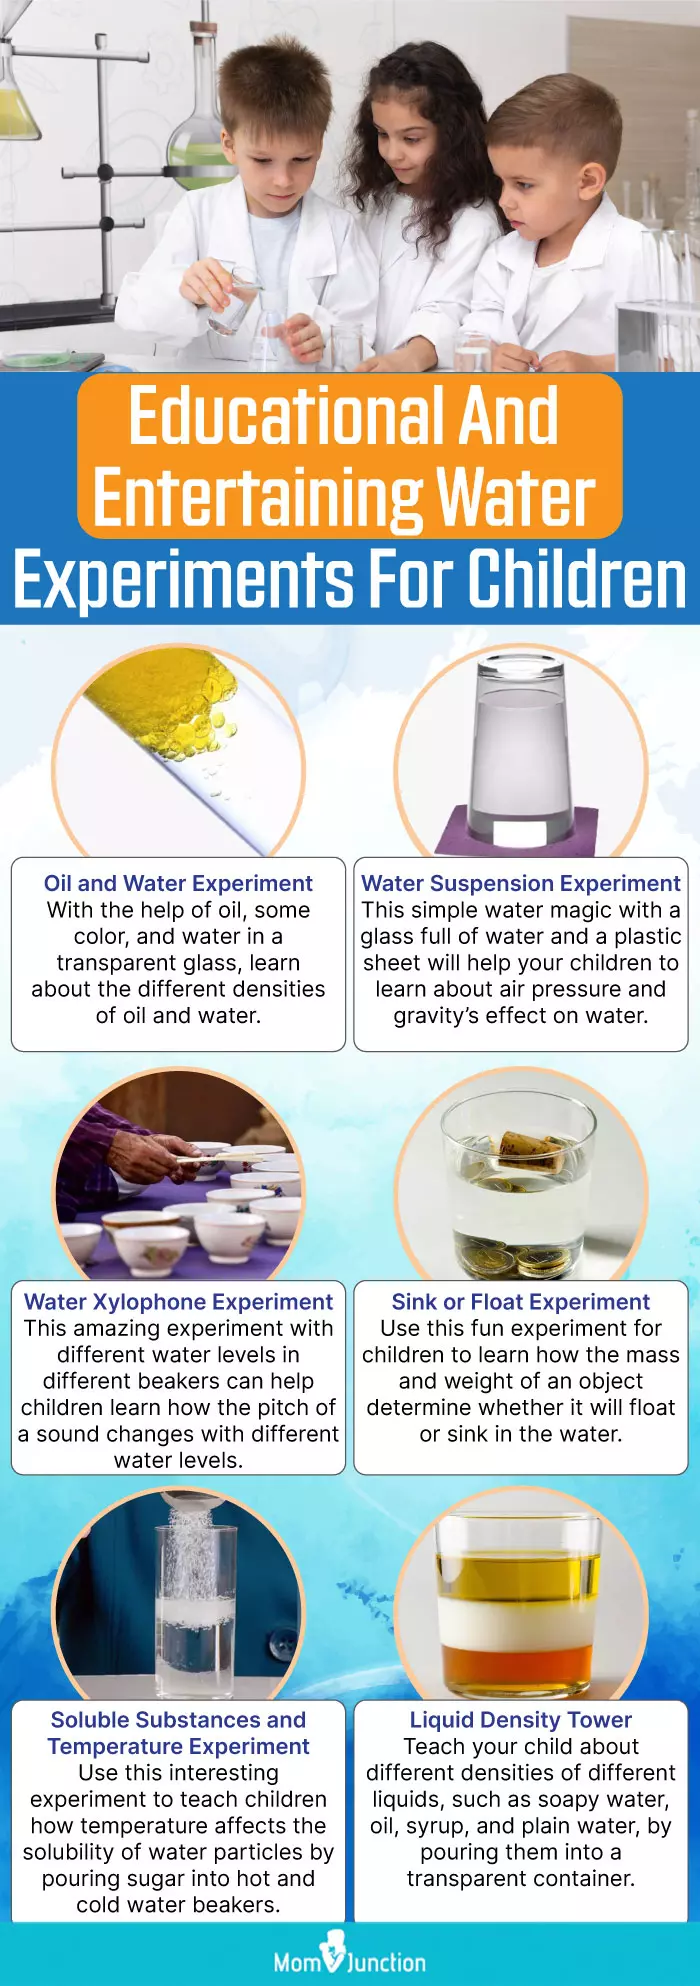
Illustration: Momjunction Design Team
Illustration: Engaging Water Experiments For Kids
Image: Stable Diffusion/MomJunction Design Team
Unleash the science geek in you with these 10 amazing water experiments that you conduct with things that you can easily find around the house.
Community Experiences
Join the conversation and become a part of our nurturing community! Share your stories, experiences, and insights to connect with fellow parents.
Read full bio of Katherine Paxton
Read full bio of Nisha Bharatan
Read full bio of Harshita Makvana
Read full bio of Trisha Chakraborty


